A Beginner’s Guide to Setting Up a Web Application with Typescript and Express
Web applications are types of software applications that run on remote servers (source). Examples of web applications can range from word processors, to file scanners, video editing tools, shopping carts, and more. Web applications can be great additions to any website; they can even function as websites themselves (Facebook, Gmail, and Udacity’s classroom are all examples of popular web applications), so understanding how to set up and implement a web application is a fantastic skill to have.
For this guide, I am assuming that you already have a basic knowledge of npm, node and whatExpress Requests and Responses are (or that you at least know what they are used for in their basic sense). Also, I assume that you know what the npm install and mkdir commands do. You have to know basic Typescript to implement — or at least know basic JavaScript to read and understand — the code below. Finally, this is the base for the backend of a web application. You still need to create a frontend application using a framework like Angular or an HTML/CSS file to make requests and display responses.
Before you start, it’s important that you create a folder in your favorite place on your computer. This can be anywhere as long as you have a sense of how you are going to find it later when you come up with an awesome project to start developing.
The Process:

Step 1
Open the folder in the text editor of your choosing. I picked VSCode because it is the one I have been using since I started programming, but you can use any you like. Once you have the folder open in your editor, verify that you have npm and node installed by running npm -v and node -v .
If you do not have npm or node installed, click here to learn how and then come back.

Step 2
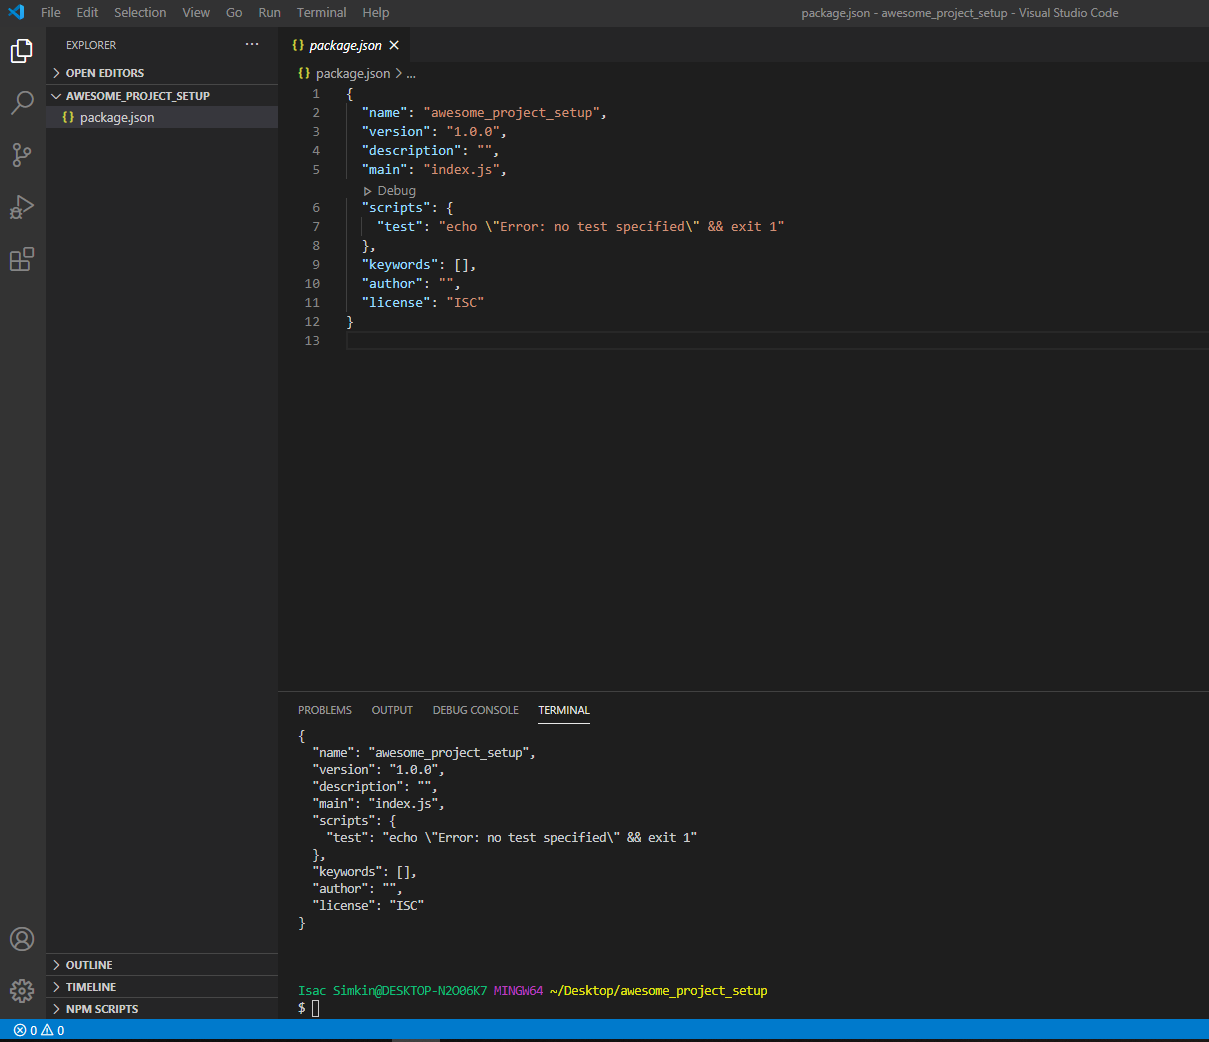
Once you’ve verified that you have both installed, it’s time to start setting up the project. The first step is to run npm init in your command line. This will “initialize” the project for you. It will start asking you questions about your project including how you want to name it, its description, and other fun stuff. However, if you want to bypass those questions and allow npm to set everything to the default values, run npm init -y instead and you’ll be set to continue. After you run the command, npm creates the package.json file which contains all the information that you chose — or didn’t choose — to set.
Step 3
The next step is to create the index file which will be the center of command for your entire project and will contain an instance of Express. Even though it is good practice to place all of the functional code inside of an src folder, your application will still work if you don’t create one. If you decide to follow my advice, create a src folder using the mkdir src command and create index.ts inside it.

Step 4
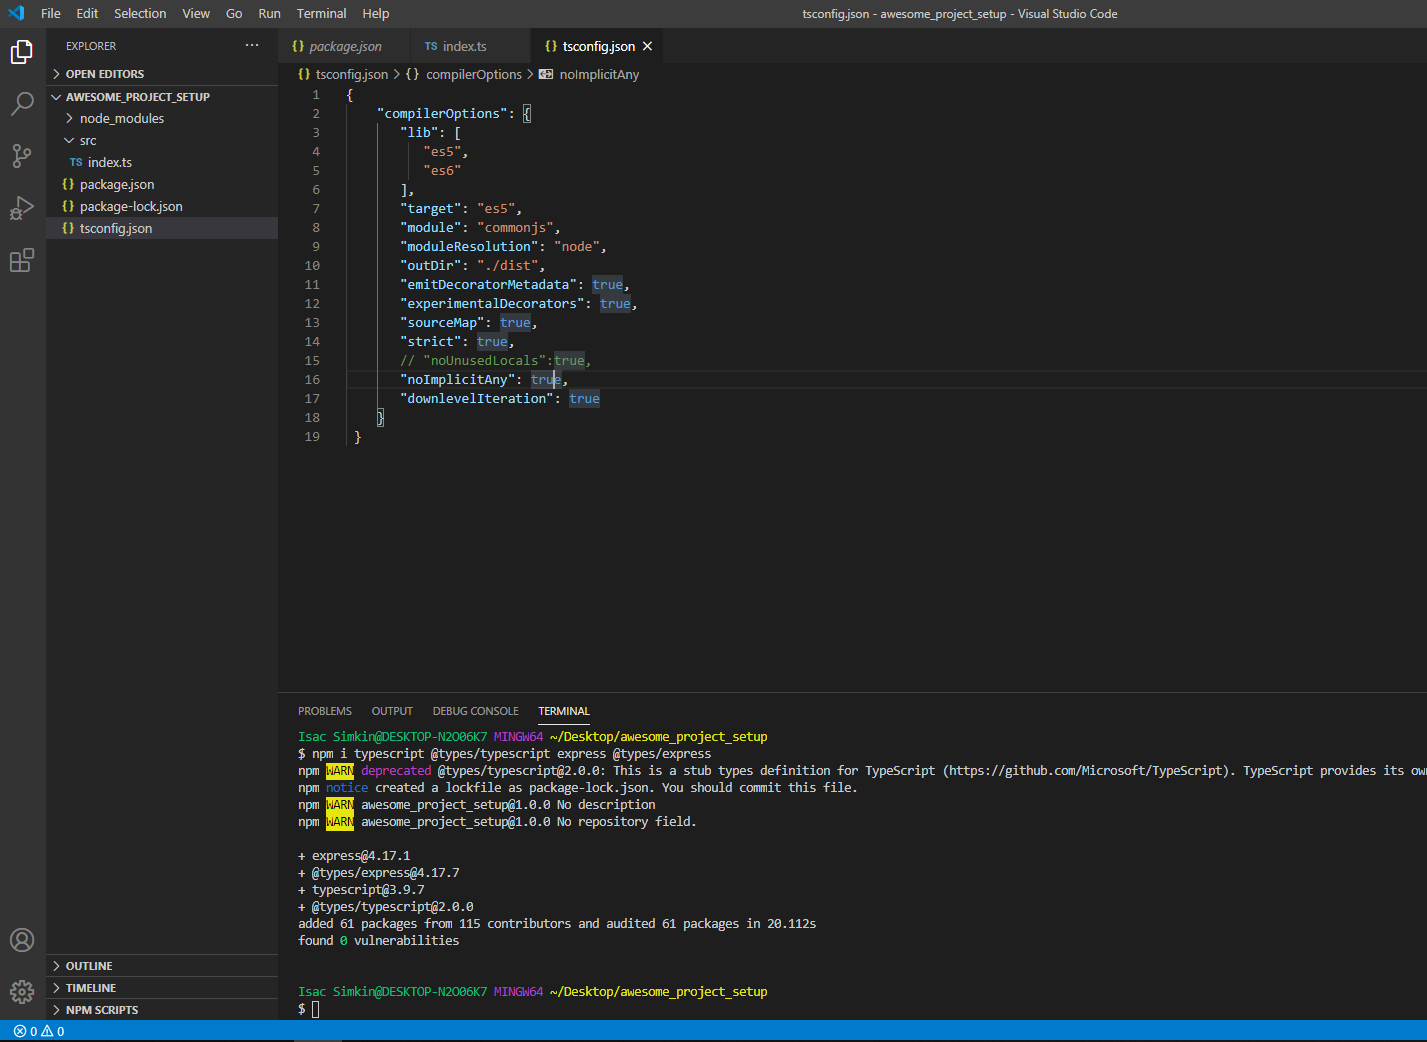
Next, install all the packages required to run your application. To start creating your awesome project in Express and TypeScript, you need at least both the Express and the TypeScript packages with their respective types complement. You can install them all at once using npm i typescript @types/typescript express @types/express . However, you can install them individually runningnpm i <package_name> for every package.

Step 5
The next step is to add the tsconfig.json file. This is the file that specifies the configuration of the project for TypeScript (hence the name). This is very simple, just create the file and name it tsconfig.json , then copy the snippet of code below. All the configuration specified in it will give you a good base to start writing effectively in TypeScript and be able to transpile it to JavaScript.
Step 6
Now it is time to add some scripts in package.json to help you run your application more easily:
"clean":"rimraf dist". This will use therimrafpackage to get rid of the previous JavaScript transpiled code stored in thedistfolder. Note: installrimrafusingnpm install rimraf."build":"npm run clean && tsc". This will run the previous script alongsidetscwhich will turn the TypeScript code into JavaScript."start":"npm run build && node dist/index.js". This will run the previous two scripts before running the newly compiled application.

Step 7
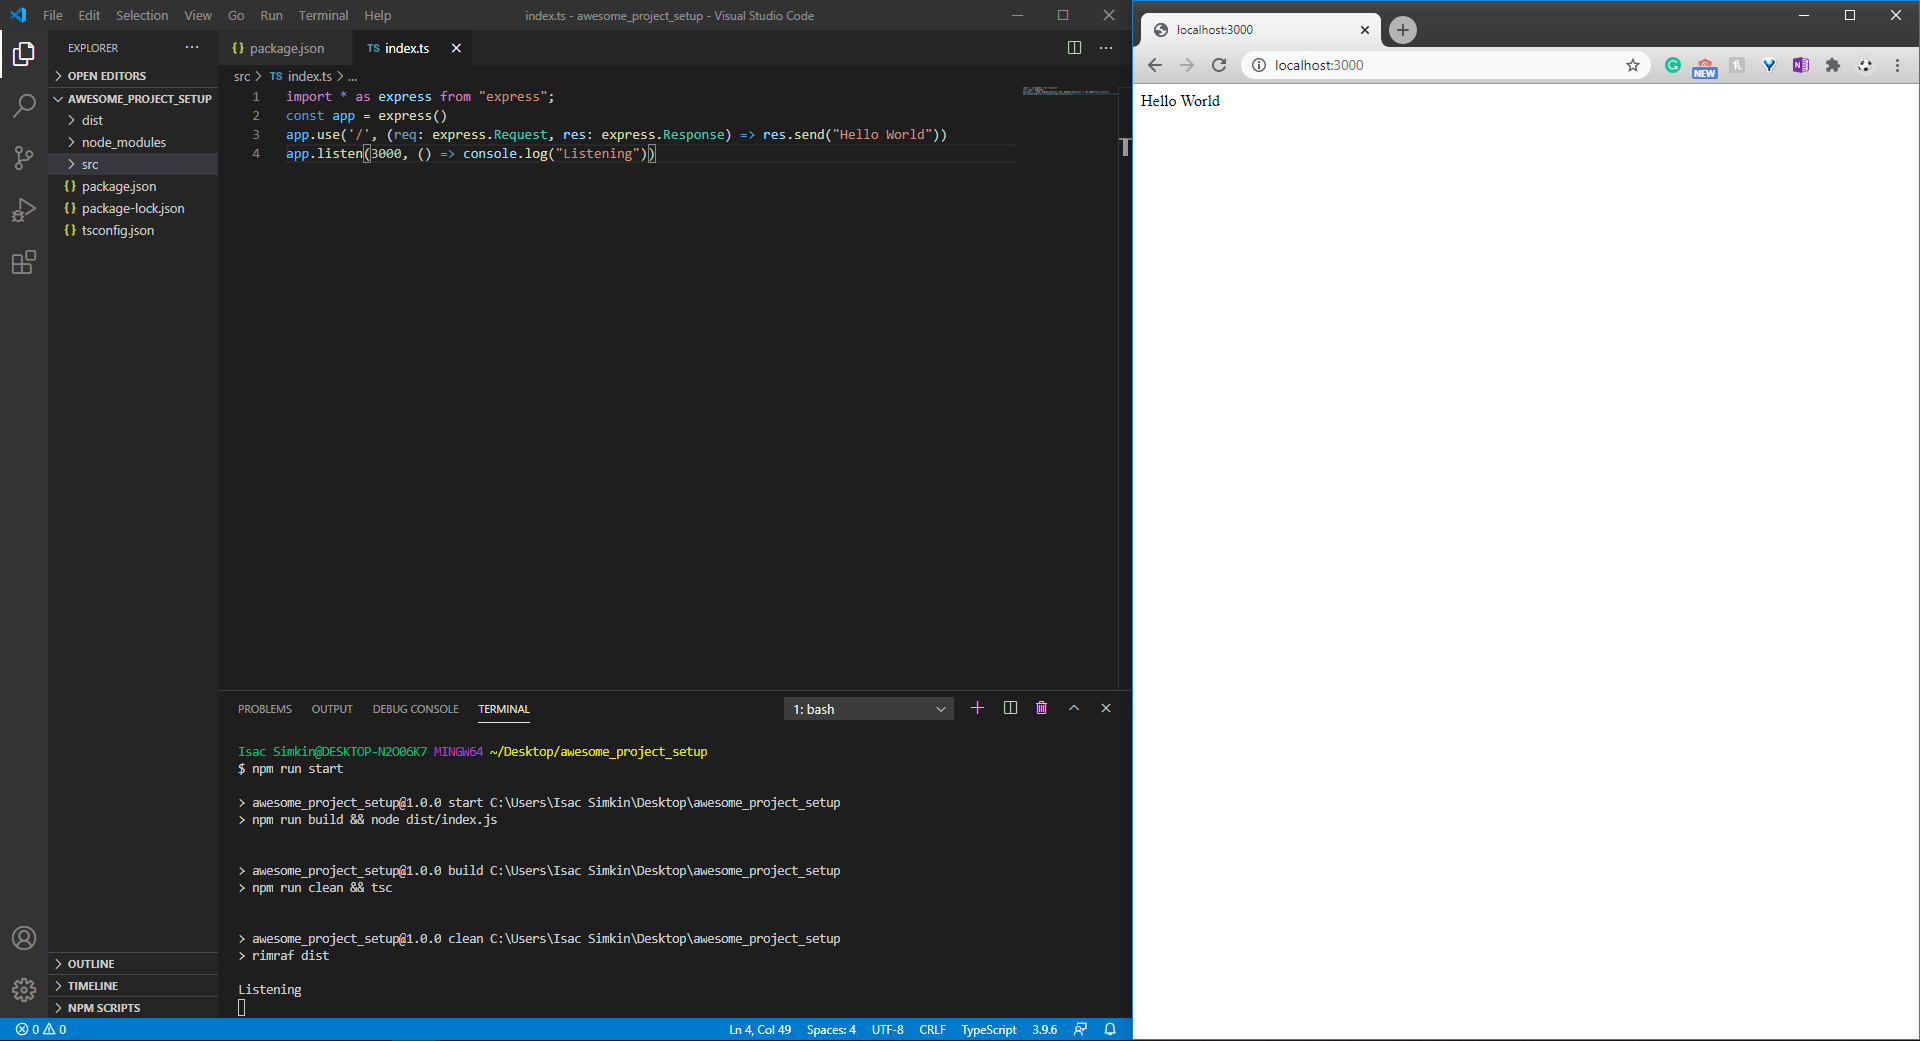
Once you have finished all of the above, it’s time to code. Start working in the index.ts file:
- Import
Express[line 1 in the image below] - Initialize an
Expressinstance. [line 2 in the image below] - Allow Express to listen for requests in a specific port. [line 3 in the image below]. I chose port 3000 as you can see, but you can choose any number that you like.

Finally, you need to add a route to receive requests and then respond. See line 3 in the image below for an example.
I implemented the .use() function to bind GET and POST HTTP requests in one single line, but you are more than welcome to implement .get() or .post() functions when you deem them necessary.

Step 8
Now that we are ready with the coding portion, run npm run start to start your application. Once the application compiles and is running smoothly, you are going to see the Listeningmessage in the terminal. Open your browser of choice and go to http://localhost:3000/ to view your new webapp working its magic.
Remember that if you chose a port other than 3000, replace it in the link above. If you chose 9999, go to http://localhost:9999/
If you were too lazy to set up everything manually, go ahead and download the code from my Github page. After you clone it, run npm install to install all of the packages I mentioned above and then run npm run start to bring the application to life. I often think it is better to learn the basics first, but some of us can’t wait to get started. Enjoy.
Conclusion
So there you have it, an overview for setting up a web application using Typescript and Express. As I mentioned earlier in this piece, having the skillset to implement a web application is very advantageous in a world that is increasingly dominated by websites and the digital realm in general. I hope that this guide has empowered you to take your first steps towards possessing this skill and growing from there. I will make a continuation of this guide that covers the routes and how to set them up correctly so keep an eye out for it. In the meantime, happy coding!

