A Beginners Guide to using apt-get commands in Linux(Ubuntu)

Ubuntu is widely regarded as a beginner friendly version of Linux and has a lot of GUI-based methods for installing applications but personally i think managing your software via the command-line can be a real time-saver and is really fast.
If you just started using or have been using Ubuntu or any other Ubuntu based Linux distribution such as Linux Mint it’s likely that you will have had to use an apt-get command at some point.
In this guide, we will discuss the basic usage of apt-get and how they can be used manage your software.
WHAT IS APT?
Ubuntu is dependent on Debian Linux and Debian Linux uses a dpkg packaging system . A packaging system simply provides programs and applications for installation.
APT(Advanced Package Tool) is a command line tool that is used for easy interaction with the dpkg packaging system and it is the most efficient and preferred way of managing software from the command line for Debian and Debian based Linux distributions like Ubuntu . It manages dependencies effectively, maintains large configuration files and properly handles upgrades and downgrades to ensure system stability.
USING APT-GET COMMANDS
Apt-get performs installations, package searches, updates and many other operations to packages available to your system. Keeping packages up to date is extremely important , as using out of date packages can lead to security issues on your system.
Apt-get requires administrative(super-user) privileges, as it deals with core aspects of the system, so in Ubuntu or Ubuntu based distributions you’ll need to prefix most commands with “sudo”.
Updating Package Database
Before commencing any operations with apt-get, we need to ensure that our local copy of the database is up-to-date. Without this the system won’t know if there are newer packages available or not. An update should always be performed before an upgrade or dist-upgrade. To perform an update run this command on your system’s terminal:
sudo apt-get update
From the terminal image above, you should notice three different types of lines
- Hit: This signifies that there is no package change since the last check. Simply put, it means that there is no newer version of the package.
- Get: This means there is a package update(new version) available and it will download the details for this update, but not the update itself.
- Ign: This means that the package has been ignored. This happens either because of an error or because the package is recent and there is no need to check it for updates.
Upgrading Package Database
Once your package database has been updated, you can now upgrade the packages with updates installed on you machine. This will update any applications, and the Ubuntu core system to the latest versions available. To carry out an upgrade, run this command on your terminal:
sudo apt-get upgrade
To upgrade only a specific program rather the the whole system, use the command below:
sudo apt-get upgrade [package_name]You can also perform an upgrade with the following command:
sudo apt-get dist-upgradeThis also performs the function of apt-get upgrade command with some slight differences. The apt-get dist-upgrade command intelligently handles changing dependencies with new versions of packages and will attempt to upgrade the most important packages at the expense of less important ones if necessary. Thus unlike apt-get upgrade , the apt-get dist-upgrade command may actually remove some packages in necessary instances.
COMBINING COMMANDS
You can actually combine commands in ubuntu, such that one command can run multiple functions. To carry out an update followed by an upgrade, you can run this command:
sudo apt-get update -y && sudo apt-get upgrade -yThis command is basically telling the machine to run an update, then run an upgrade. The -y flag signifies automatic yes to any prompts that may come up in the command line.
INSTALLING NEW PACKAGES
If you are familiar with the name of the package you want to install, you can install it by running this command:
sudo apt-get install [package_name]suppose i want to install VLC player, i’ll just run the command below:
sudo apt-get install vlc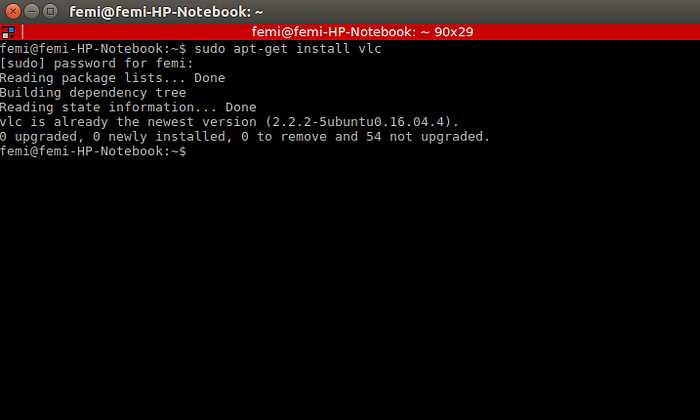
This command also has auto-complete functionality, so if you are unsure about the package name, just type in some few words and hit the tab button and it will suggest some package names for you.
You can also install multiple packages at once by using the command below:
sudo apt-get install [package_1] [package_2] [package_3]If you try to install an already installed package, it will check the package database and if a newer version of that package is found, it will upgrade the installed package to its newer version.
If you want to install a specific version of a package you can run this command:
sudo apt-get install [package_name]=[version_number]REMOVING INSTALLED PACKAGES
To uninstall a package from your system, you can use the following command:
sudo apt-get remove [package_name]This command removes the package but keeps the configuration files. So in case you reinstall the same package, your configuration remains the same. If you want to remove both the package and its associated configuration files, you can run this command:
sudo apt-get purge [package_name]You can also use:
sudo apt-get autoremoveThis command automatically removes any packages that aren’t used or associated with any installed program. It’s a great way to clean up any unused libraries and packages you don’t need.
SEARCH FOR PACKAGES WITH APT-CACHE
Unlike apt-get that is used to upgrade, install, and remove packages, apt-cache is tool that is used to query the package database for package information. Also apt-cache does not require administrative privileges like apt-get , so you don’t have to use the “sudo” at the beginning of your command.
To search for a package you can use the following command:
apt-cache search [search_term]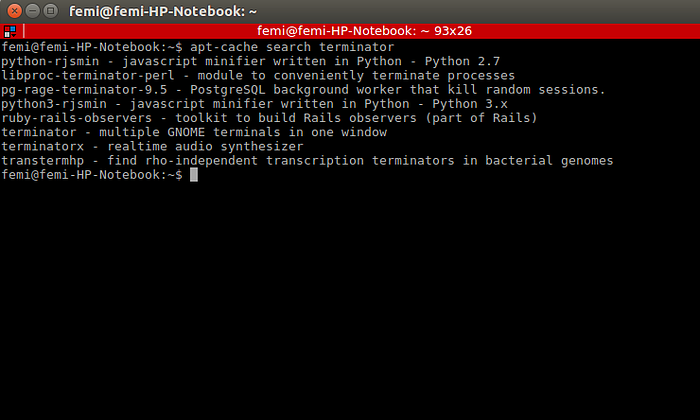
This allows you to search for terms rather than exact package names, so you don’t have to know the name of the package you’re searching for. However, if you want to search for packages that contain your search term within their name, you can use the following command:
apt-cache showpkg [package_name]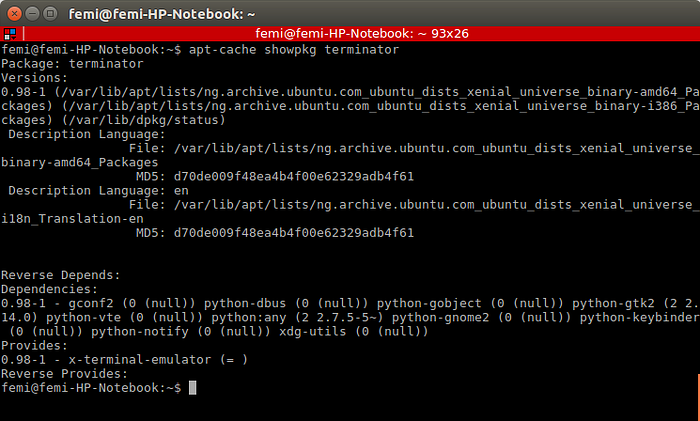
From the output above you can see that this command will display important information of the searched package such as version numbers and dependencies.
To view information about a package you can run the following command:
apt-cache show [package_name]CONCLUSION
There is more to apt-get but this should get you started. To explore more, you can run the following command in your terminal:
man apt-get && man apt-cacheThis should display an in-depth manual on apt-get and apt-cache commands and its different options.
Cheers guys!!!

✉️ Subscribe to CodeBurst’s once-weekly Email Blast, 🐦 Follow CodeBurst on Twitter, view 🗺️ The 2018 Web Developer Roadmap, and 🕸️ Learn Full Stack Web Development.