Bloomberg, Walmart, Wix, Townske are few of the brands that have built their mobile apps on React Native versions, which is great, as their app turned out to be a howling success.
React Native in 2019 getting more attention in the business community and adopted by most developer’s every day. The new version of React Native version 0.59, was released on 12th March 2019.
More and more developers using React Native version 0.59 for application development because from 01st August 2019 Google requires all mobile apps on the 64-bit of APK. That you can do that with React Native version 0.59 because it has 64-bit of libraries.
So, if you’re are the one who is looking to upgrade your app to this version, we will discuss complete information in this post and the top React UI Components to use in 2019.
We will also discuss the benefits of using React Native for building your business application. You can also hire React Native developers to upgrade your app to this new version of React Native version 0.59. Let’s now see the details of what React Native offers for the optimistic user interface.
React Native Offers an “Optimistic User Interface”
The updating phase of app development is often asynchronous in nature where the app has to wait for a response either from the backend server or from the user end. Well in the React Native when a user triggers an action, the “User Interface” updates instantly without any error which is called as the “Optimistic User Interface” where you can update your app UI right away.
Let’s look into the process of how you can upgrade your app to React Native version 0.59
Step 1
To upgrade you will need to use the rn-diff-purge that will allow you to view the differences between your current version of React Native and your target version.
Note: Here is an example of what all are the necessary changes to upgrade from the old version of your React Native to React Native version 0.59.
Step 2
Once you know that you are running version 0.59 you will need to use the “package.json” file and run “dependencies block” to search for the react-native.
Step 3
In the “dependencies block” once you find react-native, then simply update the value to 0.59.0 or 0.59.1 and open the project’s root directory to run the “npm install” command.
Step 4
You can also run the command “npm install react-native@0.59” to directly update your old version of React Native from the terminal at the project’s root directory.
Step 5
To keep your React version updated with the React Native new version you can do it either by adding commands directly from the terminal or by editing the value in the “package.json” file.
Step 6
To update your React version to React-Native from the file, look for the key react version in the “dependencies block.” Once you found that, update the value to 16.8.5 and simply run “npm install” command at the project’s root directory.
Step 7
To directly update from the terminal run the command “npm install react@16.8.5” at the project’s root directory.
Step 8
To replace all the files according to the new version of React Native version 0.59, run the “react-native upgrade” command at the project’s root directory. Simply press ‘y’ whenever the system prompts you for a file replacement.
How to Handle Deprecation Warnings in React Native version 0.59?
Once you’re upgraded to React Native version 0.59 you could face the issue of deprecation warnings. So, here is how you can handle those deprecation warnings. You can hire React Native developers to solve the issue. Or, you can apply the points I have mentioned below to solve the issue related to deprecation warnings in React Native version 0.59.
What causes this warning?
It is the way you code. Yes, when you upgrade to React Native version 0.59 you remove all the APIs that will make you confused on why things are not working.
Here’s the wrong way you code:
App.jsimport React, { Component } from ‘react’;import { StyleSheet, Text, View, Button, AsyncStorage } from ‘react-native’;export default class App extends Component {get = () => {AsyncStorage.getItem(‘item’).then(result => alert(result));};write = () => {AsyncStorage.setItem(‘item’, Math.random().toString()).then(() =>alert(‘set!’));};render() {return (<View style={styles.container}><Button title=”Get” onPress={this.get} /><Button title=”Set” onPress={this.write} /></View>);}}const styles = StyleSheet.create({container: {flex: 1,justifyContent: ‘center’,alignItems: ‘center’,backgroundColor: ‘#F5FCFF’,},});
The right way to code is:
Terminal
yarn add @react-native-community/async-storage
react-native link @react-native-community/async-storage
The right way to update your code:
App.jsimport React, { Component } from ‘react’;import { StyleSheet, Text, View, Button } from ‘react-native’;import AsyncStorage from ‘@react-native-community/async-storage’;// …
Let’s talk about ..
React Native version 0.59 Latest Updates
JavaScript Core (JSC)
The new JSC (JavaScript Core) update comes with a 64-bit of support and performance features that is comparably better from that of Android and iOS JSC.
React Hooks
React Native version 0.59 is also updated with React Hooks that is expected to improve the whole React native application development in terms of reusing the logic behind the logic components without restructuring the React Native components.
Improved CLI Tools
With improved CLI tools, developers can run the commands at a much faster rate in React Native version 0.59 and formatting will be easier for them because CLI tools have been shifted to the new repository with all the advanced improvements and you will immediately notice a difference in coding:
Now, we will see top React Native components (UI components) to use in 2019 that allow you compose UIs with the isolated piece of components. Rent a coder to give you full brief of React Native components and to develop app according to your project requirements.
2019’s Top React Native UI Components
On React Native version 0.59 you can build components on isolated components. It will make your work much easier with the “UI Kits” and “Libraries” and also saves your time and make app development much faster. Different UI components offered by React Native version 0.59 are:
Buttons — For handling touches nicely on any platform.
Sliders — To select a single value from a range of values.
Picker — Help renders the picker component on Android and iOS.
Switch — To handle the boolean input.
Let’s check out the list of top React Native components
React Native Component — UI Kitten
React Native UI Kitten provides most of its components in a single package with the same UI design. With 3345 stars and 459 forks in the library, the UI kitten library is customizable and best to boost the entire process of mobile app development as supported by IT projects outsourcing firms.
- Limited set of elements with similar UI design.
- Flexible UI customization and styling using the RkComponent class similar to CSS classes.
React NativeBase

React NativeBase offer you myriad of cross-platform React Native component. With 10,000 stars and 1,000 forks in the library makes it a widely popular UI component that allows you to use the types of native third-party libraries and customizable theme templates.
- Prebuilt and ready-to-use components.
- Give you app native look and feel on iOS/Android.
- Perform customization using `StyleSheet`tool.
React Native Vector Icons

React Native Vector Icons are easy to use, easy to extend, and also easy to integrate into your business application. With above 10,000 stars and 1119 forks in the library of fully customizable icons support for NavBar/TabBar/Toolbar Android.
- Have platform-specific native icons.
- Different icon libraries including Ionicons, FontAwesome, Evil Icons, Foundation, Entypo, Material, and others.
React Virgin
React Virgin have around 1349 stars and 89 forks and has the beautiful most UI kit with different react native components including header, horizontal list, vertical list, buttons, grid-view, chat bubble, loader, etc.
React Native Elements

With over 12,000 stars in the library, the React Native Elements is a type of customizable cross-platform UI toolkit that is built on Javascript. The React Native Elements is all about component structure that you can control from the one central location.
That’s why it’s the best option to use for the developers as every react native component defined in a central place including header, icon, avatar, badge, checkbox, input, etc.
- Offer small components like buttons, avatar, form elements, icons, typography, sliders, etc.
- Offer complex elements like search bar, rating card, pricing, search bar, checkbox, list items, etc.
- Support solid documentation and themes.
React Native Shoutem

React Native Shoutem is a platform that has three main parts including UI components, Themes, and component Animation. This library offers a complete set of cross-platform react native components for both iOS and Android and all components are built to be both composable and customizable.
All react native components have a predefined style that makes it possible for you to build complex components without manually defining complex styles.
React Native Nachos UI

React Native Nachos UI components are fully customizable that include bubble, button, card, carousel, checkbox, input, slider, spinner, badger, and many more components. With around 1752 stars and 103 forks in the library, Nachos UI offers around 30+ pre-coded UI components to use.
- Come with 30+ pre-coded UI react native components including slider, card, typography, radio, spinner, etc.
- Provide React Native Web support.
React Native Paper
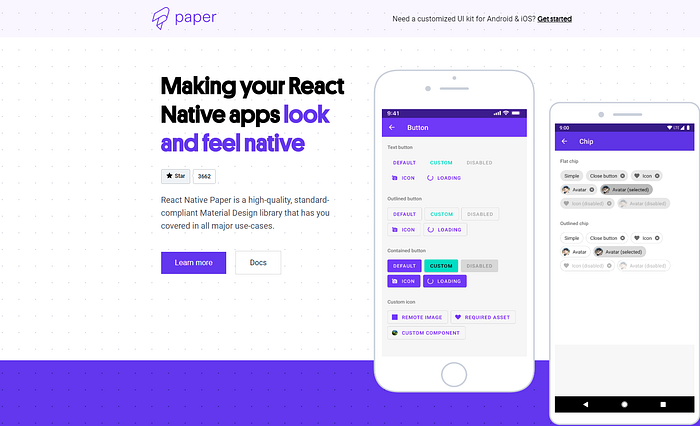
With 1.5k stars in the library React Native Paper is a popular cross-platform UI component library that follows the material design guidelines with global theming support and an optional babel-plugin to reduce bundle-size.
Let’s move onto the list of isolated React Native components:
React Native Isolated Components
Much like the React Native optimistic UI, developers prefer to build application UI using isolated components that can be easily created using tools:
1. React Storybook
Here’s how you can use Storybook to develop and design different UI React Native components without creating an account in your app or without using a backend server.
Here’s how you can use Storybook
Step 1
Run the command ‘npx -p @storybook/cli sb init’ inside your app’s directory.
Step 2
After that, setup React Storybook in your development environment by following these commands:
# Create application:npx create-react-app taskboxcd taskbox# Add Storybook: npx -p @storybook/cli sb init
To quickly check that the various environments of your application are working properly:
# Run the test runner (Jest) in a terminal: yarn test# Start the component explorer on port 9009:yarn run storybook# Run the frontend app proper on port 3000:yarn start
To know more on how to build react native components, construct screens, wire in data, integrate and use add-ons, etc. on React Storybook click here.
2. React Styleguidist
It is a style guide where you can see all your react native components on a single page with their descriptions and details. To use Styleguidist, first, you need to install with the following command:
npm install — save react-styleguidistOr, you can use yarn:
yarn add react-styleguidistThen, add these scripts to your package.json:“scripts”: {+ “styleguide”: “styleguidist server”,+ “styleguide:build”: “styleguidist build”,“start”: “react-scripts start”,Now, run the npm run styleguide command inside your app’s directory.
After that, follow the instructions on the screen. See more details here: Styleguidist guide.
So, be ready to code on React Native version 0.59. You also have the option to include more React Native components to my list. Last but not least, thanks for reading! Would like to hear from you, feel free to comment on my post. Also, feel free to contact software development service for complete help on the application upgrade, updates, and development.