A Skeptics Guide to Frontend Testing: Part 1
Through this series, we will be exploring frontend testing as we slowly build a simple calculator web application (using React / Redux).

TL;DR: I started writing this series as a skeptic of frontend testing. But after writing this first article, I have already concluded that I need to add testing to my development process; the question then becomes more about what and how to test.
First, want to put a couple of things out here.
- With most of my experience, being with either agencies or startup companies, I do not have a lot of practical experience with testing.
- The limited experience that I have had with testing came in the form of backend testing; the idea being that the backend is the gatekeeper of the business logic and data integrity.
- My starting bias is that one does not need to unit test controller or display code (both are typically very declarative in nature). I found an article, Testing Declarative Code, that captures the gist of my thinking.
- I am writing this series as I dive into exploring frontend testing; learning and explaining myself as I go.
The examples in this series are available for download.
Setup
As our focus here is exploring testing, we will keep things simple and use create-react-app to provide the build process. At the same time, I am a big proponent of owning your build process and have written on webpack extensively; My Best webpack Configuration To Date: Part 1.
As create-react-app is a fairly robust tool, it includes Jest as the testing framework and jsdom for browser emulation. It also includes a sample test for the App.js component that we can run (including a coverage report) with:
yarn test -- --coveragenote: Note the extra pair of dashes; this is not a typo.

Smoke Testing
The term ‘smoke testing’, it is said, came to software testing from a similar type of hardware testing, in which the device passed the test if it did not catch fire (or smoked) the first time it was turned on.
— Software Testing Fundamentals
The included sample test, App.test.js, is an example of a smoke test as all it does is render / unmount (turn on /off) the App component.
part1/src/App.test.js
import React from 'react';
import ReactDOM from 'react-dom';
import App from './App';it('renders without crashing', () => {
  const div = document.createElement('div');
  ReactDOM.render(<App />, div);
  ReactDOM.unmountComponentAtNode(div);
});
As this seems fairly painless, I will begin by exploring the following guidance of always providing smoke tests for components.
There is a broad spectrum of component testing techniques. They range from a “smoke test” verifying that a component renders without throwing, to shallow rendering and testing some of the output, to full rendering and testing component lifecycle and state changes.
Different projects choose different testing tradeoffs based on how often components change, and how much logic they contain. If you haven’t decided on a testing strategy yet, we recommend that you start with creating simple smoke tests for your components.
— create-react-app README
Went ahead and stubbed out a Calculator and Button component and wrote the smoke tests (the tests are identical to App.test.js above with the component changed out) for each of them.
part1/src/Calculator/index.js (incomplete)
import React from 'react';
import Button from './Button';function Calculator() {
  return (
    <div>
      <Button />
    </div>
  );
}
export default Calculator;
part1/src/Calculator/Button/index.js (incomplete)
import React from 'react';function Button({ number }) {
  return (
    <div>Button</div>
  );
}
export default Button;
Also, added the Calculator component to App.js.
part1/src/App.js
...
<p className="App-intro">
To get started, edit <code>src/App.js</code> and save to reload.
</p>
<Calculator />
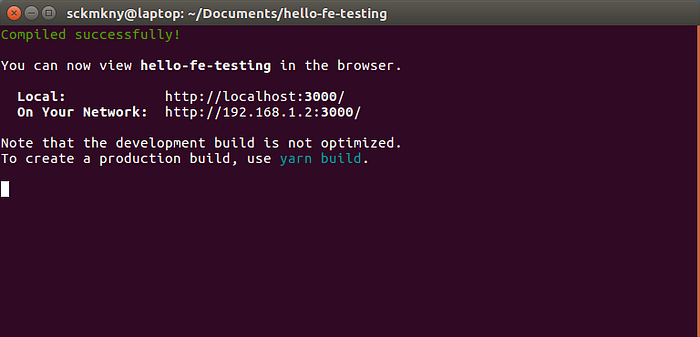
...With this in place, I start up the build (webpack under the hood) and testing (Jest under the hood) processes to that they watch for changes with:
yarn run startand in another window:
yarn run testI got the weirdly satisfying feedback that everything is building and passing; started to realize that testing is a somewhat of a gamification feature of development.
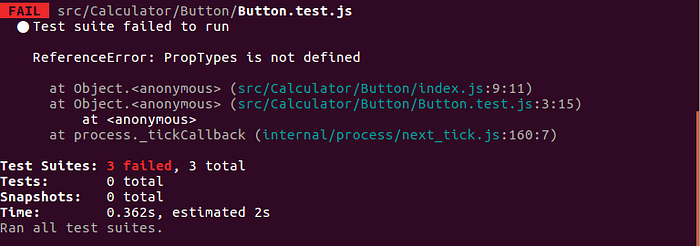
Starting to work on the Button component, I make a mistake by forgetting to import PropTypes.
src/Calculator/Button/index.js (incomplete)
import React from 'react';function Button({ number }) {
  return (
    <div>{number.toString()}</div>
  );
}
Button.propTypes = {
  number: PropTypes.number.isRequired,
};
export default Button;
All heck breaks loose…

Observations:
- Both the build and testing processes reported the failure; with sufficient detail to help me troubleshoot
- Even though the error was only in the Button component, all three tests failed. Without reading the detailed error message, it is hard to see which component was the source of the trouble (will dive into this issue later).
So, I fix the problem:
src/Calculator/Button/index.js
import React from 'react';
import PropTypes from 'prop-types';
...
and then:

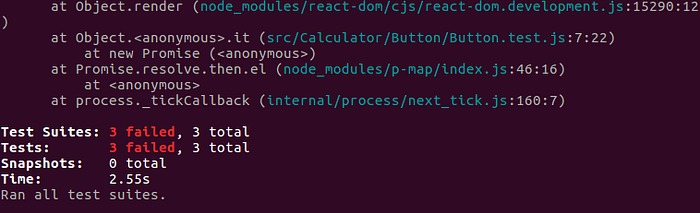
Observations:
- The code still has a problem; the Calculator component is not passing the Button component the required number property.
- The build process does not catch this failure.
- All three tests fail with the message: Warning: Failed prop type: The prop `number` is marked as required in `Button`, but its value is `undefined`
I then fix the Calculator component.
src/Calculator/index.js
...
<div>
<Button number={0} />
</div>
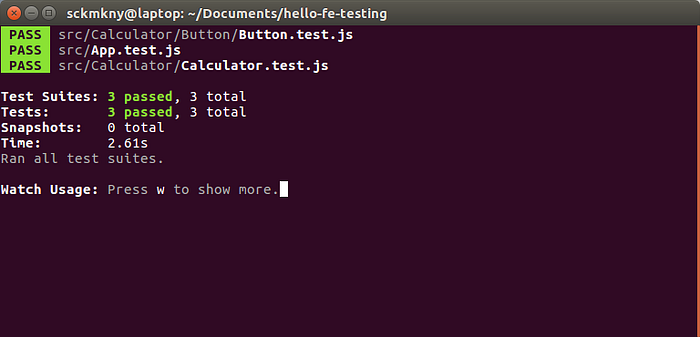
...The build process continues to report Compiled successfully! and two of the tests (App.test.js and Calculator.test.js) pass and one fails (Button.test.js).
I quickly realize that Button.test.js does not test the Button component with the required number property. This is an easy fix.
src/Calculator/Button/Button.test.js
...
it('renders without crashing', () => {
  const div = document.createElement('div');
  ReactDOM.render(<Button number={0} />, div);
  ReactDOM.unmountComponentAtNode(div);
});
...
With this fix, the build process and all three tests are successful.
General Observations
Through this trivial (yet common) example, I have convinced myself that, by simply adding smoke tests for every component, I will catch some run-time errors early (before the application fails in the browser).
More importantly, because these tests can be run in a continuous integration workflow, we can automatically catch these sorts of errors before they have a chance of getting into production.
Next Steps
In the next article in this series, A Skeptics Guide to Frontend Testing: Part 2, we will explore how linting and another library (Enzyme) fit into our testing strategy.
