Automatic visual regression testing
When I first heard the term “snapshot testing”, I naively assumed it dealt with image data. You can imagine my disappointment when I found out that it didn’t do any fancy visual regressions, though after using snapshots for a while I’ve come around to appreciate their benefits. However, there was still a gap in my heart for actual snapshots of website regressions.
🦄 A Unicorn appears
Recently I became aware of the excellent jest-image-snapshot module, which does exactly what you think it would: testing of visual differences in an automated way. The API functions very similarly to toMatchSnapshot in Jest:
Snapshotting a webpage
Setting up toMatchImageSnapshot is about as easy as it gets:
And using it is even easier:
There’s a lot of stuff happening under-the-hood so let’s dive into it. toMatchImageSnapshot works identically to the Jest toMatchSnapshot . It takes care of:
- Creating, naming, and saving the image for you on first-run.
- Finding the image on subsequent executions to compare.
- Doing the delta comparisons, and generating a preview of deltas if there is a difference.
- All the other administrative stuff: removal, updating, and throwing on failure.
Cut chit-chat, where’s the demo?
Below we have Exhibit A, a “mission-critical” log-in window with a friendly welcome-header:

Since this is a window that gets viewed many times a day I want to ensure that it doesn’t change much. So, in a few lines of code I author a test and jest-image-snapshot saves all the details:

Awesome! Now I can go about my day without worrying too much about visual regressions. Fast-forward a few days later and now my test is failing?!?
Shoot! Something happened! Let’s take a look at that image that gets generated in the console:
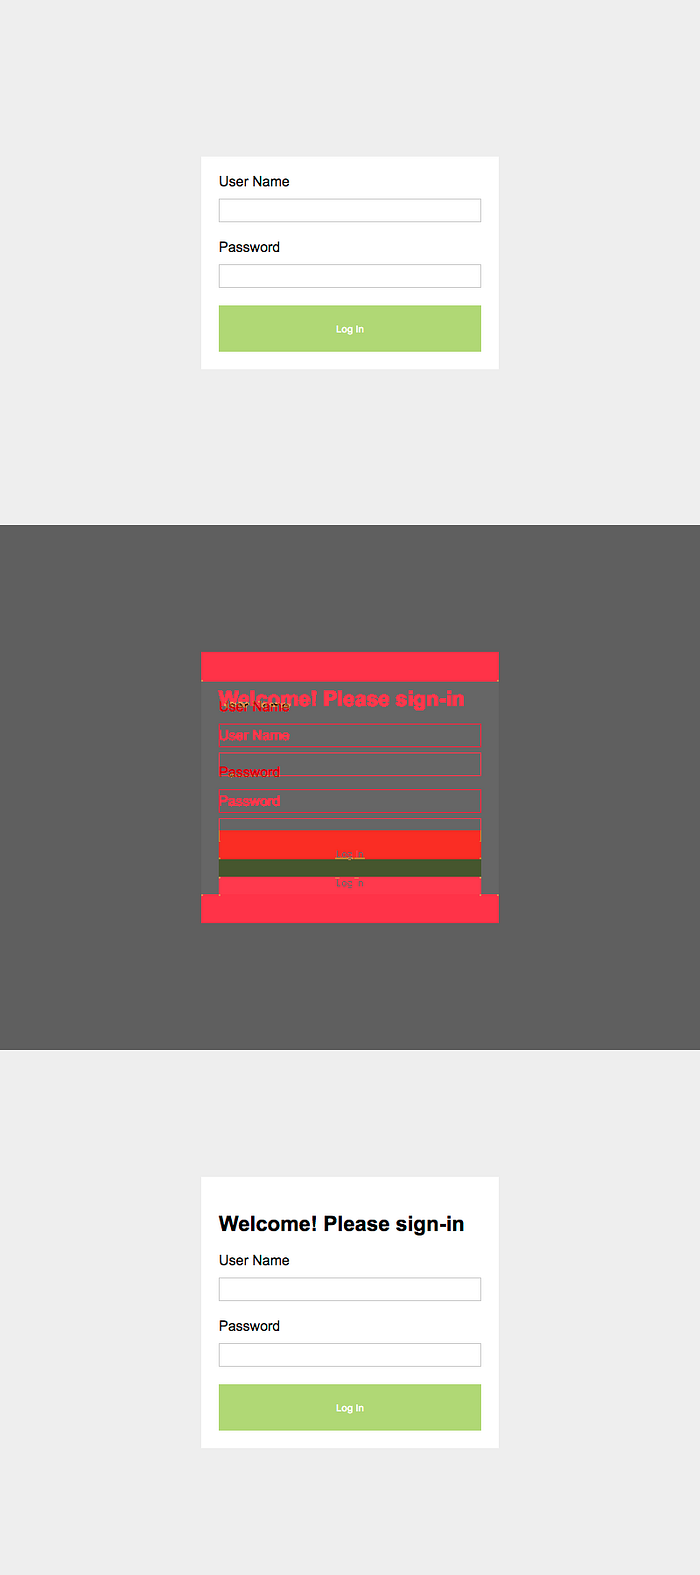
Here we get a nice shot of the “after”, the diff, and the “before”. It looks like my friendly header message is gone. Once I fix that my tests now pass!
At this point all’s well and good, but we’re missing one thing: how do we capture the screenshots automatically?
💪 The Browser Driver
You might be thinking about reaching out for old Selenium or some other driver, but I have something else to suggest: Navalia. Navalia is a dead-simple browser-driver with a concise API, a GraphQL front-end, and the ability to scale work on multiple instances. With it, we can easily install a npm module and begin setting up our image capturing.
Visual regression with jest-image-snaphot + Navalia
And that’s it 💥 The first run of this test should produce an image that will be stored in your project, and each subsequent run will diff against it, ensuring things are kapeesh. I heavily recommend you checkout these open-source libraries so you can get your project off of the ground with confidence!
Checkout jest-image-snapshot on GitHub, as well as Navalia on Github
Happy testing!