Creating a Medium-Like Blog App Using Angular 9 and Firebase

Live Demo: https://mehulk05.github.io/Blog-Book/
Demo2: https://blog-app-tawny.vercel.app
Github:https://github.com/mehulk05/Blog-Book
I previously developed a blog app in Angular and Firebase (Live Demo) but it had limited features and didn’t allow me to edit blogs once they were published. It also only allowed the admin to publish blogs which was quite limiting. Due to this I decided to develop another blog app just like Medium that has CRUD operation allowing all users to register and write blogs, comment on and like blogs, and mark their blogs public or private. The idea is that users can use my app like their personal diary. Also, I have added a Rich Text Editor (like Medium) to edit the text formatting in the blog app.
Complete Demo

Tools and Technologies
- Technology: HTML, Bootstrap, CSS, Angular-9, Firebase
- Database: Firebase(RealTime Database) .
The Features
- CRUD Operations
- Authentication (Email /password and Google login)
- Verification of mail and Password recovery
- Like/Unlike the post
- Comment On posts
- Public and private options to mark their blog public and private. If the post is private then the only user can see his post after logging in
- User can view other users’ profiles and their blog
- A search filter to search the blog by title or author-name
- It has featured post and latest post section
- Rich Text Editor like Medium(WYSIWYG)
What It Covers
This project covers all fundamentals of Angular:
- Cross component communication
- Components, Template, and DataBinding
- Form validation
- HttpClient
- Animations
- Dependency injection
- Routing and navigation
- Service workers
- Pipes
- CRUD operations
- Guards etc.
Getting Started
- Let’s get started by cloning the source code and we will cover some of the above features in this part.
git clone https://github.com/mehulk05/Blog-Book.gitNavigate to the project directory and install the required dependencies.
cd BlogBook
npm install
After doing this next step is to setup Firebase. Follow this. Angular + Firebase Tutorial — Angular + Firebase + Typescript — Step by step tutorial or follow this and set up your firebase rules
Now Let's begin with CRUD Operation, How I created my Service files to create a post.
- Create or Add your first Post to Firebase
2. Retrieve Post FromFirebase
To retrieve posts from Firebase, we will use the get method of Http. Below is the code snippet for the same
3. Update Your Post In Firebase
To update your post in the Firebase realtime database you need your old post data and your new post data. After this, we will write one method which will get the key from the firebase under which our post is saved.
To get the key we will query our database and compare our current post title with all the results received from the database. If matching is found under a particular key we will store that key.
Then we will use the Http patch method to update our data in the firebase
4. Delete Operation in firebase
To delete a single post in firebase again we will use the same approach and get a unique key. Then we will fire our Http delete method.
Demo Of CRUD Operations
How to make your post public or private based on user choice
So in this part, I will show you how I have implemented the post either in the public or private node. So, first of all, I have created node by using a unique ID which is generated by firebase when we log in or create account
Then I have maintained a node inside that unique ID and stored data under this node as public or private as per users privacy
How to maintain Like/Unlike post count
So how to maintain like/unlike the status of the post whether a user has liked this post or not. For this, we will need the post ID and the user unique ID (UID)
So first we will create method in the component file which will be called every time when a like button is clicked
After creating like the method we need to call this method in service to create an entry in the database for every click
Demo of Like/Unlike On Post

Comment on posts
So, how do we maintain comments on a post? For this, we need users’ unique ID (Uid) post ID on which the user is doing his comment. So we will follow the same approach as we did for maintaining like status in the database
After creating a submit method on click we will call the create comment method in the service file where we will compare the post with our given post value. By comparing the title of our post against a list of posts in the database we can get the post ID.
The next step is to get current user ID and create an entry is given post ID with comment date and comment value
Demo of comment on the post

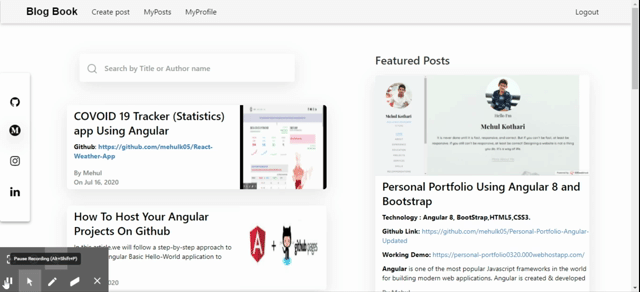
Featured post and latest post
So in my project, I have implemented a category known as a featured post. When you visit the medium’s home page you can see many categories like featured posts, latest posts, and so on. I have tried to replicate it on a small scale.
My logic was very simple for the featured post. If a post has more than 10 likes it will move to the category of a featured post. So I haven’t maintained featured posts in a separate database. Instead, I have fetched data from all public posts and then applied filters on their like count.
So before moving let's have a look at my database nodes
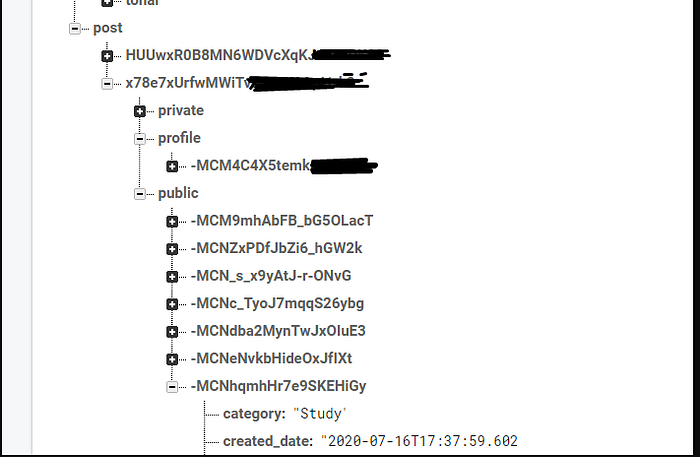
So here I have every data is in Post node. There I have users’ unique id (UID)as its next node. Inside that, I have 3 sibling nodes. Public-private and Profile. So we need to get public posts from their post-Id.
So here is sequence.Post->Uid->Public->PostId= PostData
Demo of Featured Post

The search filter to search post
I have also implemented search functionality on the home page to search posts by author name, the title of post, or category. To implement this I have used the ng-search-filter library as it doesn't need much hustle to maintain code
Install
npm i ng2-search-filter --saveImport Ng2SearchPipeModule to your module
import { NgModule } from '@angular/core';
import { BrowserModule } from '@angular/platform-browser';
import { AppComponent } from './app';
import { Ng2SearchPipeModule } from 'ng2-search-filter';@NgModule({
imports: [BrowserModule, Ng2SearchPipeModule],
declarations: [AppComponent],
bootstrap: [AppComponent]
})
export class AppModule { }
And use pipe in your component
import { Component } from '@angular/core';@Component({
selector: 'example-app',
template: `
<div>
<input type="text" [(ngModel)]="term">
<div *ngFor = "let item of items |filter:term" >
<p>{{item.name}}</p>
</div>
</div>
`})export class AppComponent {items: string[] = [{ name: "archie" }, { name: "jake" }, { name: "richard" }];
}
Demo of search filter
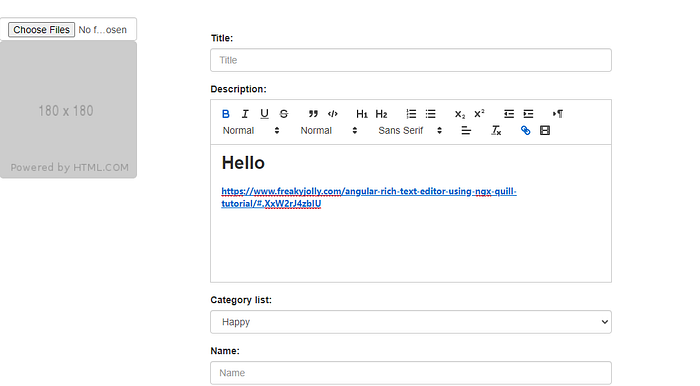
Rich Text Editor Like Medium(WYSIWYG)
So one of the basic needs while developing a blogging app is a Rich text editor which can bring the look and feel to your text formatting. So I have used the Quill Rich Text Editor For my app. It is very simple and easy to use.
Rich text editors or What You See Is What You Get(WYSIWYG) editors provide a full-featured text area where users can do text formatting, add multimedia content, use emojis, use text heading, change text size, or color, etc.
To use Quill editor in Angular project we need to install the Angular directive and Quill library by running following NPM commands given below:
$ npm install ngx-quill
$ npm install quill
Configure for CSS and JS file
In the angular.json file at the project root, update styles and scripts property array as shown below:
...
            "styles": [
              "src/styles.scss",
              "./node_modules/quill/dist/quill.core.css",
              "./node_modules/quill/dist/quill.bubble.css",
              "./node_modules/quill/dist/quill.snow.css",
              mention/dist/quill.mention.min.css",
            ],
            "scripts": [
              "./node_modules/quill/dist/quill.min.js"
            ]
...
Import in App Module
To use Quill in the application, open the app.module.ts file and import the QuillModule then add in imports array as shown below:
// app.module.ts
...import { QuillModule } from 'ngx-quill'
@NgModule({
  ...
  imports: [
    ...
    QuillModule.forRoot()
  ]
})
export class AppModule { }
Using Quill Editor
After the installation and configuration part, to create the editor in a component we just need to add the <quill-editor> directive. Adding the directive will create the basic Quill editor as shown
<h1>Simple Quill Editor</h1>

    <quill-editor [styles]="{height: '200px'}"></quill-editor>
More, you can visit the link
Demo
So this is all in this post. I hope you have found this useful!

Live Demo: https://mehulk05.github.io/Blog-Book/