Build a cryptocurrency dashboard with React
Extendable ReactJS portfolio for beginners

This tutorial will walk you through how to create a basic cryptocurrency dashboard using ReactJS and the free Coinbase API.
The goal for this tutorial is to create an easily extensible base project that you can build off to create your own unique and custom portfolio project. Some potential ideas for how you can add features to this project:
- Create a card-style layout for each cryptocurrency with routing for more data
- Add multiple time segments for users to look at historical pricing for each currency
- Build a trading bot by creating a Coinbase API account
- Add pagination support to get more historical pricing data on a user’s request
- Customize or animate the charts
- Make the charts real-time by updating the value with websocket data
Video Tutorial and Demo
If you prefer watching a video to reading, you can also follow along here. The first part of the video also shows what the finished project will look like:
Resources
- Github repo — https://github.com/renaissancetroll/reactjs-crypto-api-dashboard
- Coinbase API docs — https://docs.pro.coinbase.com/
- ChartJS docs — https://www.chartjs.org/docs/latest/
Tutorial Summary
- Initial project setup
- Define application state
- Create effect hook for initial render
- Create effect hook for currency pair changes
- Helper function to format data for chartJS
- JSX and CSS styling
Setup
This tutorial is built using Create React App as the starting template, but you can follow along using any ReactJS setup you prefer. The only libraries you will use for this tutorial are chartJS and react-chartjs-2, which can be installed using NPM.
npm install --save chart.js react-chartjs-2
For the file structure of the application you can create a components folder and also a generic utils.js file that will be used for generic helper functions.
Setting up application state with hooks
When you call the API you’ll need to be able to store that data as state. This will be done using React hooks and the values stored will be:
- currencies- all available currency pairs on Coinbase
- pair- current currency pair selected by the user
- price- price of the current currency
- pastData- historical price data from current currency
We also need to create 3 variables:
- ws- a useRef hook to create a persistent websocket object
- url- a base URL to the coinbase API
- first- another useRef hook to prevent an initial render(I’ll cover this in depth later)
The code for all of this will go inside your main App component.
useEffect hook for initial render
Now you need to implement the logic for your app’s initial render when the page loads. In this hook, you will use the websocket reference object created earlier to connect to Coinbase’s websocket data API.
You will also make an initial API request to get all available currency pairs from Coinbase. These will be used to populate a selector list so users can choose which specific cryptocurrency they want more data about.
If you have trouble understanding how the code works make sure to read the comments I’ve left above certain lines of code that might help clear up the confusing portions.
Important things to note about the above code
- The empty array passed as the 2nd argument to useEffect is crucial. This causes the effect hook to only run on the initial render. This is known as the dependency array. If no argument is passed it will run every time state changes in the react app which will cause major problems in many apps.
- The API call is made from an async function, you will get an error if you attempt to run a synchronous function inside a React hook.
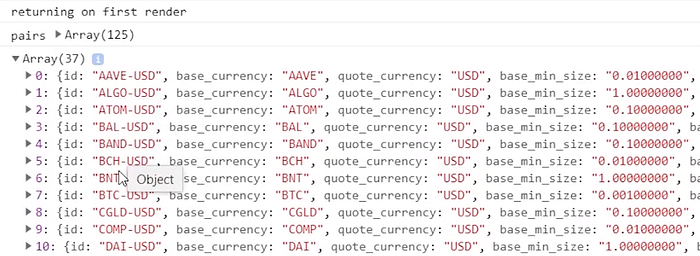
To verify that the code is working properly you can console.log that data and make sure it’s being formatted properly. In this case, we can see that Coinbase initially returns over 100 currency pairs and that after filtering only for US dollar-based currencies we have less than 40 left and they are sorted alphabetically for better user experience.
Connecting to the Real-Time data API with another effect hook
Now that you have the currency data you can use it to select which additional data you want to retrieve from the API. To do this you’ll create another effect hook. This will listen for changes to the currently selected currency pair and run every time a new currency is selected by the user.
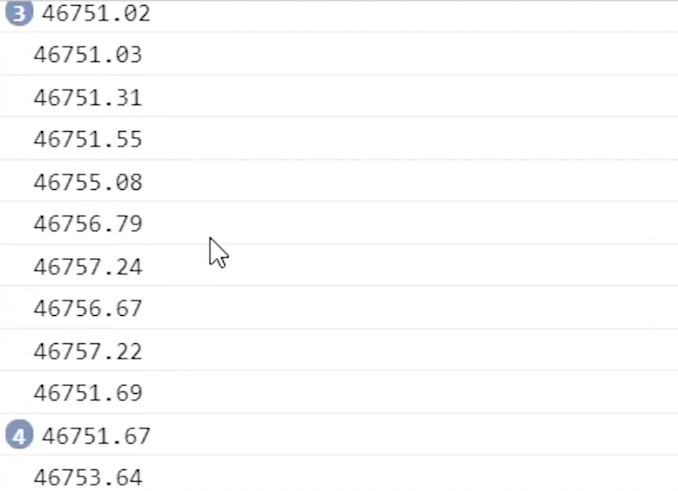
Again we can verify that our websocket data is working properly by logging the results to the console. You should see a new value get printed nearly every second, sometimes multiple times per second for more popular currencies like Bitcoin.
Formatting Historical Data
To help keep our code clean we are going to create a helper function that will modify the historical data made in the effect hook above and format it so it just needs to be saved directly to state and then passed to the chart component that will display the data.
This function will be placed in your utils.js file and imported into your main App file.
JSX and CSS styling
The hardest part is out of the way! You’ve retrieved and wrangled the data into a more workable format and now all you need to do is pass that data to your JSX components to display it.
First, let’s create the Dashboard component which will be imported into our main App component.
Now let’s create the JSX for the main App component and import our Dashboard component. The final code for the App should look like this:
The final thing we need to do is add some basic CSS styling. If you prefer to use a UI library you can leave this out and style the rest however you want.
Conclusion
That’s it, by this point you should a functioning app that’s pulling in and displaying data from the coinbase API. What you build now is up to you and the sky is the limit.
Crypto is really hyped area right now with lots of public interest so there is tons of opportunity to create websites and apps that could be monetized in a number of different ways.