Building a Budget Manager with Vue.js and Node.js (Part III)
The app is now completed and deployed
Hello again, and welcome to part three of this tutorial series where we’ll learn how to build a complete Vue.js and Node.js Budget Manager application.
You can find the second part of this series here, where we build our Login and Sign Up components, create a placeholder component for our Home page, style our App component and protect our routes.
You can also find the first part of this series here, where we build the barebones of our RESTful API and use JWT for authentication.
The GitHub repository for this tutorial is here.
Also don’t forget to comment any doubts you have during this tutorial, or even to correct me in any place that I might’ve explained something wrong. And if you know a better way to handle any part of this tutorial, feel free to comment or contact me!
A couple of fixes
First I would like to thank @OmgImAlexies for opening an issue regarding our background image, which I don’t hold the rights to use, and for providing a great source for free images here.
So lets start by changing our background image to this one.
(Don’t forget to reduce the image size later on if you want to deploy the app).
If you want the reduced image you can get it from my repository here.
Go to your App.vue component after you download the image and replace the last one, and lets change our style:
We added a background-size: cover and
.application {
  background: none;
}
Because Vuetify adds a white background to our application. Now, still on our App.vue component, we’ll make a small change to our template:
<template>
  <v-app>
    <v-container>
      <router-view/>
    </v-container>
  </v-app>
</template>
We changed div id="app" to a v-app which is the main component from Vuetify.
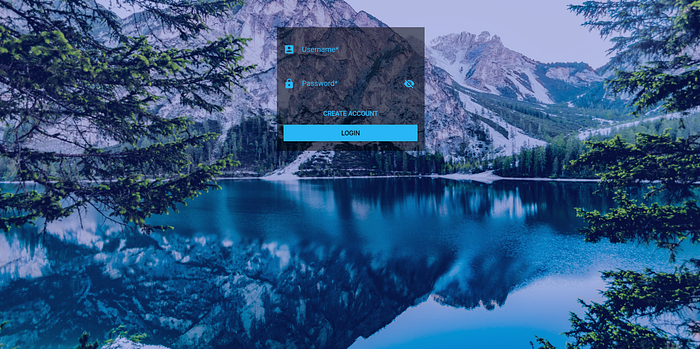
Open your Authentication.vue component and lets do a few changes to our style:
We override a few vuetify styles because of how v-app works and we also extend l-auth class since our l-signup class is exactly the same, only changing it’s animation name.
Our app will now look like this:
Now head to your index.js file inside your Authentication folder.
First we’ll make a change to our authenticate method:
We changed our promise to destruct only to data, because now we are going to store our user id as well.
Now lets modify our signup method:
We change our first promise to an arrow function since we never receive a response from our POST request. With that said, we also dont set our token in here anymore.
Instead we call our authenticate method.
We did this fix because otherwise, after signing up, our user would be redirected but he wouldn’t have a valid authentication since we never authenticated them.
Now, right below our Sign Up method we’ll add our Sign Out method:
And right after our Sign Out method, I’ll be making a small change to our Check Authentication method:
You can leave this method as it was, or you can also change it to a ternary (which is unneeded):
It’s a common mistake in JavaScript to use a conditional expression to select between two Boolean values instead of using ! to convert the test to a Boolean
this.user.authenticated = token ? true : falseBuilding our Header component
Before we move on to building our Home page component, we’ll create a header. Go to your components folder and create a Header.vue component:
This is a pretty simple placeholder component for now, we only have a search input binded to our search data, a clients button which will take us to the clients screen later on, a select with the states of our budgets, and a sign out button.
Open your _variables partial and lets add a color and also change the transparency of our background-color to .7:
Now lets define our component on our router. Open our index.js file inside our router folder:
First we import our Home component and then our Header, after that we register it, remember that @ in this case is Vue’s webpack alias to src folder.
app-header is the tag name we will use to render our Header component.
Note that Vue does not enforce the W3C rules for custom tag names (all-lowercase, must contain a hyphen) though following this convention is considered good practice.
(Directly from Vue’s documentation)
Now lets check our router:
In here we are defining that our Home page’s default component is Home and we enable our Header component on it as well. Notice that we are not making any changes to our login route. We don’t want the header to be enabled in it.
Pretty simple so far, right? Of course we’ll add more to our Header as time passes, but for now we’ll leave it as it is.
Building our Home component
As usual, lets open the target component of this section. Head to your pages folder and open Home.vue component:
Here we render our header, a h4 tag with the name of our application which contains the classes:
- white — text: Used to color the text white
- text-xs-center: Used to center text in the x-axis
- my-0: Used to set y-axis’ margins to 0
and our budget-list which is a component we’ll create next, containing budget-list-header and budget-list-body components as slots.
We also pass an array of budgets as props to our budget-list-body , which we fetch when the component is mounted, passing the Authorization header, so we can access our API, and user_id as a parameter, so we can specify which user is requesting the data.
Building our Budget List components
Go to your components folder and create a new folder named Budget and inside this folder lets create a component named BudgetListHeader.vue:
This is merely a header for our budget list.
Now create another component in the same folder, named BudgetListBody.vue :
Here we define our budget list’s body, and how it’ll look on different breakpoints. We are building this mobile-first.
Now lets finally create our BudgetList.vue component on the same folder:
You see the slot tags? We render our components in them, these are called named slots.
Now we need to add our BudgetList component to our router:
Again, we import our component, register it and then enable our Home component to use it.
Going back to our RESTful API
Lets start by cleaning up our API first, open your user.js file inside our services/BudgetManagerAPI/app/api folder:
We are removing the setup and index method, since we already have a way to create accounts on our application we don’t need setup and since we will never display every registered user we won’t need index. We are also removing a console.log inside our signup method and an empty array of clients inside our new user.
Now open our user.js file inside the services/BudgetManagerAPI/app/routes folder:
We removed the routes that used our deprecated methods.
Improving our Models
Lets navigate to our models folder inside BudgetManagerAPI/app/ and make a few improvements to our models, open our user.js model:
We’re only going to be modifying our User schema:
And creating a couple more Models, lets start with the client.js model:
And then our budget.js model:
We did this so we wouldn’t have growing mutable arrays, instead we reference which user/client we want using ref and ObjectID .
Now open your index.js file inside your setup folder:
Adding new methods to our API
We need to add a new methods on our API for our new models, so go to your api folder and create a new file named client.js :
Here we have a method to create new clients, and to get all of them. These methods are protect by our JWT auth.
Now create another file named budget.js :
And just like the last one, this is also protected by our JWT auth, it has three methods, one to create new budgets, one to get all budgets in a User’s account, and one to get all budgets of a client.
Adding routes for our Budgets and Clients
And protecting them
Go to your routes folder and create a new file named budget.js :
And then create a new file named client.js :
Both of these files are similar, we first call passport’s authenticate method, and then our api method with our models and secret.
How our application looks so far
So if we use Postman to register a client, and then register budgets we’ll have this:

What’s next + HOMEWORK!
So that’s it for this part of the tutorial, we made a few improvements to our application and API, and created our budget and header components.
On the next part we will build our clients page, and the components necessary to register new budgets and clients, alongside with a lot of improvements to our current application.
Now I have a proposition to all who are interested!
Fork this repository here or just clone your own on another folder and try to create the components needed to register new clients and list them, and comment how you did it, and if it worked! On the next part we’ll build these components together.
Thank you for reading and don’t forget to check the next part soon!
You can find more about me following me on github @gdomaradzki.

