Building a NodeJS web server with HAProxy and Let’s Encrypt on Debian Stretch

TLDR; Use my Ansible playbook: https://github.com/JamesTheHacker/nodejs-server-ansible-playbook
In this guide I’m going to show you how to setup a NodeJS server using HAProxy and Let’s Encrypt on Debian Stretch. You will also learn how to turn your NodeJS application into a daemon so it can be stopped, started and restarted and automatically restart on crash/reboot.
In my setup HAProxy acts like a reverse proxy, proxying requests from port 443 to the port of the NodeJS application (in this tutorial we run 3 instances of the application on ports 5001, 5002, 5003) and use HAProxy to load balance between them. I could have used Nodes’ cluster to do this, but HAProxy is simpler, and offers more features. Imho it’s much easier to scale an application that already uses HAProxy as opposed to having to refactor the setup afterwards.
We’ll also secure our application by using HTTPS and Let’s Encrypt and go into a little detail on securing the firewall.
This is a fairly long article so go grab a coffee, or a beer, and let’s begin.
Prerequisites
Before we start you’ll need a few things:
- Debian 9 (Stretch) is required to follow through with this guide. Unless you know what you’re doing I highly recommend Digital Ocean to set up a test server. If you don’t have an account click here to claim $10 free Digital Ocean credit ($10 is enough to fund 2 months worth of server space). A server is required because we’ll also set up Let’s Encrypt for HTTPS (because security).
- A domain name that’s setup to point to your server. This is required for LetsEncrypt. Without it you will not be able to use HTTPS.
I also recommend employing a few basic security measures:
- Create a new user. Do not use
root! - Disable SSH login with password. Use public-key cryptography.
- Disable SSH
rootlogin - Set up a secure firewall to only expose the required ports and block everything else (I discuss this at the end of the article)
Ready to begin? Lets Go!
Install Required Packages
I use a minimum Debian installation that doesn’t include programs such as git or curl. We’ll need these. Lets install them first:
sudo apt-get update
sudo apt-get install -y curl \
    git \
    build-essential \
iptables-persistent- curl: Required to install NodeJS
- git: Required to deploy application to server
- build-essential: Required to install some Node packages
- iptables-persistent: Save iptable rules permanently
Note: During installation iptables-persistent will present a dialog asking if you want to save the current iptables rules. If you’re setting this up on a fresh server select <no> for both questions.
Installing NodeJS
Now that we have curl installed we can install NodeJS. In this guide I’ll be using NodeJS 8. Currently version 8’s LTS status is still pending. If this is important to you consider installing an LTS version.
Run the following commands to install Node 8:
sudo curl -sL https://deb.nodesource.com/setup_8.x | sudo -E bash -
sudo apt-get install -y nodejs
If all runs successfully NodeJS will now be installed.
Install The Test Web Application
I’ve created a test application with NodeJS specifically for this article. It’s a very simple script that creates 3 http.createServer instances. Take a look at the source: https://github.com/JamesTheHacker/nodebox-testapp
Important: Change web.web to your user, and group, before running the following command. If you don’t do this you will not have permissions to write files to /var/www.
sudo mkdir /var/www
sudo chown -R web:web /var/www
cd /var/www
git clone https://github.com/JamesTheHacker/nodebox-testapp .
Let’s Encrypt SSL/TLS Certificates for SSH
Now’s the time to generate a Let’s Encrypt SSL/TLS certificate to setup HTTPS. To do this we’ll use certbot. This will generate the required certificates to setup our application with haproxy to use HTTPS instead of the insecure HTTP. Google has a fantastic document on why you should use HTTPS.
From the Certbot site:
Certbot was developed by EFF and others as a client for Let’s Encrypt. Certbot is part of EFF’s larger effort to encrypt the entire Internet. Websites need to use HTTPS to secure the web. Along with HTTPS Everywhere, Certbot aims to build a network that is more structurally private, safe, and protected against censorship.
Install Certbot:
sudo apt-get install -y certbotNow we need to validate the domain and obtain a certificate. We’ll use Certbot’s --manual plugin and dns to prove we control our domain.
sudo certbot certonly --manual --preferred-challenges dns --email your-email -d www.your-domain.com -d your-domain.comYou will need to change the following:
your-email: Set this to your email addressyour-domain.com: Set this to your domain namewww.yourdomain.com: Set this to your domain name inc. thewww
VERY IMPORTANT! Before you run the following command ensure you have an A record for your-domain.com and www.your-domain.com. This is easy if you’re using Digital Ocean: see here.
Follow the on screen instructions. When asked “Are you OK with your IP being logged?” press Y (if you’re not happy with this you will need to consult the Certbot manual for alternative validation methods).
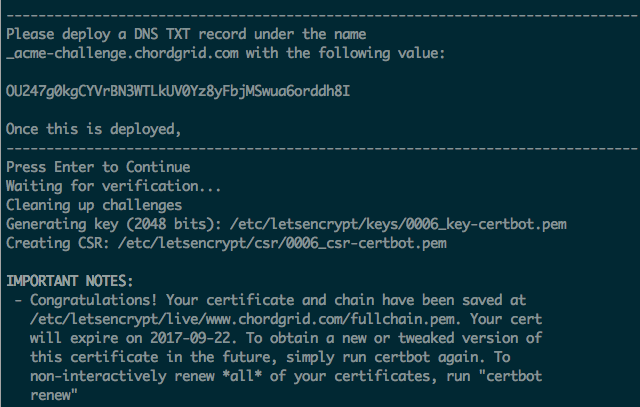
During installation you will be asked to add 2 TXT records to your domain name with instructions on what to add (on Digital OceanTXT records can be added in the control panel). After adding the TXT records allow some time for them to propagate, otherwise Certbot will fail and you’ll have to repeat the process again. A couple of minutes is usually enough.
Here’s an example of the setup, and the congratulations message when successful:
Auto Renewing Certificates
Let’s Encrypt certificates are valid for 90 days, after which time they expire. When they expire they need to be renewed in order to gain a new certificate.
To ensure certificates remain valid, and up to date, with zero downtime, we’ll create a cronjob that uses certbot renew to renew any invalid certificates. If a certificate is due to expire within 30 days certbot will update it.
Open the crontab:
sudo crontab -eAdd the following line:
00 01,13 * * * root /usr/local/bin/certbot renew --post-hook "service haproxy restart" --quietThis creates a cronjob that runs twice a day to check (at 1am and 1pm) the validity of the certificate. If it’s close to expiring it will automatically renew. The --post-hook argument will restart haproxy for the new certificate to take effect.
Recommended Reading:
Installing and Configuring HAProxy
We’ll be using HAProxy as a reverse proxy/load balancer. Instead of load balancing applications on different servers, we’ll be balancing applications on different ports. It’s really easy to set up to load balance different servers should you need to.
Install HAProxy:
sudo apt-get install -y haproxyBefore we setup HAProxy we meed to combine the fullchain, and private key, created in the previous section, and copy it /etc/haproxy/certs. Remember to change your_domain.com to your own domain name:
sudo mkdir -p /etc/haproxy/certs
sudo sh -c  'cat /etc/letsencrypt/live/www.your_domain.com/fullchain.pem /etc/letsencrypt/live/www.your_domain.com/privkey.pem > /etc/haproxy/certs/your_domain.com.pem'
Now it’s time to create the HAProxy configuration file. Using your favourite text editor open /etc/haproxy/haproxy.cfg. Copy and paste the configuration file below and replace all instances of your_domain.com with your domain, and all instances of public_id with the public IP address of the server:
Note: The formatting on Medium can sometimes get messed up. I’ve put the haproxy.cfg template on GitHub if you’d like to use that instead: https://gist.github.com/JamesTheHacker/536a21b1a7e39f8691e5343e20b32ec7
global
    log /dev/log local0
    log /dev/log local1 notice
    chroot /var/lib/haproxy
    stats socket /run/haproxy/admin.socket mode 660 level admin
    stats timeout 30s
    user haproxy
    group haproxy
    daemon
    maxconn 2048
    tune.ssl.default-dh-param 2048defaults
    log global
    mode http
    option httplog
    option dontlognull
    option forwardfor
    option http-server-closefrontend www-http
    bind public_ip:80
    reqadd X-Forwarded-Proto:\ http
    default_backend www-backendfrontend www-https
    bind public_ip:443 ssl crt /etc/haproxy/certs/your_domain.pem
    reqadd X-Forwarded-Proto:\ https
    acl letsencrypt-acl path_beg /.well-known/acme-challenge/
    use_backend letsencrypt-backend if letsencrypt-acl
    default_backend www-backendbackend www-backend
    redirect scheme https if !{ ssl_fc }
    mode http
    balance roundrobin
    stick-table type ip size 200k expire 100m
    stick on src
    server www-1 127.0.0.1:5001 check
    server www-2 127.0.0.1:5002 check
    server www-3 127.0.0.1:5003 checkbackend letsencrypt-backend
   server letsencrypt 127.0.0.1:54321
Restart haproxy:
sudo service haproxy restartRecommended Reading:
- https://www.digitalocean.com/community/tutorials/an-introduction-to-haproxy-and-load-balancing-concepts
- https://www.haproxy.org/download/1.4/doc/configuration.txt
- https://www.youtube.com/watch?v=oqvKDbrF-TA&spfreload=10
Daemonizing the Web Application with Systemd
Systemd is a system and service manager for Linux. We will use it to turn our NodeJS application into a daemon which allows us to stop, start, and reload the app. It will also automatically start a NodeJS application when the server crashes, or reboots.
To turn an application into a daemon we need to create a new Systemd unit file. This is simply a file that contains some configuration directives that describes and define the behaviour of our daemon.
Using your favourite text editor open the file /etc/systemd/system/nodeapp.service and copy the following configuration directives:
[Unit]
Description=NodeJS Web Application
After=network.target[Service]
ExecStart=/usr/bin/node /var/www/server.js
ExecReload=/bin/kill -HUP $MAINPID
Restart=always
StandardOutput=syslog
StandardError=syslog
SyslogIdentifier=nodeapp
User=web
Group=web
Environment=PATH=/usr/bin:/usr/local/bin
Environment=NODE_ENV=production
WorkingDirectory=/var/www/[Install]
WantedBy=multi-user.target
On my systems I run my applications using an unprivileged user usually called web. You likely use a different username. Change User=web and Group=web as required. DO NOT EVER USE ROOT! YOU’VE BEEN WARNED!
Once you’ve created and edited the file run the following commands for the changes to take effect:
sudo systemctl enable nodeapp
sudo systemctl start nodeapp
The following commands can be used to start, stop, and reload the application:
sudo systemctl start nodeapp
sudo systemctl stop nodeapp
sudo systemctl reload nodeapp
… and use journalctl to view application logs:
sudo journalctl -u nodeappIf you’re new to systemd I highly recommend you read this: https://medium.com/@johannes_gehrs/getting-started-with-systemd-on-debian-jessie-e024758ca63d
Test Everything Works
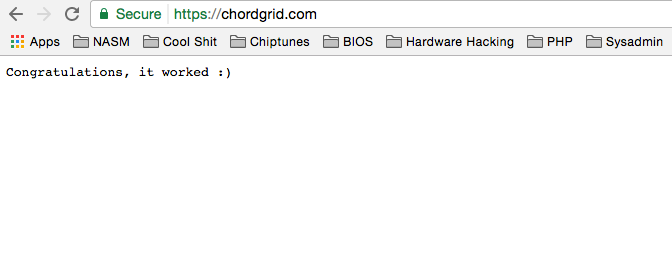
Before we setup the firewall test that everything works by visiting your website in the browser. If all went well you should see a page similar to the one below.
Also, reboot your server and visit the URL … it still works :)
Setup a Secure Firewall
We’re almost done, I promise. The last part of the guide is to set up a secure firewall. I use a block all approach where by I block everything and only open the ports required. This is the most secure way to setup a firewall.
The following rules assume that your web server requires the following ports to be open (feel free to modify them):
- Port 22: Required for SSH
- Port 53: Required for DNS
- Port 80: This is used for HTTP. Although we’ll be using HTTPS it’s important to leave this port open. If someone accesses your website using HTTP it will automatically be upgraded to HTTPS.
- Port 443: Required for HTTPS
Copy the commands below into a new file called firewall-setup.sh:
#!/bin/bashiptables -t filter -F
iptables -t filter -Xiptables -t filter -P INPUT DROP
iptables -t filter -P FORWARD DROP
iptables -t filter -P OUTPUT DROPiptables -A INPUT -m state --state RELATED,ESTABLISHED -j ACCEPT
iptables -A OUTPUT -m state --state RELATED,ESTABLISHED -j ACCEPT
iptables -t filter -A INPUT -i lo -j ACCEPT
iptables -t filter -A OUTPUT -o lo -j ACCEPTiptables -t filter -A OUTPUT -p tcp --dport 53 -j ACCEPT
iptables -t filter -A OUTPUT -p udp --dport 53 -j ACCEPT
iptables -t filter -A INPUT -p tcp --dport 53 -j ACCEPT
iptables -t filter -A INPUT -p udp --dport 53 -j ACCEPTiptables -t filter -A INPUT -p tcp --dport 22 -j ACCEPT
iptables -t filter -A OUTPUT -p tcp --dport 22 -j ACCEPTiptables -t filter -A OUTPUT -p tcp --dport 80 -j ACCEPT
iptables -t filter -A INPUT -p tcp --dport 80 -j ACCEPTiptables -t filter -A OUTPUT -p tcp --dport 443 -j ACCEPT
iptables -t filter -A INPUT -p tcp --dport 443 -j ACCEPT
Run the script for the changes to apply the new rules:
sudo chmod +x firewall-setup.sh
sudo ./firewall-setup.sh
Note: Running these rules will lock you out of SSH for a brief moment. This is because we’re blocking all ports before setting the new rules including SSH. The lockout is temporary (~10 seconds). If for some reason it doesn’t reconnect automatically log back in via SSH.
To ensure the rules are automatically loaded on reboot run the following:
sudo invoke-rc.d netfilter-persistent saveTest the new firewall rules have been applied:
sudo iptables -LThe End
Phew! We’ve come to the end. If everything worked correctly you should now have a fully functioning NodeJS server. In future articles I will go into more detail on different network architectures, and security.
If you have any issues, or notice a mistake I’ve made, please leave a comment or send me a Tweet: @JamesTheHaxor
