Building a Proxy Server in Koa for React SPA
It takes two to tango.
Same is true for creating web applications, i.e you need both frontend and backend to create up and running application in a Client-Server architecture. Being a frontend developer is hard sometimes specially when you need data in a certain way than provided by the backend api calls. Maybe, you need to aggregate data from several different data endpoints or backend services. And as your web app project size grows, you realise there should a cleaner and manageable way of handling this data exchange between the two parties.

Motivation
The simple mantra is that Front-End should be concerned about building and interweaving reusable UI components while managing the state of the application during user interactions etc. The work of fetching and managing complex data aggregation should be abstracted out in another layer like a proxy sort of a server which relays the requests coming from the client to the upstream (actual) server and returns the response back to the clients. This way there’ll be cleaner separation of concerns between UI and backend services. Your UI thread shouldn’t be busy in just transforming huge pile of raw data it got from backend to make it in a consumable shape for the UI Components.
Agenda
We’ll bootstrap a Koa backend server and plug our React application to get served from it.

We’ll setup a proxy engine interface by making use the nodejs request module and create a configuration driven interface for adding routes to our application based on our needs.
Next, we’ll setup logging in place using Morgan and Winston middlewares to tap into the requests being proxied over the time for debugging purposes.
At last, we’ll peek into how to plug it into your existing UI application by bundling using webpack and serving the built application in dev and prod environment.
You can anytime find the entire codebase with working example demo here at github

Installation
We can start by creating an index.ts in the server folder of your existing CRA application and installing the required deps as
yarn add koa koa-body koa-router koa-cookie koa-static koa-useragent Types can be added for the corresponding packages as
yarn add @types/koa @types/koa-router
Koa app can be just instantiated using new Koa() and then we can apply middlewares like:
- bodyParser: Helps parsing the raw body in various formats on the http node incoming request and expose the result on a body variable on Koa req object as
req.body - cookieParser: Parses the incoming request cookie and expose them on the Koa context in a dev friendly object as
ctx.cookieUsed here for logging purpose. - userAgent: Again used for sole logging purpose only, to check from which browser, os, device version etc the req has come from. It analyses the http user-agent header and smartly builds a list of flags which you can check on.
In the end, we start the koa server by listening on the PORT either provided by the running Node process environment as PORT env variable or 8082 as default. chalk is used to show colored outputs on the terminal
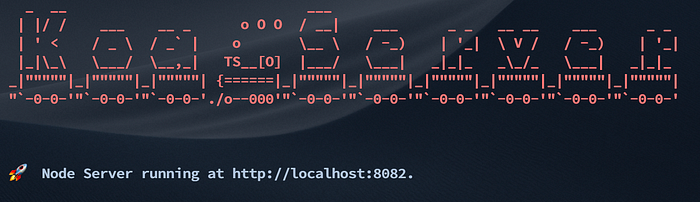
In addition to this, we can do branding by generating console art using figlet for fun in the same file as
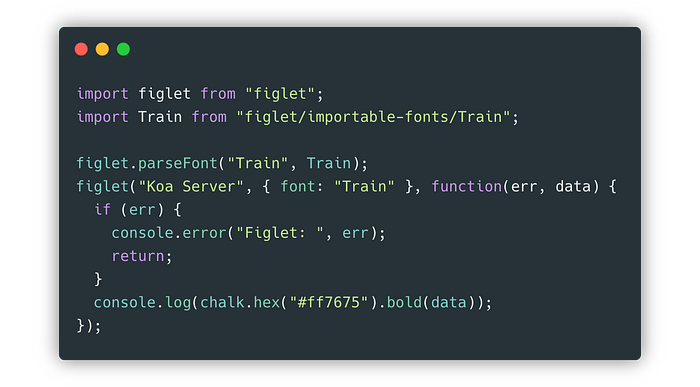
We can start the server after webpack bundling by running yarn run start:server script and it’ll give this in console
Routing
Next step is to expect adding routes to listen to on our server. koa-router does a good job at providing express style route defining apis easily as
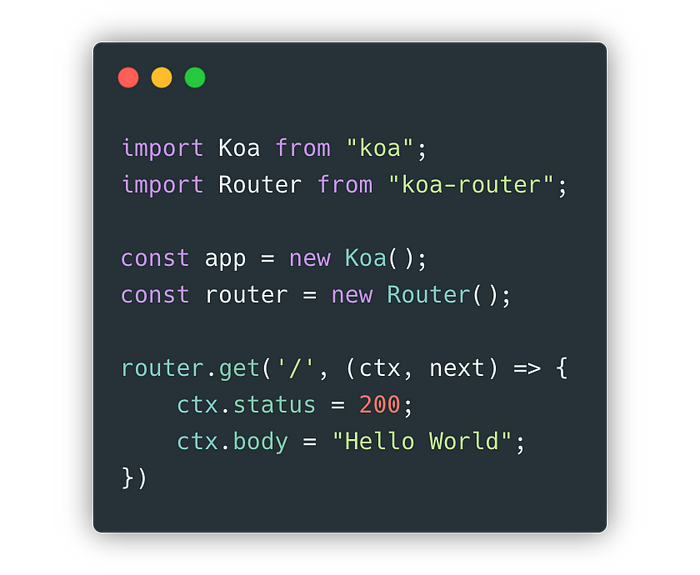
Here, we’re defining an http GET route and sending a status code as 200 when someone hits it while sending a body as plain text. Adding body and status on ctx are internally wired to be handled as setters in Koa which intelligently detects and apply the headers like content-type and content-length
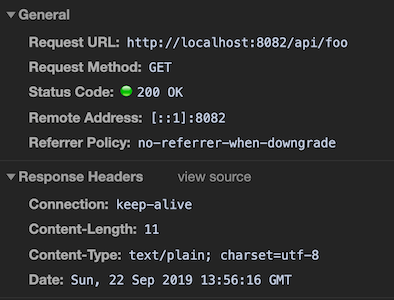
Sending plain “Hello World” automatically got detected as text/plain content-type in the response and the content-length is also automatically populated as 11 which is the length of the string. Same way if you send an object in the body, it’ll send application/json in the content-type header.
Logging
Logging of requests and other things is really important when it comes to debugging or server health analysis. Instead of applying a log at each request handler, we can tap into any incoming request through a middleware. The prominent nodejs loggers are morgan and winston.
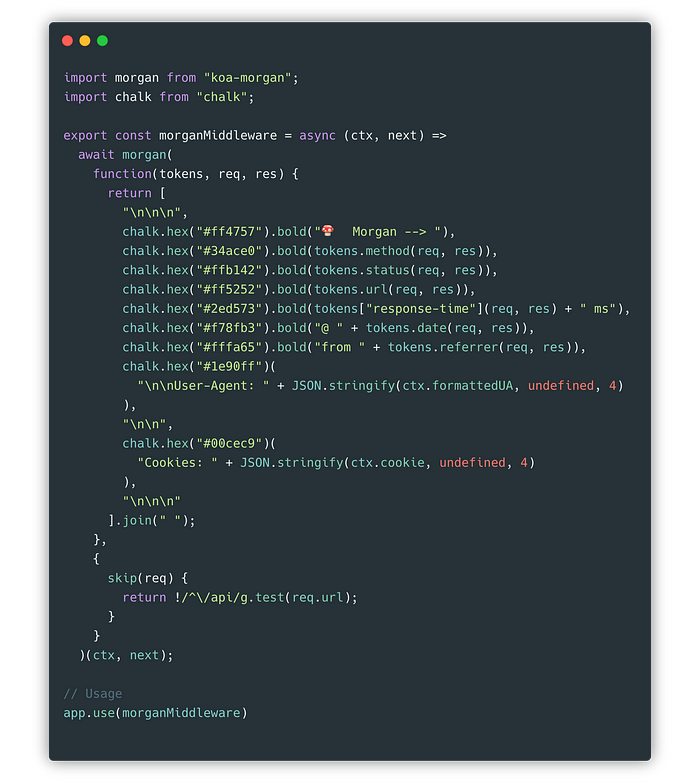
This is the Morgan configuration I like to go for:
It’ll give the console output like this whenever it intercepts any request that passes the skip check
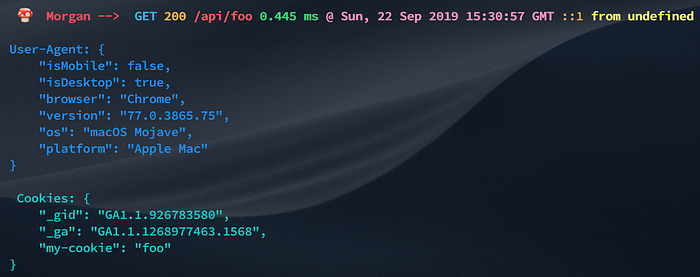
These are the automatic intercepted request logs through our server. There are instances where we might wanna log something imperatively in our code base. Also, we would want to store those logs somewhere in the filesystem for future analysis. This can be done via winston as
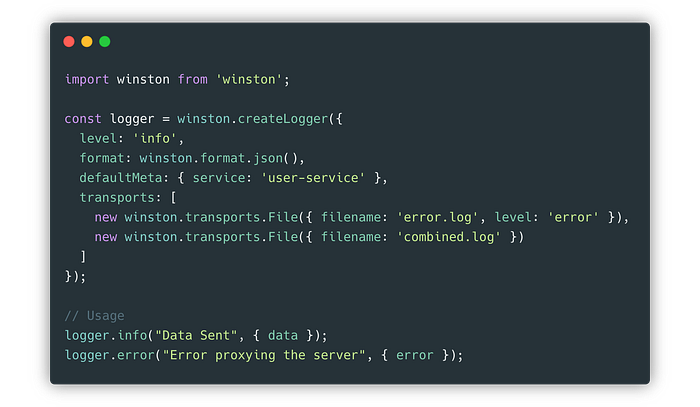
The detailed configuration is there in the github repo.
Proxy
Now, let’s talk about the heart of the setup, setting up the proxy request module. I’m using Node Request module for sending http request from the Koa server to the upstream server. There are other libraries as well like axios, needle which makes it pretty easy by abstracting the low level http module of Node.
Here’s a cut down version of proxyRequestfunction
The usage is simple as
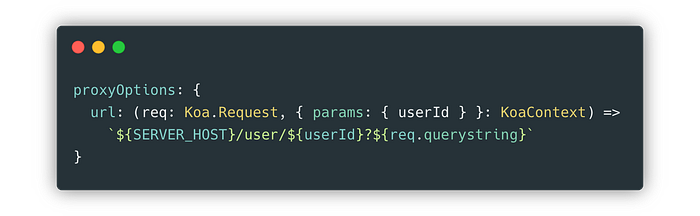
The proxyRequest function accepts some configuration options for the request, first one as the url which can be either string or a function that resolves to a string. Here’s what its typing looks like
TypeScript is really beneficial. Anyway, resolution function gives inversion of control to the caller environment of constructing the url as per its needs. Say, you want to add querystring or path params after some processing like
Then after the URL resolution, in the proxyRequest.ts, options for request module are being constructed with some defaults being provided. There are plenty of options you can pass. Have a peek in the docs here. We’ll discuss about the caveats
In a line, I’m overriding the accept-encoding header to gzip, if your browser sends it as gzip, br, deflate and the upstream server also supports brotli resources, then it’s problematic since request module doesn’t support brotli decompression of the response it receives out of the box.
And setting up gzip option to true is important since it’ll allow decompression of the response received from the upstream server and setting up appropriate request and response headers for the same.
Also, I’m using request-promise-native module which is a promised version of the official request module in favour of the more clean async-await syntax over traditional NodeJS callbacks.
Webpack Bundling
It’s a good idea to bundle the server side code as a single runnable unit. You can have liberty of writing your server code without any restrictions with the language you like and ultimately compile to ES5 or ES6.
Below is a simple configuration for the same. And, now it’s possible to write webpack config itself in TS. But for running it, you need to have ts-node installed as a dependency.
Let’s discuss the caveats
Setting up __dirname: false under node is useful.
Also, don’t forget to set target: node
CleanWebpackPlugin is being used to cleanup the build/dist folder on every webpack build.
The define plugin is being used to set a global variable to suppress a useless warning from one of the node modules I’ve been using.
Build Commands
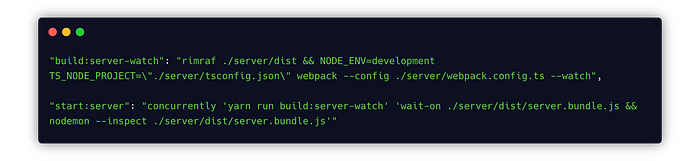
For dev environment, you wanna start the webpack in watch mode and immdiately listen for any changes in the built dist/server.bundle.js using nodemon while passing the --inspect or —-inspect-brk flags for breakpoint debugging. You can use Chrome devtools or VSCode to debug nodejs apps.
Anyway, start:server command starts two commands in concurrently, first being webpack in watch mode which continuously builds server.bundle.js by listening to any changes in the files in it’s dependency graph. And the second command basically waits-on the server.bundle.js to appear for the first time and then proactively runs nodemon to monitor any changes done to that server.bundle.js file and runs it.
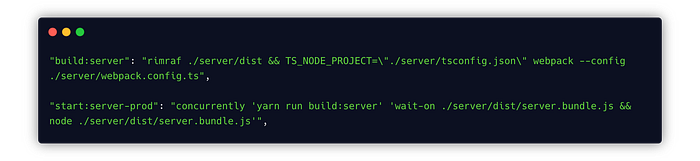
Here’s how the script will look like for prod environments
Serving React SPA
Lastly, let’s discuss how would you would plug into React application created via Create React App or by that matter any other tooling also. We need to take care of two things:
Dev Environment
For dev environment, our React app runs on webpack-dev-server, usually at a default port of 3000 say http://localhost:3000 . Now, you wanna route or “proxy” all the /api request to your koa-server running at http://localhost:8082. Create React App provides a pretty easy way for that. Check out the docs here. Basically, adding a line to your package.json would do the job.
"proxy": "http://localhost:8082"For more control, you can configure using setupProxy guide as mentioned in the CRA docs.
Doing all this, you can say goodbye to the CORS woes since everything is now being served on the same origin! 🎉
Prod Environment
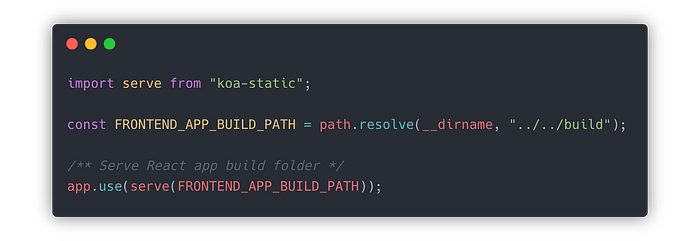
For prod environment, you don’t need to setup a separate nginx server to serve your static built React app assets. You can use the existing Koa Server to double up its job as a static server as well. koa-static is quite beneficial for this. It smartly serves the assets by doing proper Content Negotation internally.
Along with this, you need to write a rewrite rule for relying on client side routing of React Router as
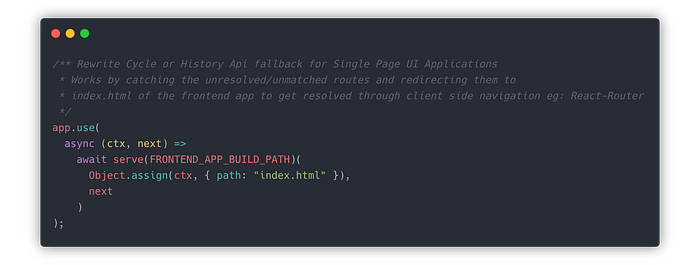
It’ll redirect all the non-matching routes on page refresh to index.html of the React App build folder to be picked up by the browser history api.
That’s it. Enjoy your CORS free React app setup.
Summary
You can leverage it for isomorphic app to enjoy benefits of Server Side Rendering if that’s needed and share data models in TypeScript, perform heavy data massaging or handling business logic entirely on the server-side, hence sending pre-cooked data to the client app as its needed to render there. It’ll be great separation of concerns by confining the job of the UI to what it’s mean to do, rendering pure reusable web components and handle layouting, interactions and animations etc. It’ll save you from polluting the UI code with unnecessary business logic specially for data pruning since it’s a very common pain of Front-End devs to not get pruned data directly from the backend. Best would be to build TypeScript models (by defining classes). And that’s what we’re doing here at Swiggy. There‘s microservices architecture that’s being followed here, setting up a middle proxy server has been quite beneficial towards solving these common problems.
Thank You.
Happy Coding 🤓