Building React Native Projects with Native Code: Part 4
Revisiting the workflow in updating the native (Android now iOS later) code.

This article is part of a series starting with Building React Native Projects with Native Code: Part 1.
Revisiting Building Native Review Applications
While we got the Expo / React Native build to work reasonably well (was hard work) with the generalized Travis CI service, there are services that specialize in mobile continuous integration that are easier to configure. In particular, we will look at one; Nevercode (happens to be one that I have been recently exposed to).
The trade-off is that while these specialized services are easier to configure for the common situations, they are either difficult to impossible to configure in one-off situations (luckily, React Native / Expo is relatively easy with Nevercode).
Ejecting from Expo
We start by creating a new branch, e.g., nevercode, off the develop branch and ejecting.
expo ejectBecause Nevercode has built-in APK signing, the only changes in the repository from the React Native Generating Signed APK documentation we need to follow is removing the org.gradle.configureondemand=true line from android / gradle.properties (has to do with bundling the JavaScript and assets into the APK).
At the same time, we still do need to create the keystore; just not saving it to the repository (will use later).
If you are starting from a project without having done the Travis CI configuration, you can skip the next section.
Backing out Travis CI Configuration
We need to undo some changes that we made to the develop branch (carried over to the nevercode branch) for our Travis CI workflows. In the nevercode branch:
- Remove the android/gradle.properties and android/app/my-release-key.keystore lines from .gitignore
- Remove .travis.yml
- Remove release-channel-patch.sh
- Remove deploy.js
- Remove aws-sdk devDependency from package.json
We then commit and push the branch to GitHub.
Nevercode CI Configuration
Nevercode does a lot of things for us automatically with React Native builds, e.g.,
- Comes with Node.js installed
- Comes with Yarn installed
- Provides the correct Android build components for React Native
- Yarn installs the project
- Starts the Android build
- Signs the APK
- Publishes the APK (so we can download it)
We, however, still need to implement a number of Expo-specific items before the Android build:
- Globally install Expo
- Login to Expo.io
- Publish the Expo bundle
- Fix the AppContants.java file
With Nevercode, we can create a pre-build script and upload it as an custom build step.
note: Tried to rely on the build scripts in the repository, but got inconsistent results. Instead used the upload environment files feature. Will store the custom build step script in a folder (for documentation purposes).
In the nevercode branch, we create the following (fairly obvious) script, commit it, and push it to GitHub.
nevercode-scripts/NC_PRE_BUILD_SCRIPT.sh.bak
Observations:
- The set -e command will allow the script to exit immediately when any of the script commands fail; set -x is used to output the steps to the console
- Apparently, these builds run on macOS and the sed implementation is slightly different than on Linux systems
We then:
- Create a Nevercode account
- Connect it to our GitHub account
- Connect it to the repository, e.g., react-native-scaffold
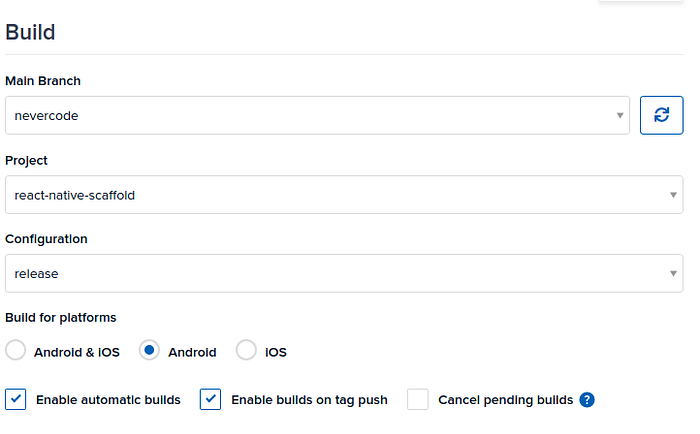
- Connect it to the branch, e.g., nevercode
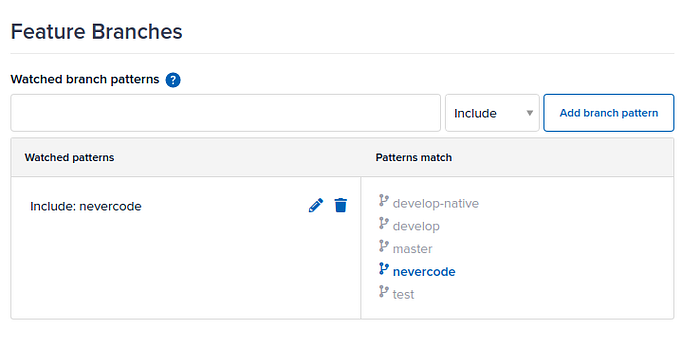
- Set it to only watch the nevercode feature branch
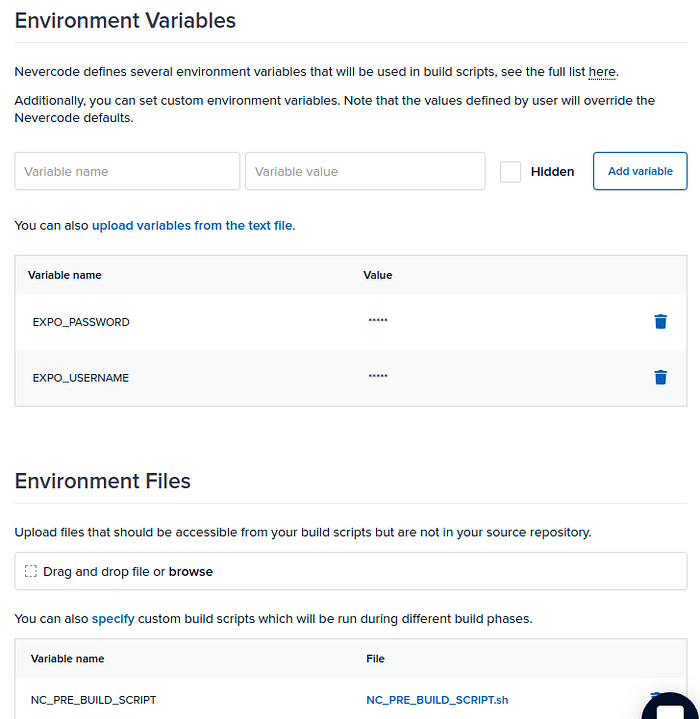
- Setup the environment variables: EXPO_USERNAME and EXPO_PASSWORD
- Setup environment file, uploading the file NC_PRE_BUILD_SCRIPT.sh and naming it NC_PRE_BUILD_SCRIPT; notice that I dropped the .bak extension.
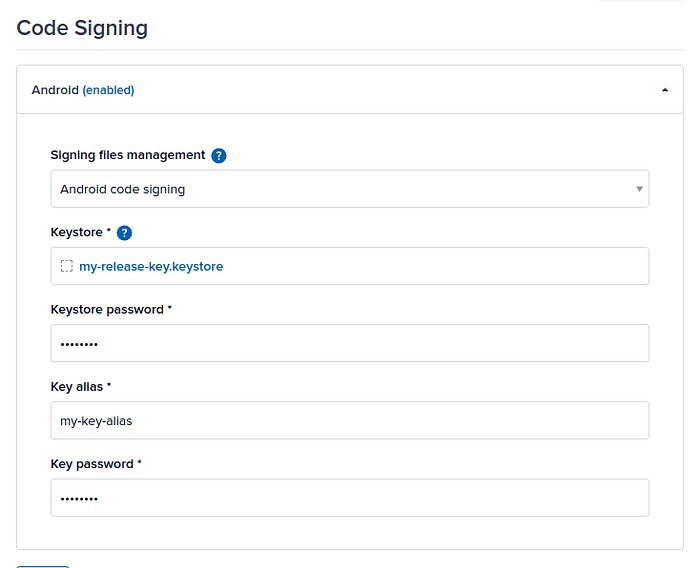
- Enable Android code signing; uploading the my-release-key.keystore file, keystore password, alias, and alias passwords
- Enable Publishing > Publish artefacts for pull request builds
In the end, the final modified Nevercode configuration (sorry has to be screenshots) consists of:

Build Time
With this in place, we can initiate a build (and download the artifacts, e.g., the APK files), several different ways:
- Press the Nevercode Build button
- (The normal workflow) Creating a pull request from branches of nevercode back to the nevercode branch, uses the pull request id as the Expo release channel. This is just like the workflow we implemented with the develop-native branch
- Merging into the nevercode branch, uses nevercode as the Expo release channel; this is an extra build that we did not get with Travis CI as it is configured to only build on pull requests
A build from a pull request:

If all goes well, the build will complete in about 30 minutes. We then can side-load the generated APK file, app-prodMinSdk-prodKernel-release.apk, (available from the Artefacts tab) into our Android device.
note: For some reason, I had to disable Google Play Protect to load the application this time; wondering if it was because it was signed slightly differently.
Next Steps
In the next section, Building React Native Projects with Native Code: Part 5, we will begin to explore the release process (release branch).
