
Building Your First React App
React is an open source Javascript library for building dynamic apps. MVC stands for Model View Controller, and React is the V, or View in this architecture.
Here are some of the advantages to building apps in React:
- Encapsulated components: Because apps can be divided up into smaller components, it allows it to be broken down into smaller pieces that can be re-used more easily.
- Dynamic properties & states: Elements and components within React can be given states and properties (props). These states and props can be change, and passed down to other elements and components within it the app. This allows for more reusable code and better organization.
- Virtual DOM: React works off of a virtual DOM. Because updating the actual DOM can lead to longer load times, React relies on a virtual DOM, which is like a lightweight, faster version of the DOM. whenever a change is made to states or props, React checks those changes, and only re-renders the elements that have changed, instead of rendering the entire document.
- React is Independent of the rest of the application: If you want to use React, and integrate a back end database with MongoDB, or any other framework, you can easily do so.
Getting Started:
Getting started with React is simple. After it’s installed, you can just run the create-react-app on the command line, followed by the name of the app you want to create. This creates the react app, with all the necessary functionality you need, already built into the app. Then you can just cd into the react app, and start it with npm start.
Here’s how that will look on the command line:


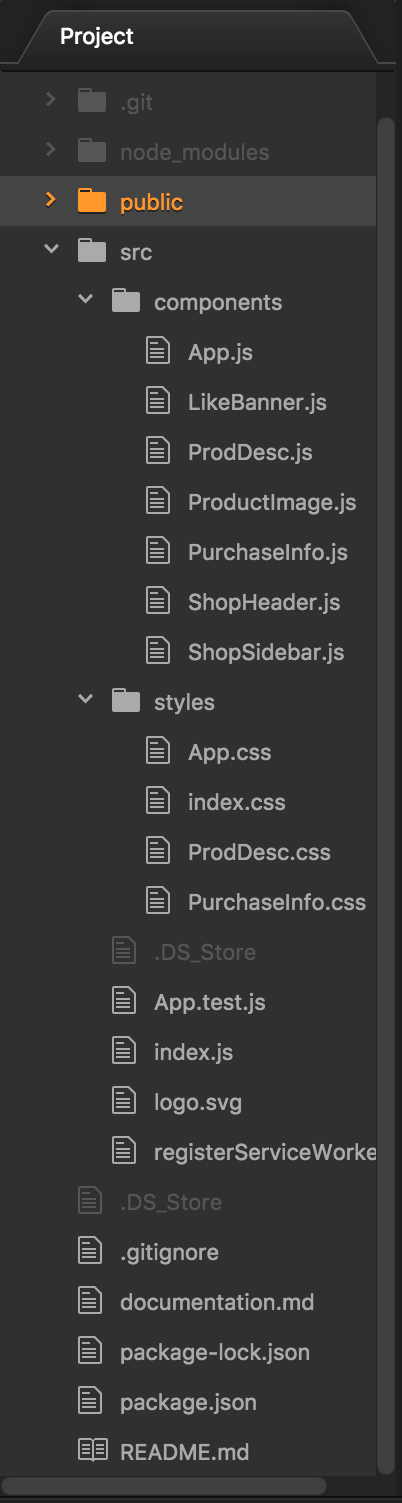
After you’ve started the app, go ahead and open up the application in your text editor. The first thing you want to look at is the file structure. Create-React-App has already installed several files for you, and organized several of them into folders. Your main folders are a src folder and a public folder.

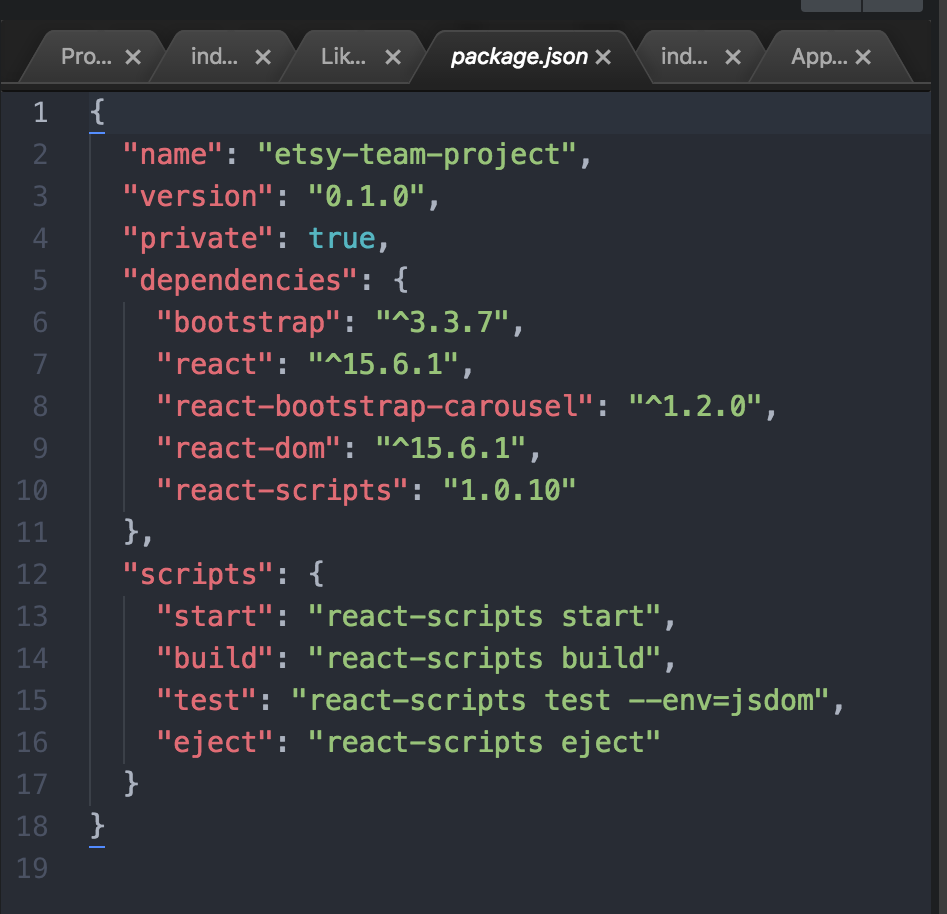
If you go to the package.json file, you can see that the create-react-app has installed several react scripts for you as well. I’ve also installed some bootstrap features here for this project, but everything else comes pre-installed.
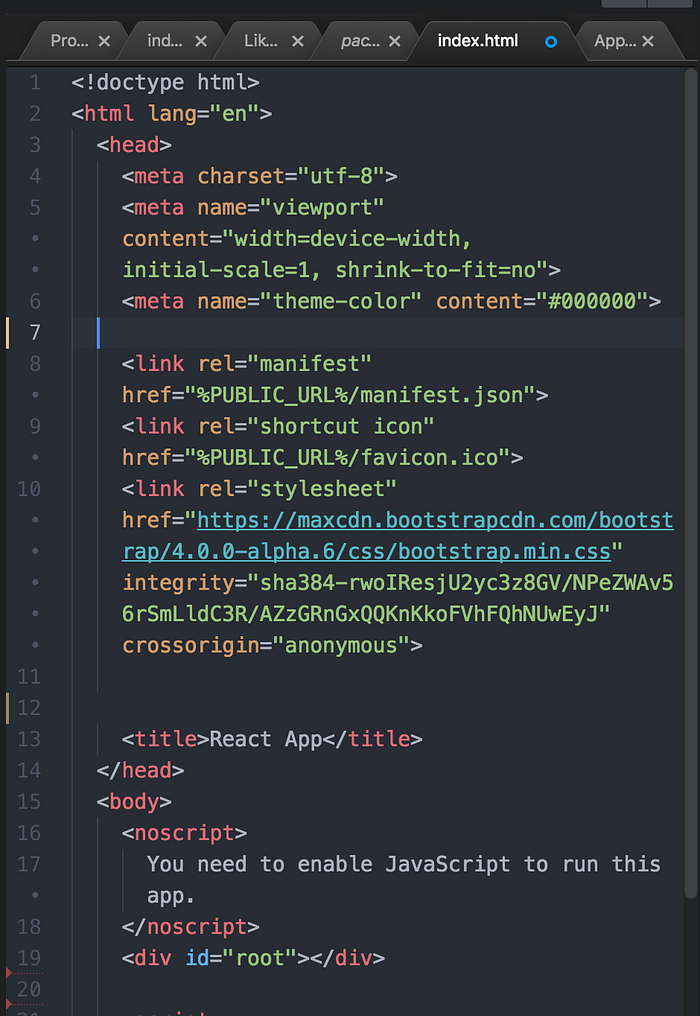
Next is the index.html page, located in the public folder. If you do link up any external stylesheets, or need to add bootstrap, or another feature, this is where you would add it. You can see where I’ve added bootstrap in the project here. You can also change the title here, which as you can see, I have failed to do. Other than that, you won’t usually need to touch this file very much. You will also notice the div with the id of “root”. This is where all of the content will be output. You don’t need to change that, but just know that it’s there.
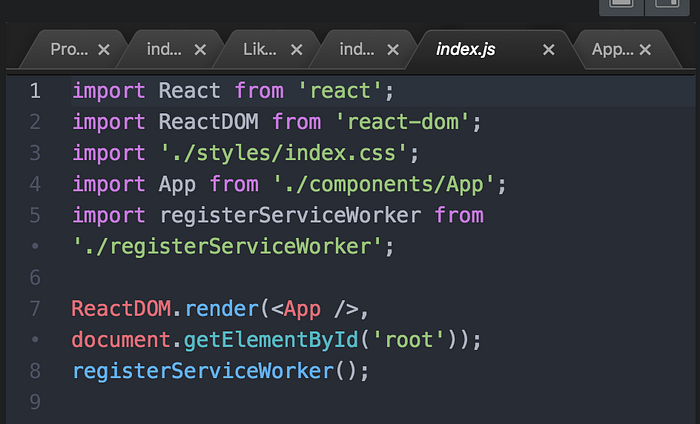
The next file you may want to look at is your index.js file in the src folder. Here, we’re importing React and the ReactDOM. We are also rendering everything here to the ‘root’ element. You won’t need to touch or alter this file either, but it’s just good to know that this is how it’s structured.
I mentioned earlier that one of the great things about React, is the ability to compartmentalize code in separate components. You can create all of your components in one app.js file. However, to avoid having a long app.js file, it’s often easer from an organizational standpoint, to create a components folder, and keep separate js files inside there, for each component you need. I altered my file structure to reflect that. I’ve also created a styles folder, so I can keep my CSS files separate as well. How you organize it is up to you, but this seems to work well for me.
Since we have a separate components file for each component, we can work on them separately, or divide responsibilities between different members of a team, if it is a group, rather than an individual project. Let’s briefly take a look at our App.js file, and our ProductImage.js file, and see how we would import those components.

Here’s what the top of our App.js file will look like. First, we import React from ‘react”, as well as any style sheets. Then, we use the same syntax to import all of our individual components as well. Because our App.js file is also in our components folder, we can simply say ‘./ProductImage’ for our Product Image component. However, if your App.js was outside of the components folder, you would need to add components to the file path, and it would look like, ‘./components/ProductImage’. There’s not right or wrong way to do it, but just something to keep in mind when you are setting up your file.
Components & Constructors
Then you’ll notice the line,
class App extends Component
we will use this syntax within each of our other components as well. This is basically saying that any attributes contained with in Component, are going to be extended through App. Our ProductImage component will also extend the main component, as well as all of the other individual components. The first method we call after extending the component is our constructor method. This is how we initialize the state.
The constructor for a React component is called before it is mounted. When implementing the constructor for a React.Component subclass, you should call super(props) before any other statement. Otherwise, this.props will be undefined in the constructor, which can lead to bugs.
The constructor is the right place to initialize state. If you don’t initialize state and you don’t bind methods, you don’t need to implement a constructor for your React component.
It’s okay to initialize state based on props. This effectively “forks” the props and sets the state with the initial props. Here’s an example of a valid React.Component subclass constructor:
Before we get too far into states and props, let’s take a look at how we’ll actually get those components into our document after they are imported.
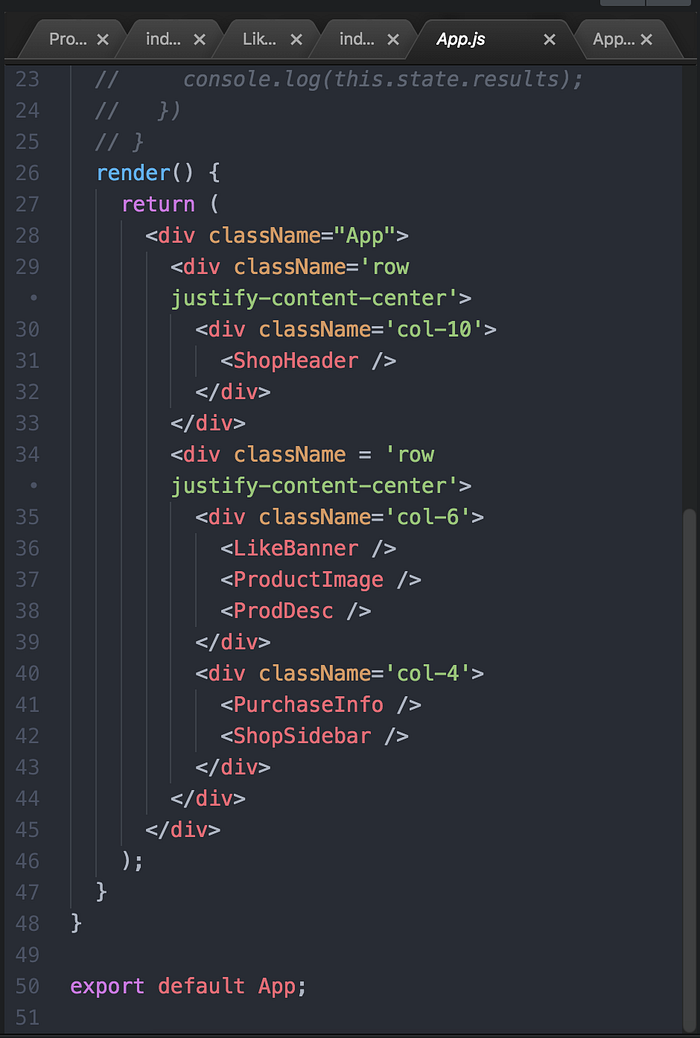
Below our constructor method, we have a render and return. Inside of this, you’ll see what looks like HTML. This is something called JSX, which React converts into Javascript when rendered. Obviously, our JSX looks pretty bare, and that’s because, again, all of the work is actually being done in the component. This is more like our HTML skeleton, where we’re telling our different components to render. All we need to do here is place the different components in a self closing tag, and we’re done. Then lastly, we’ll want to export the app at the very end.
States and Props
Let’s briefly go back and talk about what states and props are. Each element has a state, and this state can change. If you click on a button, write an email, or fill out a form, each of those elements will have a different state when it is interacted with.
There are two types of data that control a component:
propsandstate.propsare set by the parent and they are fixed throughout the lifetime of a component. For data that is going to change, we have to usestate.In general, you should initialize
statein the constructor, and then callsetStatewhen you want to change it.For example, let’s say we want to make text that blinks all the time. The text itself gets set once when the blinking component gets created, so the text itself is a
prop. The "whether the text is currently on or off" changes over time, so that should be kept instate.
setState()enqueues changes to the component state and tells React that this component and its children need to be re-rendered with the updated state. This is the primary method you use to update the user interface in response to event handlers and server responses.Think of
setState()as a request rather than an immediate command to update the component. For better perceived performance, React may delay it, and then update several components in a single pass. React does not guarantee that the state changes are applied immediately.
setState()does not always immediately update the component. It may batch or defer the update until later. This makes readingthis.stateright after callingsetState()a potential pitfall. Instead, usecomponentDidUpdateor asetStatecallback (setState(updater, callback)), either of which are guaranteed to fire after the update has been applied. If you need to set the state based on the previous state, read about theupdaterargument below.
setState()will always lead to a re-render unlessshouldComponentUpdate()returnsfalse. If mutable objects are being used and conditional rendering logic cannot be implemented inshouldComponentUpdate(), callingsetState()only when the new state differs from the previous state will avoid unnecessary re-renders.

In this example, you can see the setup of the ProductImage page. At the top, we’re importing bootstrap, as well as React, much like we saw on our App.js file. We’re also calling a class that again extends the Component, and then initializing it with a constructor and super method. This all may look very familiar, which is good. Once you have one component set up, you can copy much of the code, to re-use in other components. Because this is our Product image component, the main part of this part of the page is the image. We don’t deal with much else, so the only state that we’re using and changing is that of pictures. As you can see, we initially set the state to an empty array using this.state. Most often, you want to let you state be empty, so that when you setState, you’re changing it to something with actual content. We’re using the life cycle method componentDidMount to initiate a fetch request for API data. You can see through this code how the state of pictures is passed down and changed. On line 23, we’re mapping over the pictures, and on line 27, we’re telling React what part of the api to pull from. Then in line 33 we are using this.setState. setState changes or updates the state. This is the signal React looks for when it reads the code. setState is it’s signal, that the state of the component has changed, and React will then update that component in the DOM with the new state change.
Below that, we have our render and return, where we’re bluing the component structure with JSX, and inserting the mapped data and state change. We call that state and insert it using curly braces. Here, it reads:
{this.state.pictures}
This is all we need to do to pass the state through out component. If you remember, we already have this component imported into your app.js file, and can be rendered there as soon as React sees that the state has changed. React makes it easy to change, and pass states and props through components.
This is just a brief into into React, how to set up a basic file, and really only scratching the surface of how to use states and props within your application. For more information on getting started, and deeper look into React, visit the React web page at: https://facebook.github.io/react/
If you have any further questions, or I missed anything important, feel free to reach out. Thanks!


