Create a “secret” Dino Chrome Game in 1 hour with JS and Phaser 3
Learn how to create games with JS and Phaser 3 in a short time.

Resources:
- Full Course: https://academy.eincode.com/courses/phaser-3-the-complete-guide-build-publish-games-in-js
- Video Guide: https://youtu.be/VOtZ6yNqH84
- Github repo: https://github.com/Jerga99/dino-chrome-clone
After you finish reading I highly recommend watching my youtube guide. This blog post serves as a starting point.
Prepare the project
Download a zip file from:
https://github.com/Jerga99/dino-chrome-clone/archive/2e62c20a06b126b1a6128c56a60d5603b49daccd.zip
After the folder is unzipped install all dependencies:
npm installand start the development server:
npm run devthis will start dev server on localhost:8080
Open your browser on localhost:8080 and you should see a blank screen.
Create Game Objects
Now let’s create our first game objects, which include our main character “Dino” and the ground upon which Dino can “run”.
In PlaceScene.js you can create these game objects in a create function:
create() {  const { height, width } = this.game.config;
  this.gameSpeed = 10;  this.ground = this.add.tileSprite(0, height, width, 26,    'ground').setOrigin(0, 1)  this.dino = this.physics.add.sprite(0, height, 'dino-  idle').setOrigin(0, 1);
}
Height is 340px and width is 1000px as defined in index.js
The position of game objects is crucial. Let’s see an image of how game objects are added to the canvas.
Let’s start with Dino
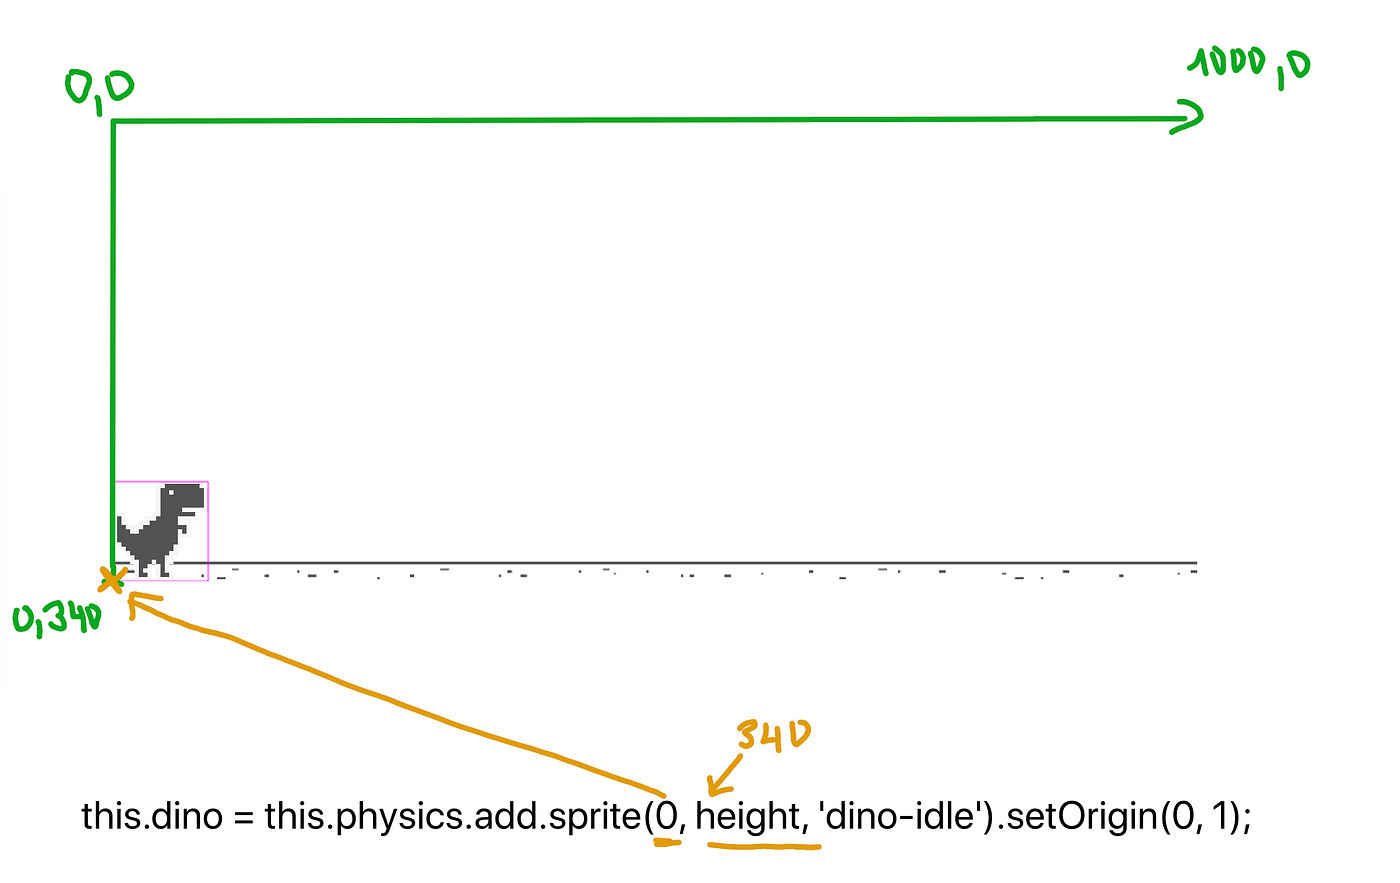
When creating a Sprite game object you need to provide x and y coordinate
The first coordinate is
x -> 0, the second one
y -> 340, and also the
key -> dino-idle (identifier of the image loaded in PreloadScene)
setOrigin defines which point of the game object is inserted into provided coordinates
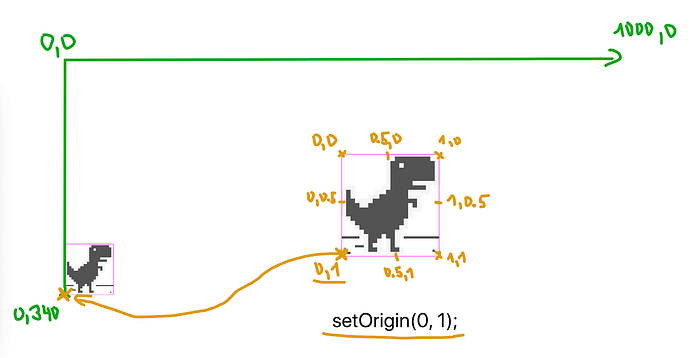
you can see the origin point of 0,1 is the left-bottom corner, this corner is inserted into coordinates 0,340 as stated before.
Add the Ground

The ground we will insert as a TileSprite. A TileSprite is a Sprite that has a repeating texture.
When creating a tileSprite we need to provide five values, they include:
x -> 0
y -> 340
width -> 1000px
height -> 26px
key -> ground (identifier of the image loaded in PreloadScene)
Since tileSprite is a repeating structure we need to provide also width and height. Width is the size of the canvas and height is the actual height of the ground image. You can find all the images in the assets folder.
The Moving Ground Effect
If we want to create a moving effect we need to change the tile position of the ground on every update of the game.
In this function:
update() {}The update function is called by the Phaser framework 60 times per second. This means your game is running at 60FPS (frames per second). If you need to define dynamic behavior then update is the right spot.
Add this to move the ground:
create() {
  this.gameSpeed = 10;
  // rest of the code
}update() {
  this.ground.tilePositionX += this.gameSpeed;
}
Where gameSpeed is 10, the ground will move 10px on every update.
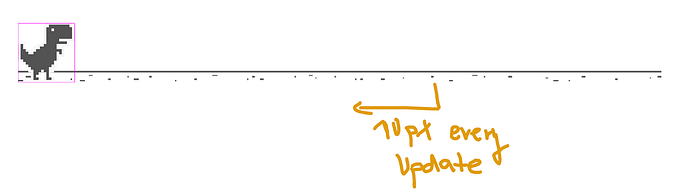
Which in reality looks like:
Let Dino Jump
First, we need to handle user input.
create() {
  // rest of the code
  this.dino = this.physics.add.sprite(0, height, 'dino-idle')
   .setCollideWorldBounds(true)
   .setGravityY(5000)
   .setOrigin(0, 1);  this.createControll();
}createControll() {
  this.input.keyboard.on('keydown_SPACE', () => {
    if (!this.dino.body.onFloor()) { return; }  this.dino.setTexture('dino', 0);
  this.dino.setVelocityY(-1600);
  })
}
setGravityY will apply a gravity force on Dino. This means Dino will be pulled towards the ground at the rate of 5000px which will increase every second.
setColliderWorldBounds sets whether this Body collides with the world boundary. Without it, the game object would fall outside of the canvas.
Now to control. Every time that a user presses the space key, Dino will go in an upwards direction at the speed of 1600px per second (setVelocityY). This will overcome the gravity for the split of the second and create a jumping effect.
setTexture will change the image of the dino as the dino will jump.
Now, notice the “if” statement. To prevent jumping in mid-air we are checking if the dino is on the floor. This will return the true value if dino is colliding with world bounds.
Here’s what it looks like:
Create Animations
First, we need the base image which we will split into multiple frames:
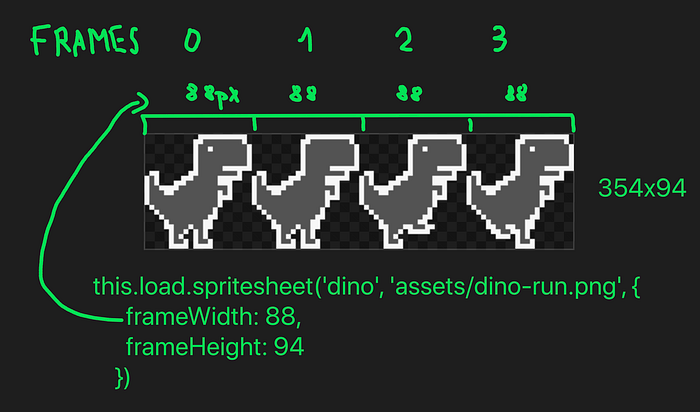
The image we are using is defined in the assets folder. We are loading this image in PreloadScene.js with this.load.spritesheet.
create() {
  //rest of the code
  this.initAnims();
}initAnims() {
  this.anims.create({
    key: 'dino-run',
    frames: this.anims.generateFrameNumbers('dino',
      {start: 2, end: 3}),
    frameRate: 10,
    repeat: -1
  })
 }
First, we need to initialize the animation. Let’s explain the parameters:
- The key: This is the identifier of the image animation
- Frames: These are the frames that the animation will consist of. In this case, frames 2,3 (from the image above)from the image assets/dino-run.png
- The frameRate: 10, frames(2,3) will be played at the rate of 10 frames per second
- repeat:-1, it will loop the animation infinitely
We will play the following animation in the update function:
update() {
 // rest of the codeif (this.dino.body.deltaAbsY() > 0) {
    this.dino.anims.stop();
    this.dino.setTexture('dino', 0);
  } else {
    this.dino.play('dino-run', true);
  }
}
We will check what movement Dino is currently in. Remember, we have two states; one in which dino is standing still and the second one in which dino is jumping
In the update function, we can check if the position of dino on the y-axis is larger than 0. If that’s the case this means Dino is jumping so we will set the default texture.
If that’s not the case we want to play running animation:
Conclusion
Creating a full game takes a little bit more effort which is hard to put into a single blog post. To finish this game, watch my code along video on youtube here: https://youtu.be/VOtZ6yNqH84 or check a full course on creating the games: https://academy.eincode.com/courses/phaser-3-the-complete-guide-build-publish-games-in-js
Best of luck, Filip.

