Deploy React to GitHub-Pages to create an amazing website!

Hello everybody!
My name is Gurjot and I recently graduated from Seneca College. I think a lot of recent graduates would relate to this when I say that “I am nervously excited about my future”. During the college years, I never felt any sense of dissatisfaction for not knowing everything about web technologies, because I was still at a learning stage. But the closer I got to the graduation date, I got more and more serious about my career and to learn in demand frameworks to improve my skills to get a job.
My ambition is to become a full stack web developer. College education provided me with basic to intermediate knowledge about software development. But to get to the advanced level I have to push myself. I have worked with AngularJS during an academic group project for which we decided to create a cross-platform mobile application using the Ionic framework. Because I already had an experience with Angular, I decided to go with the other most popular JavaScript library known as React and started learning it. But today’s topic is not only about React but how to deploy a react application on GitHub-Pages. I found it very exciting and wanted to share that with all of you. So let’s begin!
Why React and GitHub-Pages:
When I was doing my research about different in-demand web technologies I stumbled upon a number of amazing names like VueJS, GraphQL, p5.js and a lot more. One name that showed up the most was React. So I decided to give it a try. When I start learning something new I like to work on small local projects in order to get the full taste of any new language or framework. Also, for a long time, I wanted to create my own website but never got a perfect and interesting platform to work on. Recently I got to know about GitHub-Pages and after a few hours of research, I found out that we can deploy a react application to create GitHub-Pages. I got so excited and started working on setting up the environment. Below is the step by step procedure I used to create a React based GitHub-Page. It is the most basic version but in the future I will enhance it.
A brief introduction to the technologies:
React:
React is a JavaScript library developed by Facebook used to create and handle flexible components for user-interface.
Git:
Git is an amazing revision control system for any type of document-based projects.
GitHub:
GitHub is a web-based version of git with a lot cool features like bug tracking, documentation, team management, etc.
GitHub Pages:
GitHub Pages is a platform to create beautiful static websites for the repositories, using the code present in the respected repository. We can also manually create GitHub Pages for any repository by going through the documentation here. But for this post, I am going to use ‘gh-pages’ package which will automatically achieve this goal for me.
Node.js and npm:
Node.js is a server runtime environment for running Javascript on the server and npm is a package manager used to download and install different packages for JavaScript projects.
Environment:
Windows 10
Prerequisites:
- Text editor: My choice of text editor is the Visual Code. I only recently started working on it and it is just amazing (subjective opinion).

2. Git: It is really easy to setup git on windows. Just download it using this link and go through the default installation process.

3. Node.js and npm: Download it from here and go through default installation process.
4. A GitHub account.
Now the real fun begins:
- I used the following npm command on git bash to install ‘create-react-app’. This package helps to creates a boilerplate React application to work on.
$ npm install -g create-react-app2. In the next step I created a new React app called “website” using the command below.
$ create-react-app website3. Then I changed to the newly created directory and run the following command to start the application. The start command creates a local development server to run the application.
#change directory
$ cd website#run application in development environment
$ npm start
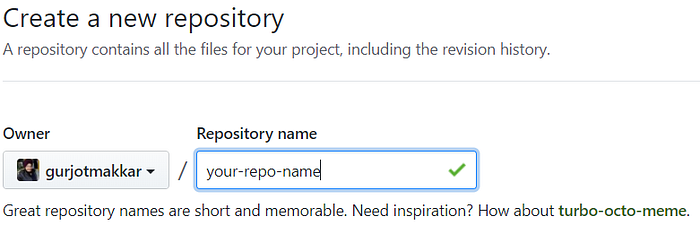
4. After checking that the application runs perfectly without any error, I created a new repository on GitHub.
5. The next step was to convert the local react project to a git repository.
#create a new git repository
$ git init#add all changed file paths to staged changes
$ git add .#commit all staged changes
$ git commit -m 'initial commit'
6. After that I added the just created GitHub repository as the remote repository and pushed the code to it using the following commands. It created a default master branch and added all the code to it.
#add remote repository
$ git remote add origin https://github.com/gurjotmakkar/website.git#pushed local repository to remote repository on GitHub
$ git push origin master
7. The next step was to install ‘gh-pages’ package using the following npm command:
#install gh-pages package
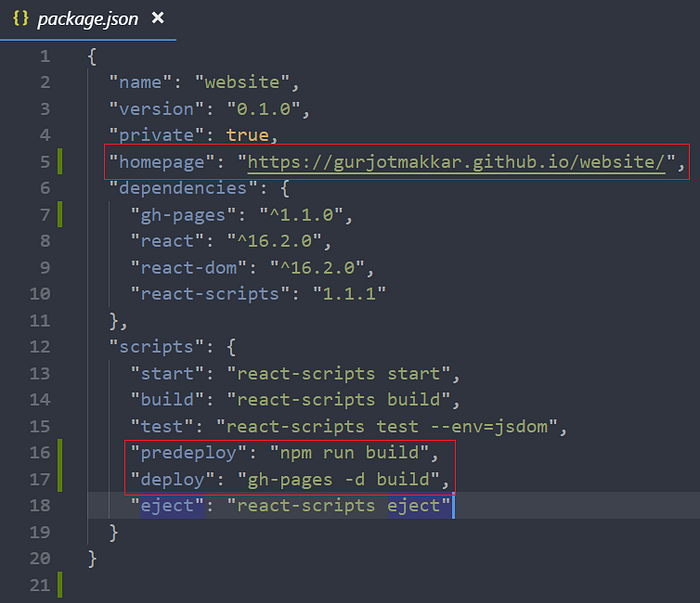
$ npm install --save gh-pages8. Now I just needed to modified the package.json file of the project by adding the following statements (the statements are highlighted):
The “homepage” specifies the host path where you want to host the application.
The template for the URL is:
https://[your-user-name].github.io/[your-repo-name]/“predeploy” specifies the command to build before deployment.“deploy” specifies which branch and directory to deploy.
9. The last step now was to deploy the application using the following command:
#deploy application
$ npm run deploy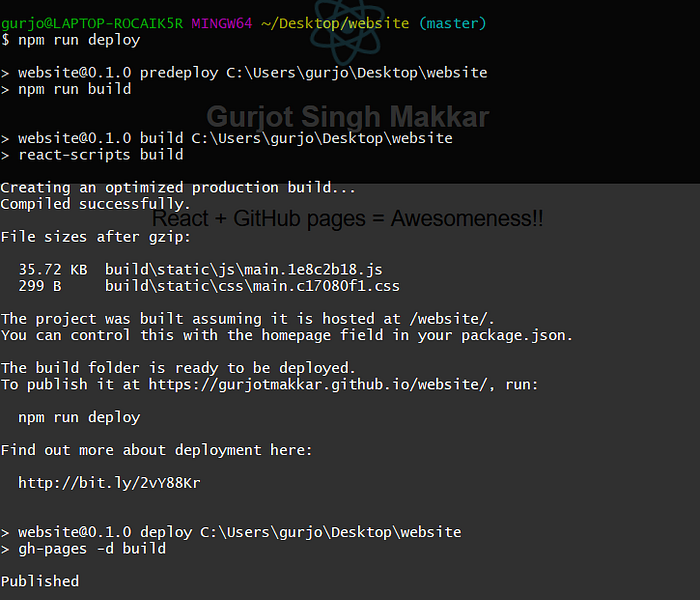
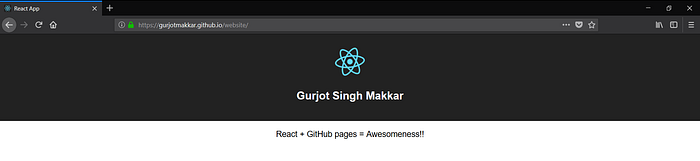
Success!!!!!!!!!
Conclusion:
So after the deployment, a second “gh-pages” branch is created which contains the static code for the React app for the website. Finally, the React-GitHub-Pages environment setup is completed. Now I can start working on it.
Author’s note:
So this is my first ever blog post. I started this blog in order to express and share my development journey with everybody for which I got the inspirationI from a dear friend Margaryta Chepiga. She is an intelligent and talented programmer, awesome blogger, kindest person and an amazing friend. You can check out her blogs over here. In her blogs she tells about her journey of struggles and success in her open source project contributions. Hopefully, she will inspire you too.
One last thing…
Please let me know how I did in my first blog. Any feedback would be very valuable to me.

