Develop and Publish Your Own VSCode Extension
A complete guide for getting started with VSCode extension development

Visual Studio Code is a popular open-source code editor among many developers in various domains of software development. Therefore, its extension marketplace consists of a rich set of extensions for programming languages and tools developed by extension developers. This article is a quick start guide for anyone who is trying to develop their first extension for VSCode. In particular, this article explains how to create an extension for text files(.mytxt).
Step 1: Software Configuration
First, download and install the following set of open-source software on your computer.
- VSCode: code.visualstudio.com
- NodeJS: nodejs.org
- Git: git-scm.com (optional)
After installing the VSCode editor, open up a terminal and using the terminal tab in the top navigation bar in the editor. Note: You can use a preferred CLI instead
In the terminal check whether the NodeJS has been installed properly using the command node -v.Thereafter, use the following command to install the Yeoman scaffolding tool and VSCode extension generator by executing the following command.
npm install -g yo generator-codeNote: Yeoman and VSCode scaffold a Typescript or JavaScript project ready for development. We will use this skeleton project for starting things off.
Step 2: Project Generation
Execute the following command to generate the skeleton project.
yo codeYou will get a generation dialogue as depicted below. Select the New Extension(TypeScript) option.
Note: you can select the JavaScript option as well. However, It is advised to choose the TypeScript option if you want to follow the project exactly as in this tutorial. Other options in the list are varients of extensions that can be developed for VSCode. In this tutorial, we’ll only focus on a simple language extension.

After choosing the extension type, you may use the following configurations such as extension identity as inputs in the extension generation dialogue.
? What type of extension do you want to create? New Extension (TypeScript)
? What's the name of your extension? MyTxtExtension
? What's the identifier of your extension? mytxtextension
? What's the description of your extension? An extension for text files
? Initialize a git repository? Yes
? Which package manager to use? npm
Next, navigate to the mytxtextension project folder executing the following command or opening up the project folder manually.
code ./mytxtextensionStep 3: Test the functionality of the extension
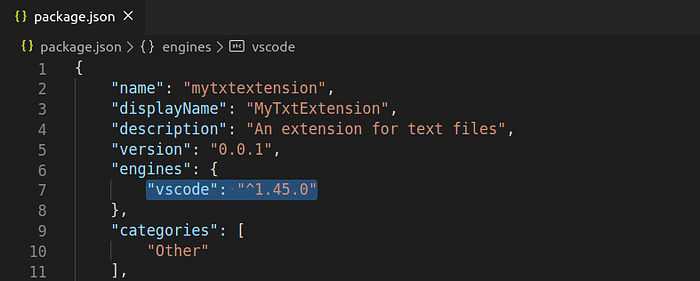
Make sure the vscode-engine version in package.json file is a minimum match so that it includes your VSCode editor version. Please refer vscode-compatability guide for more information.
To start off, we will first check out the functionality of the base project that we have generated. Next, I will explain the functionality of important features one by one.
The basic project registers a command which will show a notification as depicted below upon execution. VSCode has a component called Extension Development Host which allows developers to debug the functionality of their extensions. we’ll use the extension development host to view the functionality of MyTxtExtension as well.
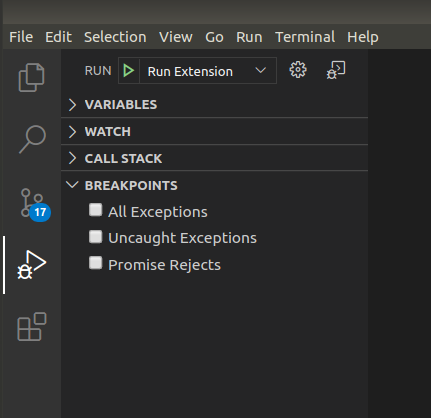
Press F5 or choose and execute the Run Extension option in the debug window.
Next, the Extension Development Host will pop-up in a new window. If the extension development host is started correctly with our extension hosted on it, a message similar to the following will be shown on the debug console.

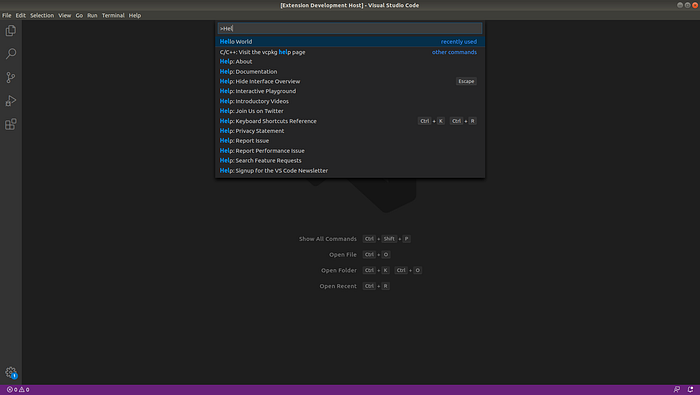
The extension development host has our extension hosted on it. We test and debug the extension’s functionality using this. In the extension development host press crtl+shift+p or cmd+shift+p and type Hello World. Select the command and a notification will pop up at the bottom right corner of the editor.

To change this pop-up message, close the extension host window and navigate to the ./src/extension.ts file. In the file locate the line that pushes the notification and change the message as Follows.
vscode.window.showInformationMessage(‘Hello VSCode from MyTxtExtension!’);Now, check if the change is reflected on the extension host:).
Step 4: Developing your extension
The package.json file located in the project’s root directory is the main configuration file or the extension manifest according to the VSCode terminology. For allowing various functionalities or features the components of the package.json file should be configured. Please refer vscode-extension-manifest for a detailed explanation of files of the extension manifest.
We are going to create an extension for files with .mytxt extension. Therefore the extension should be activated when a file with .mytxt extension is opened. To implement this we need to add new configurations to the activationEvents, contributes fields as follows.
An extension particularly developed for a language has various features such as Syntax Highlighting, Auto Code completion, Diagnostic, and Code lens. Moreover, a protocol called Language Server Protocol has been introduced by Microsoft for the development of cross-editor language-specific tools. I will further explain this concept and usage in a future article. Now, for our first extension, we’ll add the Syntax Highlighting and Code Snippets features.
To do this we first need to add a contribution point for each of the above two features to the contributes fields in the package.json as follows.
Syntax Highlighting
Syntax Highlighting is an important feature of any language extension which assists developers in identifying syntax in different contexts and scope. For instance, colorizing keywords such as if and for in differently than the regular strings is important for efficient development. Tokenization and Themeing are the two steps of syntax highlighting in VSCode.
Tokenizing is the process of breaking text to a list of tokens. For instance,
myString = “hello world”The tokenization engine of VSCode tokenizes the source code. For the tokenization process, VSCode uses TextMate Grammars as the tokenization engine. TextMate Grammar provides a set of scopes to be assigned to each token. For example, the myString token above may be assigned the following scope.
variable.other.mytxtPlease refer macromates-language_grammars for the naming convention of scopes.
The grammar for the particular language for which the extension is developed can be provided in a json file. As depicted above in the contributes field the grammar file should be added as a contribution point. The grammar file consists of the logics for tokenization written in Oniguruma regular expressions. Each tokenization logic is assigned a scope following the above scope naming conventions. We will look at how to write a simple Textmate grammar for our extension in the next section of the article.
Note: Please refer textmatebundle for a detailed explanation on how to write Textmate grammar.
Theming is the next step of the syntax highlighting process. It assigns colors and styles to tokens. Theming rules are specified in color themes. By default, VSCode has several color themes defined for the standard scopes mentioned above. In this article, we’ll not focus on color themes. If you want to learn more about theming please refer to extension-guides-color-theme.
Now, let’s create the mytxt.tmLanguage.json file in the ./grammar/syntaxes/ directory. Our grammar consists of four basic contexts namely keyword string, number, and comment.
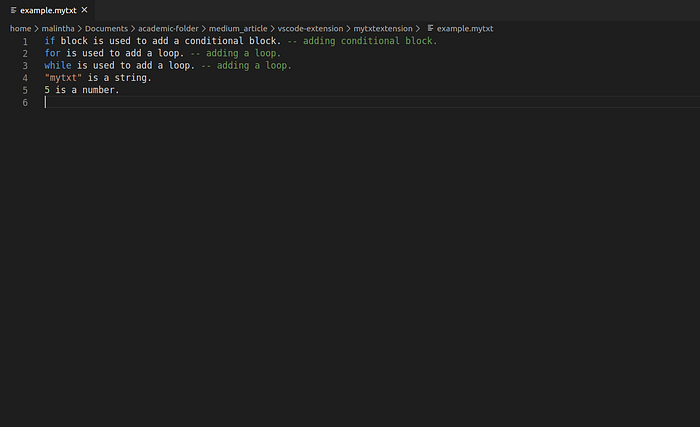
Next, let's check whether the syntax highlighting works. Make sure everything is intact and launch the extension development host. Create a file with .mytxt extension and enter some text including the above keywords and strings and numbers. You will see something similar to the following.
Code Snippets
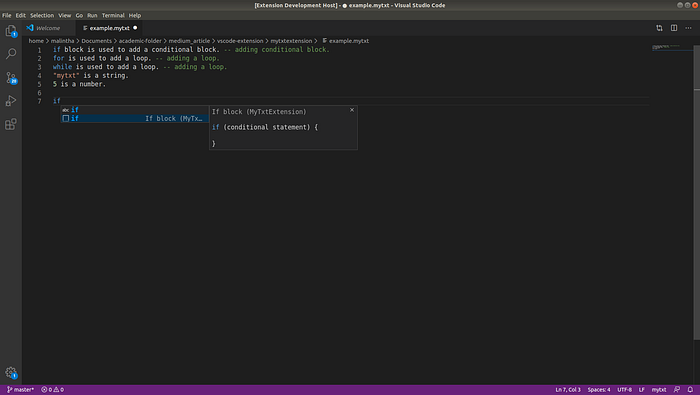
Code Snippets are a set of pre-defined code blocks or templates that assists developers to efficiently and instantly code repeating patterns such as loops and conditional statements. Please refer to userdefined-snippets if you want to learn more about snippets and how to create them.
The process of adding a snippets feature is similar to the Syntax Highlighting feature. We have already added the snippets contribution point in the package.json file. Next, create the mytxt.json file in the ./snippets directory. I have added some sample snippets to demonstrate. You can add your own snippets.
As you type if or mytxt you will be suggested the corresponding code blocks as depicted below.
We have created our own extension for VSCode. However, we have been testing it on the extension development host. Now let’s package and publish it.
Note: I highly recommend you to explore more on advance extension features referring to vscode extension API guide.
Step 5: Publishing the extension
Packaging the extension
There are few mandatory requirements to be taken into account before packaging the extension.
- include the
publishername and icon for the extension in thepackage.jsonfile.

Note: be sure to change the publisher name:)
Package the extension
VSCode extensions are packaged into installable .vsix file. A CLI tool called vsce is used for this. First, we need to install the node package vsce.
npm install -g vsceNext, execute the following command from the project’s root directory to package the extension into a .vsix file.
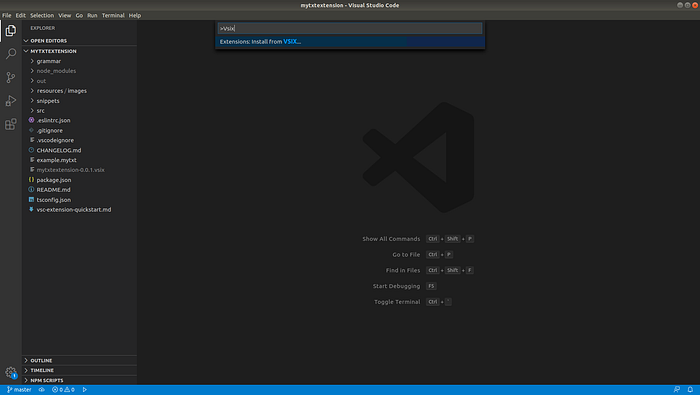
vsce packageYou will see a new file named mytxtextension-0.0.1.vsix. We can test the extension by installing it on our editor. To do this hit ctrl+Shift+p and type vsix in the search box. You will see an option named Install from VSIX. Select this option and then browse and select the mytxtextension-0.0.1.vsix file.
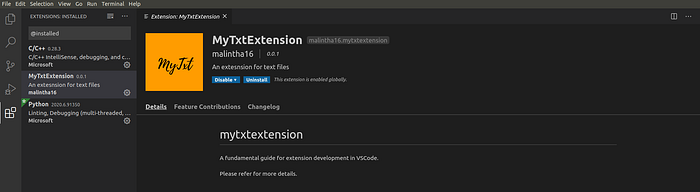
If the extension is successfully installed you will get a notification saying Completed installing the extension MyTxtExtension. Now if we navigate to the extension tab/window on the side-menu on the lead we are able to see the details of our extension.
Publishing to Extension Marketplace
publishing an extension to VSCode Extension Marketplace requires few more steps to be completed.
Please read publishing-extensions and understand requirements, terms and conditions before publishing your extension.
Note: I highly advise you as a good practice not to publish an extension without a proper purpose to the market place.
You must have a Microsoft account to publish a VSCode extension. You can use the Visual Studio Marketplace Publishing Portal to publish your extension. Happy coding:)
Summary
In this article, the fundamental concepts and the process of development of VSCode extensions are explained. The Syntax Highlighting and Snippets feature demonstrates how expansive the VSCode Extension API is. Finally, it is explained how to package and publish a VSCode extension. Please refer vscode-extension-guide for the source code.
More sophisticated language extensions have features such as CodeLens, Hover, Auto-Completion, Goto Definition and Code Actions supported by a Language Server. My next article will explore how to exploit the language server concept to develop a language extension.
Thank you for reading!