Developing Multi-Slider-Switch in React Native
This article covers designing and developing functional component with 60 fps animations
Goal
To create a three-way selectable switch module that can be used to change status of a task. This article aims to shed light into
- React Stateless Functional Components.
- Animated apis.
- Using PanResponder.
- Performant UI 60 fps ui animations without frame drops.
Implementation
Let’s start with creating a new react-native project
react-native init multiSwitchBasic Setup
First of all we can create a separate folder named multi switch which will contain all the switch related code. Add an index.js file to export the module, then we can create a file named MultiSwitch.js

Lets give the view a basic style to start with ….

Give it a borderRadius , appropriate height and a subtle background colour. Spice things up by providing a border colour with width:1 .Also add icons that will trigger click events…


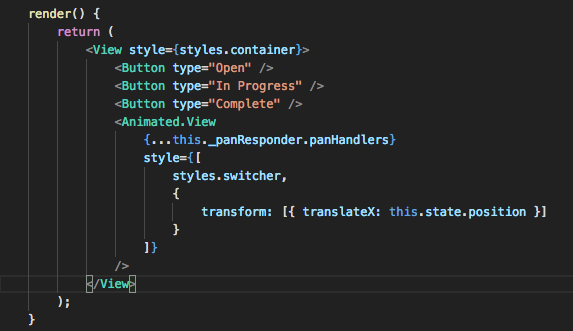
Adding this buttons to our main view

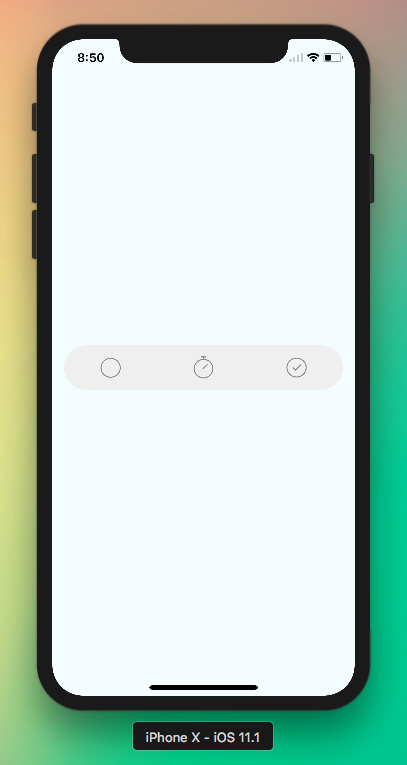
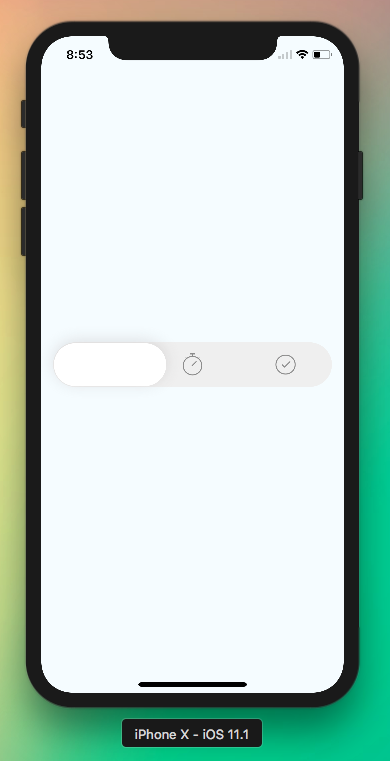
Voila … we have a basic layout to play with …yay.. !!
Lets spice things up , shall we ?!
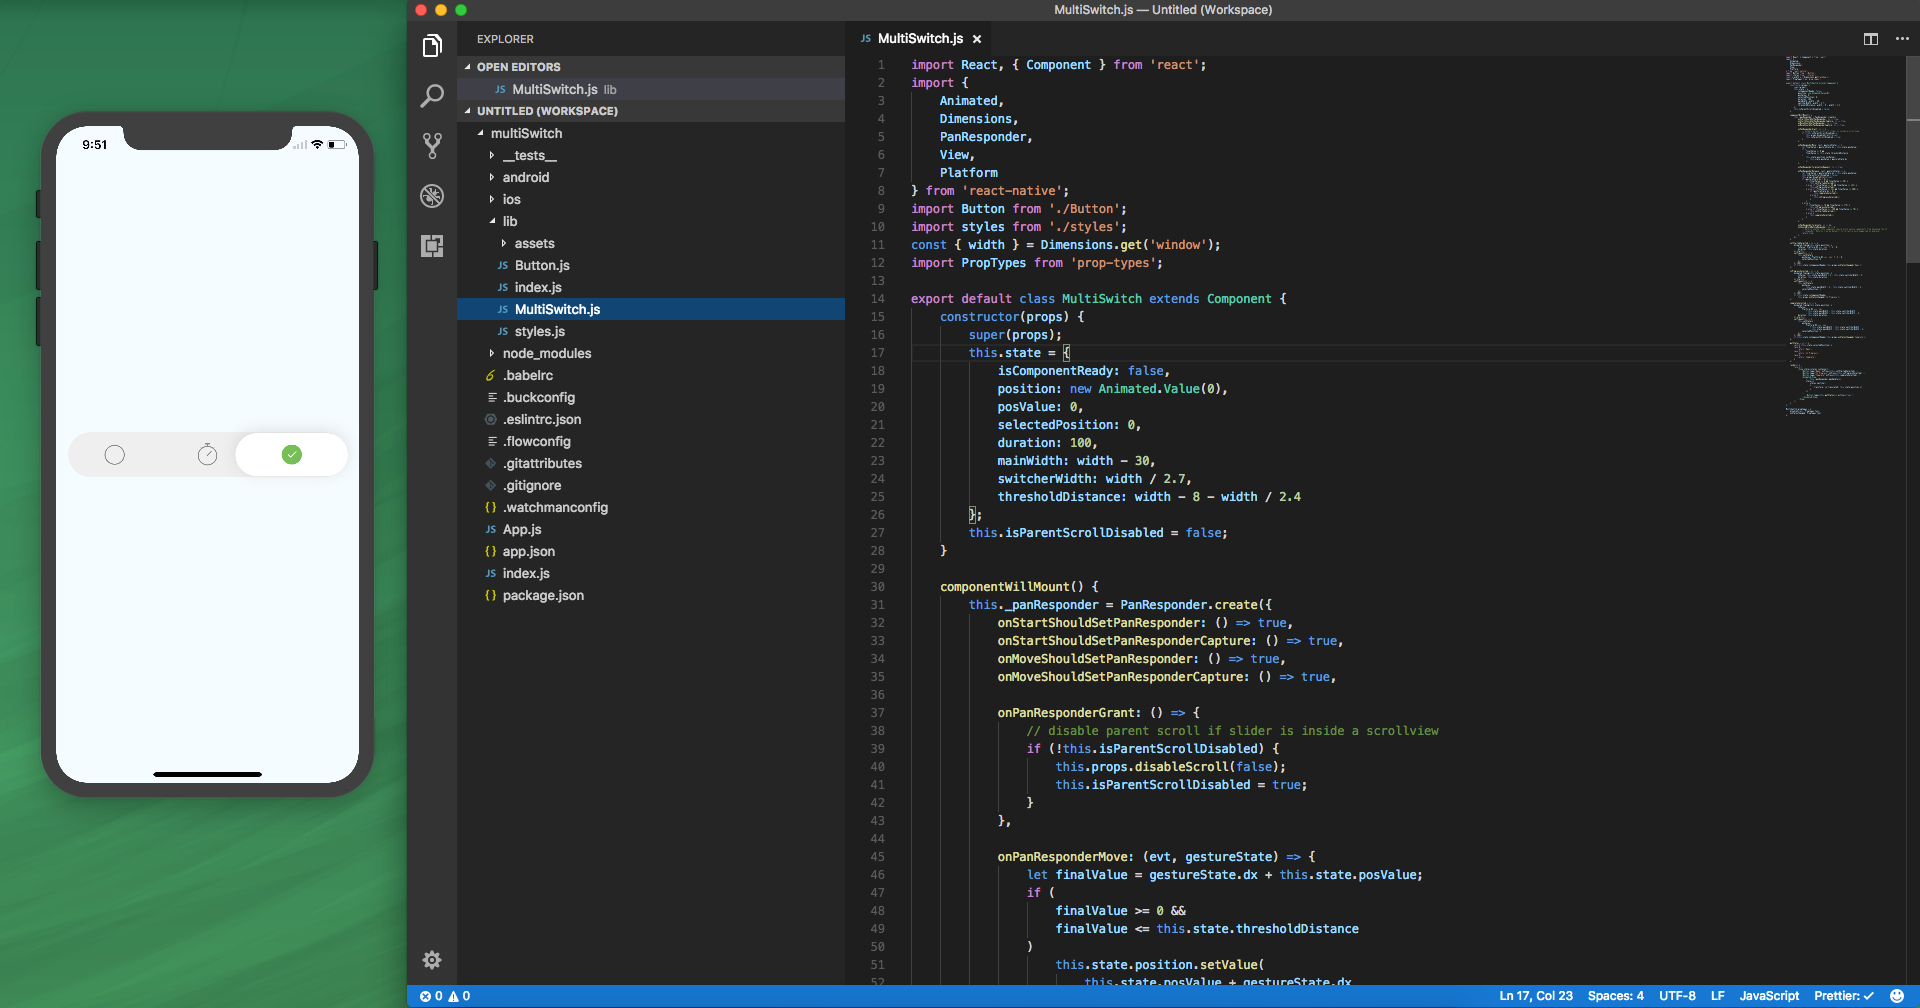
Sliding Switch
We can make use of Animated.View to create an elegant slider icon for the module. This view will work as a switch changing values with a buttery smooth animation!
Lets add an Animated.View
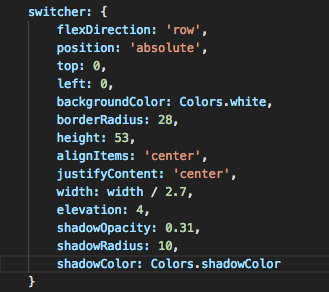
We can provide styles to the switch including shadow and other style props..
Finally .. we have our switch button
PanResponder (The Horror :D )
In React Native, you can use the PanResponder to recognise multi-touch gestures as well as swipes and other touches that make native apps feel snappy and intuitive. But getting it up and running can feel daunting and really hard to achieve.
Once you start understanding the logic behind the responder and familiarise with different methods , it becomes simple and I promise you will die building different types of gestures with it.
The magic starts with
- onPanResponderGrant - Called when gesture starts
- onPanResponderMove - Called when the user is dragging
- onPanResponderRelease — Called when user releases all touches
These following methods enable the pan responder to catch the gestures associated with the corresponding view.
- onStartShouldSetPanResponder: (evt, gestureState) => true,
- onStartShouldSetPanResponderCapture: (evt, gestureState) => true,
- onMoveShouldSetPanResponder: (evt, gestureState) => true,
- onMoveShouldSetPanResponderCapture: (evt, gestureState) => true,
In a nut shell what we have to do is, Disable parent scroll if any in onPanResponderGrant to avoid scroll issues. Then start updating the position state value and find the final resting position of the slider on onPanResponderRelease then set the state.


We are moving horizontally so we have to use gestureState.dx to get the value. If its vertical then we have to use gestureState.dy. if (gestureState.dx >0) means we are moving forward and negative then we are going backward.
The code above is absolutely not the best way to calculate positions, But once we have a working prototype we can start generalising everything.
Now we have know each range that corresponds to a section in the slider (1 in 3). Now we can add Animated.timing to support animating the slider to each section when the user taps on each status. Something like below, which will calculate the toValue that animates the slider over a duration the final position

With some basic calculations and bug fixes we have a perfectly working slider component now.


Lets see the slider in action .. shall we
if you guys want to refer the code please use this GitHub link https://github.com/victorkvarghese/rn-slider-switch
UPDATE: Fixed onStatusChanged not getting called in the lib, Added code to disable switch when needed
PRs are welcome , I will be committing to this library, adding more features.
More articles from me
- Building Facebook Messenger Clone in React Native.
- Super Cool Material UI components in React Native!
- React Native — A Deep Dive