Discord.py: The QuickStart Guide
Make a Discord bot with Python 3

NOTE: This guide was based off
discord.pyversion 1.4.1, and the Discord API has since implemented breaking changes that had to be introduced at v1.5.0. Unfortunately, this guide is outdated within two months its lifetime. I will point major revisions of my code/instructions below.
Whether you’re an avid user of Discord, currently moderating a server, or own a server, you should definitely consider making a custom bot. This experience is both fun and practical as it can benefit your server and allow you a greater ability to customize as you see fit. While there are bots already available in the Discord ecosystem that are easy use, they might not meet your specific needs or they might be too feature-packed for the simple use case that you’re after so having the skills to create a custom bot are certainly an advantage.
This guide provides you with the initial steps for making your discord.py bot. If you’re interested in making one now or in the future, read below!
Prerequisites
Before we get started, you should be familiar with the following:
- Python 3 (quite obviously)
- How to create a Discord Bot Account (complete this before continuing)
- Synchronous vs. Asynchronous Programming/Execution (optional)
- Read up on Python decorators (optional)
That’s about it. Don’t worry if discord.py is installed or not, I’ll handle that one for you too.
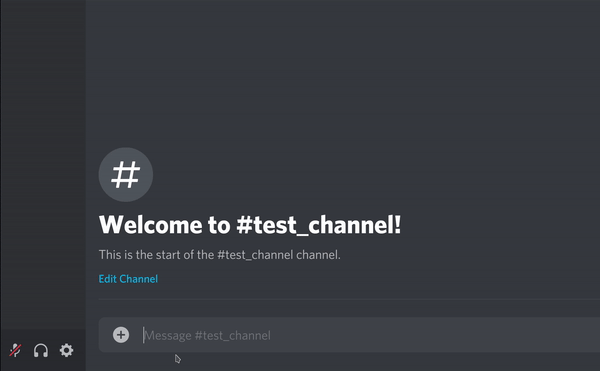
Getting Started
I am assuming you are in a new, empty directory, (preferably git initialized) to put all your code for this bot. If not, please do so now.
Installing the discord.py library
This should be a given — you’re making a discord bot with Python, right? Nonetheless, when installing discord.pyI recommend creating a Python virtual environment. Why does this matter? Well, if you are making this bot then you’re likely going to deploy it elsewhere (otherwise, the bot is only online when you’re running the Python bot script). In layman’s terms, a virtual environment keeps track of the Python packages that you use for the project so you can export them later. Most deployment methods depend on this export in the form of a .txt file and doing so saves you some hassle later on.
Heads Up: # = comments (don't copy) ; $ = shell commands# Go into your directory, if you haven't done so$ cd <your_discord_bot_directory># Create your virtual environment (venv). I'm giving it the name
# `discordbot_env`, but you can change it to whatever you want.$ python -m venv discordbot_env# Activate the environment$ source discordbot_env/bin/activate   # (MacOS & Linux)
$ bot-env\Scripts\activate.bat         # (Windows)# Install discord.py$ pip install -U discord.py
Now, fire up your favorite code editor or IDE, select your virtual environment as your Python environment and create a bot.py file in the working directory (the filename probably doesn’t matter).
Boilerplate
Other than importing discord directly, we want to use discord.py‘s Bot API which comes with the Python package. Here are some initial imports and commands to start your bot.py file:
# NOTE: after v.1.5.0, discord.py reqires "Intents" to be used with bots. I've updated this snippet to work with discord.py's latest breaking update!import discord
from discord.ext.commands import Bot
from discord import Intents
intents = Intents.all()bot = Bot(intents=intents, command_prefix='$') # or whatever prefix you choose(!,%,?)
# insert the line below at the end of the file
# define <TOKEN> as your discord bot tokenbot.run(<TOKEN>)
Doing this creates a new Bot instance that serves as the connection to Discord. We can use this instance to create event listeners and commands.
Bot instances are technically Client instances, which are lower-level (and were once the only) connections between discord.py and Discord. However, for the sake of simplicity and better feature implementation, stick to using Bot — you’ll thank me later (otherwise you’ll have to manually parse each message for the special character and following arguments with Client, where you only need to specify the command_prefix in Bot).
The Bot Module
Events- Having the bot react to what is happening on the server.
The module provides an easy way of linking the bot’s actions to various events in a discord server. discord.py supports a lot of different server events that could be “listened” to.
Here is an example:
NOTE: Due to v1.5.0’s breaking changes, you will now have to add an extra line after
on_message()to allow additional commands to run after it:await bot.process_commands(message). Failure to do so may make your bot unresponsive! For more information, look here.
When run, this Python file will do the following:
- Print onto the console
Bot connected as <bot_username>when it’s done setting itself up. - Whenever a user types
testonto the chat, the bot responds withTesting 1 2 3!
Pretty simple, indeed! Here are some things to note:
- The decorator
@bot.eventdenotes that you are specifying a function for the event on the next line. - The event function has the keyword
async. The function is asynchronous and non-blocking, meaning that it won’t prevent other functions from running if this function is still in execution. - The
message.channel.send()method is called with theawaitkeyword. This tells the asynchronous function to wait/block until the method is executed. If you run into future errors insideasyncfunctions, it’s likely because you forgot theawaitkeyword. - Notice the function names:
on_ready()andon_message(). They are named like that deliberately so as to correspond with the discord events thatdiscord.pysupports. Your events won’t work if your function name is incorrect.
To see the full list of events that discord.py supports, look here.
Commands
A Discord bot isn’t really a bot unless it has commands! Let’s say we need the bot to print the server name when someone types $server onto the channel. Here is how we can accomplish this with discord.py:
Following the code:
- We initialize a new
Botwith the command prefix$. Typing this prefix with an argument (e.g$<command>) triggers the bot to find a defined command with thenameparameter matching the argument. - We use the
@bot.commanddecorator to assign the following function to a command with the name “server”. This defines the existence of the bot command$server. - The function is asynchronous, but the function name does not matter anymore. It accepts an abstract parameter
context, which represents the relative place (server & text channel) from where the command$serverwas used. - The
guildobject actually stands for the discord server of interest, to match with the official Discord API. We get this object from the context, so theoretically this command can work across multiple servers without modification. - We output server/guild information (name, size, owner) to the same place where the command was typed (the
context).

Things to Keep in Mind
The “Help” function

When you use the Bot module (instead of Client), the “Help” function is luckily taken care for you. This function is especially useful for reminding users how to use the bot’s commands as well as what the available commands are. This “Help” function is executed by pairing the command_prefix with help; in our example it would be $help.
Usually, the function prints a string describing each command, each of which would be written by you. How do you define the help string for each command? It is passed as an argument on the @bot.command() decorator, as shown below:
@bot.command(name = 'server', help = 'Fetches server information')Changing the Discord Bot Presence
It is relatively pain-free to do this on discord.py. This can be done with the bot.change_presence() method and can be changed throughout the bot’s runtime.
For example, perhaps you want to make it so that the bot is “Playing Fortnite” and you want it to be like that from the moment you start up the bot. To do this, you should modify your on_ready() event function as the following:
@bot.event
async def on_ready():
    await bot.change_presence(activity = discord.Game('Fortnite'))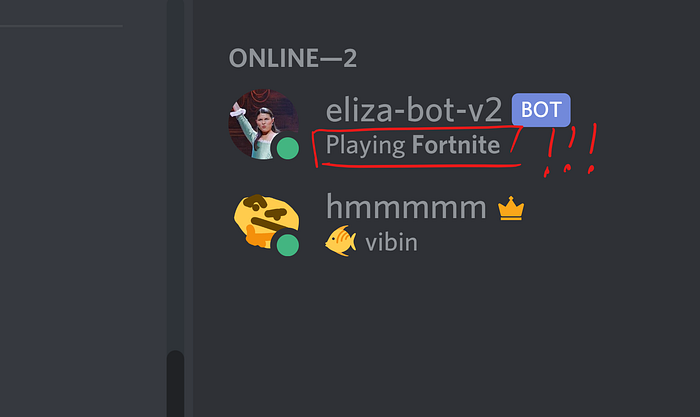
You can also modify the activity in a slightly different way if you desire an activity other than a game or a show/movie. For instance, the below gives a bot activity of “Watching Hamilton on Disney+”:
await bot.change_presence(activity = discord.Activity(
                          type = discord.ActivityType.watching,
                          name = 'Hamilton on Disney+'))
Conclusion
That’s about all the basics you’ll need to get started quickly! Custom bots add a new dimension to your server, helping you to up your efficiency and even offering a fun element as well. Beyond this, gaining the necessary skills to add a custom bot helps to diversify your abilities and can be quite a satisfying experience. I hope that my article has helped encourage you to try this out, have fun making your Discord Bot!

