ESLint: Everything You need to know about setting up a style-guide with ESLint.

A great project is made out of consistent code. In the perfect world, the code should be indistinguishable from its writer: You should not be able to tell who authored which line of code in the project.
Modern linters and formatters help to narrow this gap by defining a clear set of rules that are enforced to all the developers working on that project. These tools also help developers to write better code by pointing out common errors and enforcing good programming patterns. I subscribe to the idea, that if you want to learn best practices in React and javascript you should follow a style guide.
Linters highlights syntactical and stylistic problems in your source code, which often times helps you identify and correct subtle programming errors or unconventional coding practices that can lead to errors.
1. Download ESLint Extention
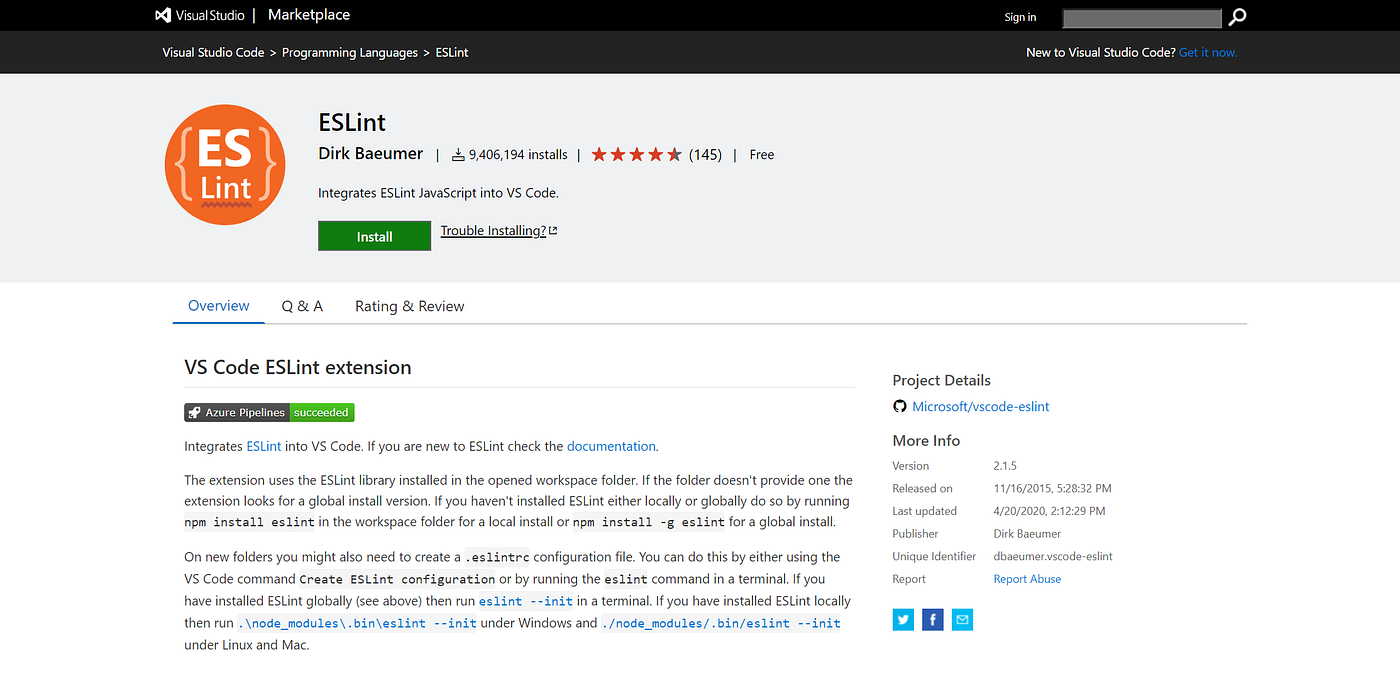
While you are at it also download the prettier extension which would be helpful later if you would like to add Prettier to the mix and use it in tandem with ESLint.
2. Download ESLint module from npm
If you are using create-react-app no need to download ESLint rather and run npx eslint --init & go ahead with downloading the style guide
npm init --y
npm install --save-dev eslint
You can use shorthand npm i -D eslint
Even though you can download ESLint globally, the official docs suggest against it, and it should be avoided. The reasoning behind that goes along the following:-
Packages should be installed locally, this makes sure you can have dozens of applications in your computer, all running a different version of each package if needed.
Updating a global package would make all your projects use the new release, and as you can imagine this might cause nightmares in terms of maintenance, as some packages might break compatibility with further dependencies, and so on.
All projects have their local version of a package, even if this might appear like a waste of resources, it’s minimal compared to the possible negative consequences.
3. Downloading a Styleguide
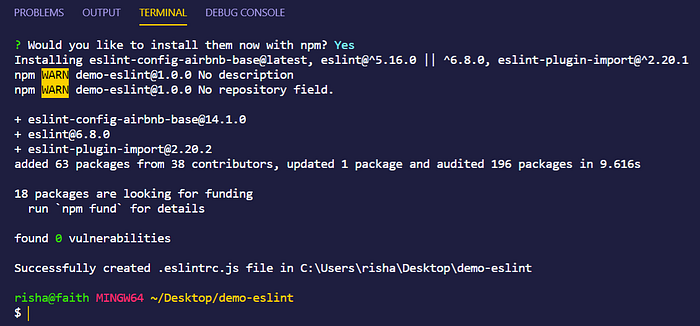
Make sure you have ESLint installed, after that run eslint --init in the terminal(this works best with VSCode Integrated terminal), after which ESLint what ask you to answer certain questions.
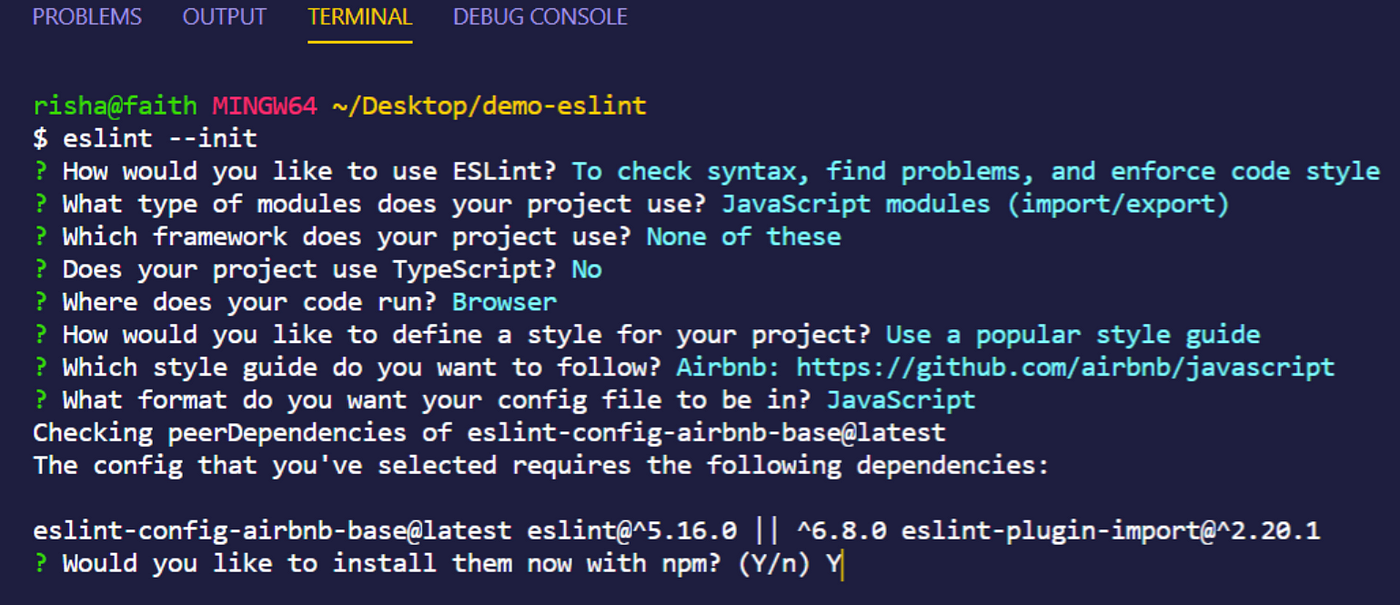
Again choose according to your need, it is asking these question because, in the end, ESLint would provide you with a list of dependencies to install based on your configuration.
Difference between the style guides?


Here is a comprehensive list of differences between the three style guides
TLDR
If you prefer to have a lenient style guide Standard is a good choice. If you are interested in having a strongly opinionated linter that provides additional validation and Reacts support out of the box, then go with Airbnb.
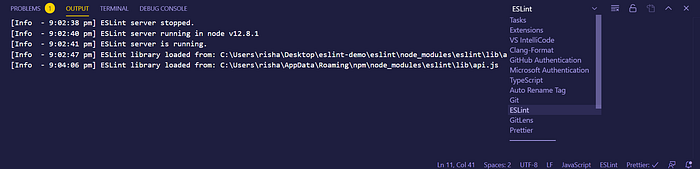
ESLint should be working now, it can be checked by opening the output tab in VSCode and selecting ESLint from the dropdown menu. In case there is an error it would be mentioned here, in most cases, the error would be just that you haven’t installed a dependency.
Configuring Prettier
Unpopular Opinion: If you are a complete newbie I would just urge you to use ESLint with auto-fix on-save, using prettier with ESLint sometimes can add complications, like having conflicting rules about how to edit the code, and there is a chance you might spend a lot of time in just trying to get these two to work together properly and not do the most important thing, code! But still, there are some benefits to using them together if you follow the given steps you should not face any complications!
npm install --save-dev prettierDownload the config and plugin file for prettier
npm install --save-dev eslint-config-prettier eslint-plugin-prettierWhereas the former turns off all ESLint rules that could conflict with Prettier, the latter integrates the Prettier rules into ESLint rules.
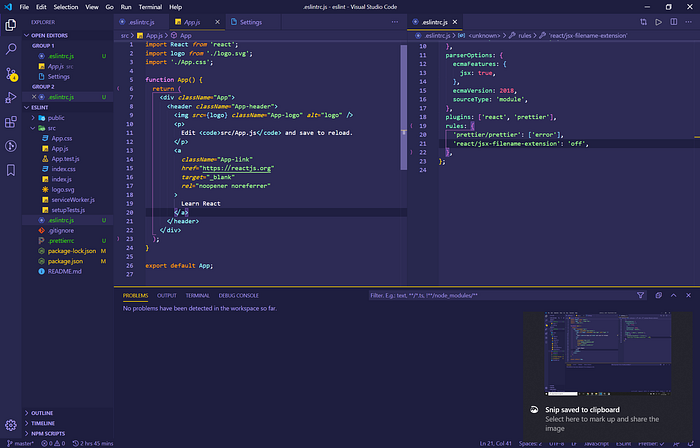
Your ESLint file should look something like the following if you were downloading a style guide on top of create-react-app. You should extend prettier/react too in the extends file
There should not be any conflicts between ESLint & Prettier now, ESLint knows about all your Prettier rules by integrating all the rules that are enforced by it and removing all the rules that could conflict with it. If you need to exclude folders/files from your ESLint rules, you can add these in an .eslintignore file (e.g. node_modules/).
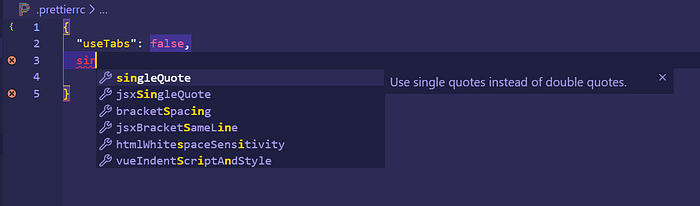
I also urge to create a .prettierrc file in your repository, with VSCode Intellisense by pressing Ctrl + Spaceyou’ll get the list of all available rules and quickly edit rules that you want to.
Auto-Fix & Auto-Format on Save

this would fix all auto-fixable problems discovered by ESLint and format your code with Prettier when you save the file.
Disabling a rule
It pretty likely that if you are following Airbnb style guide(which is quite strict) that you would come across a rule that you want to disable or understand what it means. Take a look at the following case
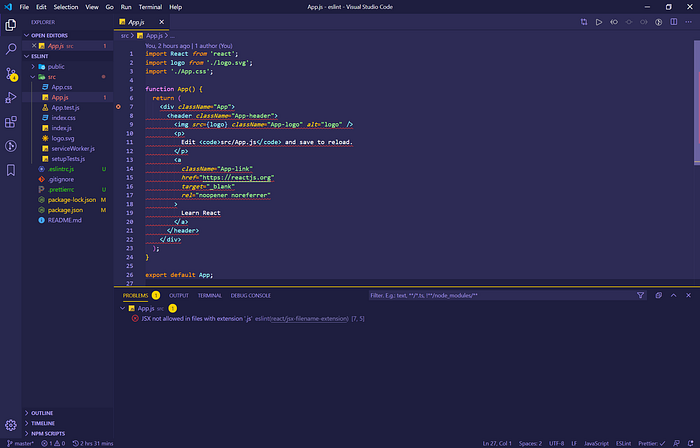
Here ESLint is telling that we should not have JSX in .js the file, and if we do want to have JSX we need to rename the file as App.jsx (It's one of the few annoying rules in Airbnb style guide which I hope is removed in future😑)
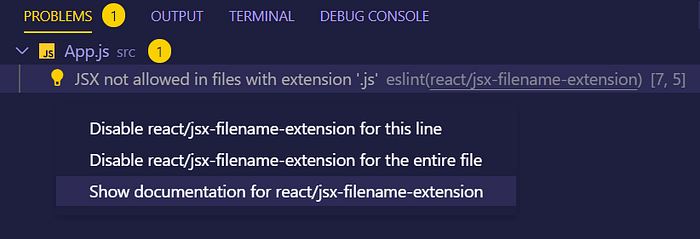
Click on the 💡 and you have the option to disable the rule for the given line, or the entire file, you can also disable the rule for the entire project, just follow show documentation for ‘xxx- rule’, you will most probably be redirected to a GitHub readme which explains the rule in detail.

.eslintrc.js
I would be explaining what the .eslintrc.js mean, so next time you open it, it does not look like jargon, explaining it is a bit verbose, and this part of the article can be skipped if you only wanted to know how to set up ESLint, but I believe understanding the following would be beneficial if you plan to use ESLint frequently.
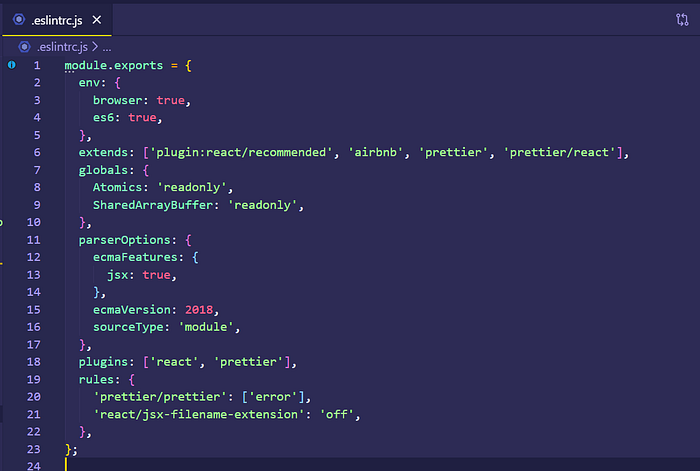
1. env
which environments your script is designed to run in. Each environment also brings with it a certain set of predefined global variables.
browser- browser global variables(window object).node- Node.js global variables and Node.js scoping(global object).es6- enable all ECMAScript 6 features except for modules.
2. extends
takes in a config file eslint-config-xxx (eg: eslint-config-airbnb)
A sharable configuration is an npm package that exports a configuration object(how the rules are implemented).
3. plugins
Allows extending a plugin file (eslint-plugin-xxx).
A plugin, on the other hand, is an extension for ESLint that will enforce rules, that are not implemented into the ESLint core.
Just having a plugin does not enforce any rule. You have to choose which rules you need. A plugin may provide you with zero, one, or more configuration files. If the plugin provides configuration file, then you can load that in your extends section after adding the plugin in the plugins section.
4. rules
additional rules can be added and existing rules can be removed, by mentioning them in .eslintrc.js
"off"or0- turn the rule off"warn"or1- turn the rule on as a warning (doesn't affect exit code)"error"or2- turn the rule on as an error (exit code is 1 when triggered)
5. Parser Option
By default, ESLint uses Espree as its parser. You can optionally specify that a different parser should be used in your configuration file
The following parsers are compatible with ESLint:
- Esprima
- Babel-ESLint — A wrapper around the Babel parser that makes it compatible with ESLint.
- @typescript-eslint/parser — A parser that converts TypeScript into an ESTree-compatible form so it can be used in ESLint.
ESLint allows you to specify the JavaScript language options you want to support. By default, ESLint expects ECMAScript 5 syntax. You can override that setting to enable support for other ECMAScript versions as well as JSX by using parser options.
echmaVersion - echmaVersion: 5 is used by default but you can override it to you echmaVersion: 2015, 2016,2017.. etc
sourceType - set to "script" (default) or "module" if your code is in ECMAScript modules.
ecmaFeatures - an object indicating which additional language features you'd like to use:
globalReturn- allowreturnstatements in the global scopeimpliedStrict- enable global strict mode (ifecmaVersionis 5 or greater)jsx- enable JSX
6. globals
Mentioning additional global variables your script accesses during execution.
Here we are defining the Atomics object that is predefined in JavaScript as a global variable. (The understanding of which is rather verbose & not necessary)
That’s all folks, I hope this was helpful in some way or another. You can follow me on Twitter @codeboyrish and GitHub @rishabh-malhotraa