Building a Simple Angular 7 App with Bootstrap 4 Styling
How to create a simple Angular 7 application and style components using Bootstrap 4 for beginners

TL;DR: In this article, we take a practical look at getting started with Angular 7 and styling it using Bootstrap 4. This short tutorial is targeted towards beginners new to Angular. But, it will also be useful for veterans wishing to update to the latest Angular version.
Let’s dive in.
Before you Start
Here are a few prerequisites you should already have before you start to use Angular 7.
- You need Node.js 8.x or 10.x and above installed. You can verify if you do by running
node -vin your terminal/command prompt. - You need the Node Package Manager (npm) also installed.
- A code Editor: Visual Studio Code is highly recommended. (Here’s why)
Installing Angular CLI
Now that you have all you need to start a project, you have to install Angular Command Line Interface which we use to create an Angular project, it is also used to generate angular components, services and other application code and libraries.
- Open your terminal or command prompt
- run “npm install -g @angular/cli”
Create Your First Angular App
Now after you get the +angular/cli message with 0 vulnerabilities you have successfully installed the angular cli tool. To create your first angular application, you will have to run a single line command “ng new newapp”
where:
- ng new: command to ask thee cli to generate a new angular application.
- newapp: your preferred application name, you can call it anything.
Before it proceeds to start generating, it would ask if you would like to use routing and your preferred style format:
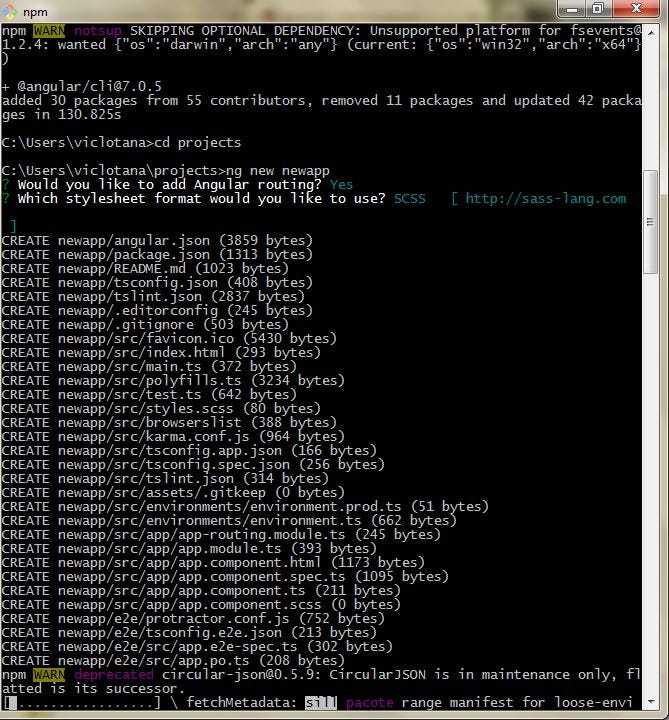
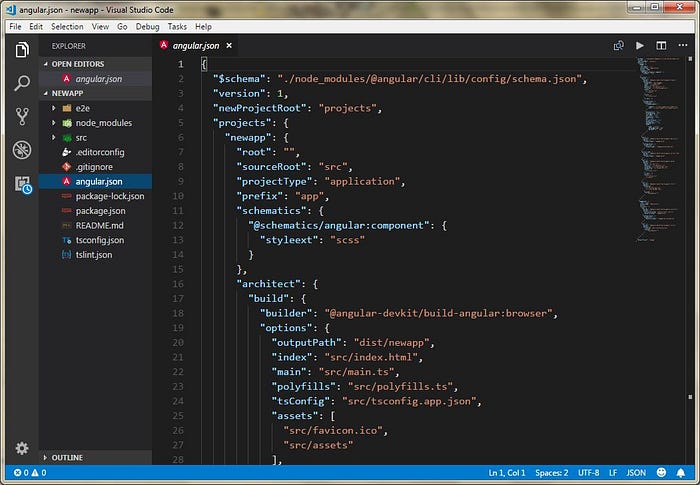
When this is done, you can now see a new folder called “newapp” inside you would see these file structure:
- e2e: end-to-end testing files for the project are contained here.
- node_modules: node modules are stored here.
- src: this is the main application source folder, where you will be working in 97% of the time.
- other configuration json files: tsconfig, tslint,readMe, package, angular, editorconfig and gitignore.
Updating to Angular 7
If you already use angular, or have an application on any version less than 7, you can upgrade any older angular project to 7 with a single command.
Running your First App
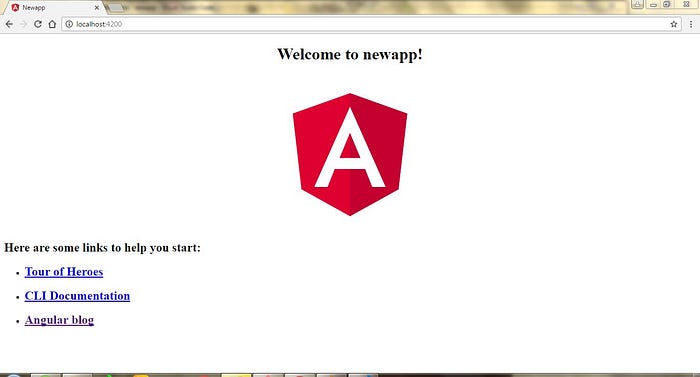
To run the application on a development server, run the commands:
Open a browser and visit “http://localhost:4200” you would see the welcome screen to your first Angular Application, congratulations!
Getting Familiar with Components
Simply put, components are the basic building blocks of Angular Applications. That is what an angular application is mainly built with as they are plugged into the main html file to render, this division into components modulates code so you can deal with a particular part at a time. They consist of three main parts:
- HTML Template where the User Interface markup is primarily built (saved in .html)
- CSS Template where the styling is done, could be css, scss, sass or less (saved in .css/scss)
- Typescript Logic where all the DOM manipulation and scripting is done (saved in .ts)
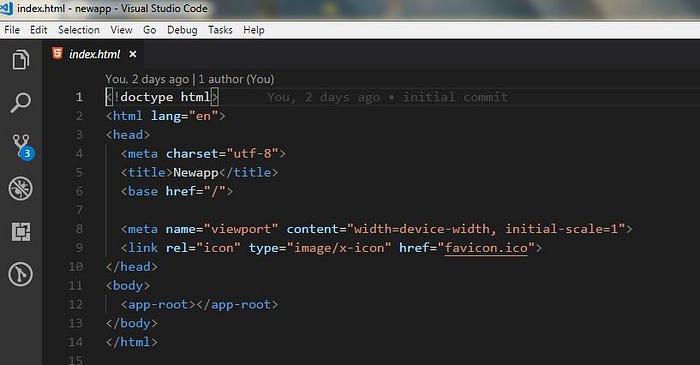
In an angular application, components are kept in the app sub-directory of the source root folder. As a new developer, the first thing to check out for in any web project (when you open the src folder) should be the main html file, it is almost always called “index.html” universally.
angular projects also come with a global stylesheet that is basically the style sheet for the index.html file in the source folder. Any styles written there would affect the entire angular project.
You will be very familiar with all the html elements asides the <app-root> element, do not fret; the app-root simply refers to a html element for everything in the app component. The App component consists of the .html, .scss and .ts and spec.ts files. Remember the basic logic for a component is in the component.ts file. Let us take a look at what is contains:
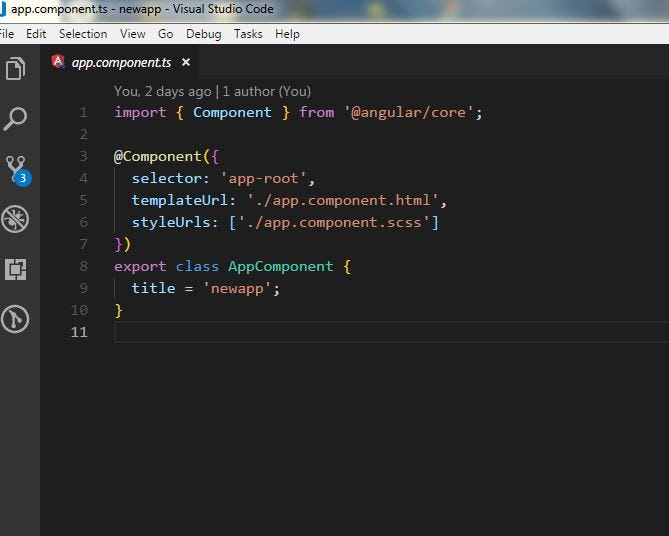
Every Component.ts file contains:
- an import statement which signifies an angular component.
- the component decorator which as an object contains:
- The Selector: the selector is simply a name you give your component to be able to use it in templates like index.html as a html element.
- The Template Url: here is the place to record the file location of the corresponding html template or to just inject the html code in back-ticks.
- The Style Urls: here is the place you record the file location of your stylesheet for this particular component.
- export statement to be able to bring the component into another component.
So Angular Applications are basically a collection of components in communication with each other, you can have a basic web application where the navbar, the sidebar, the body and the footer are all components managed separately in such a structured manner. Cool right?
Generating Angular Components
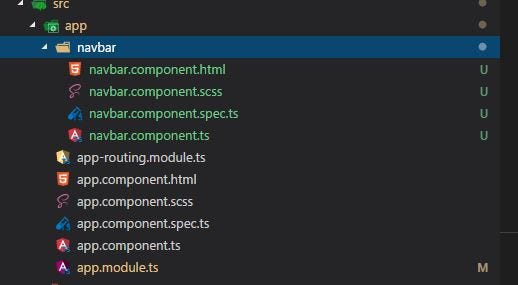
You can generate angular components with just a line of command thanks to angular cli which you already have if you have followed this article from the start. It gets easier if you use VS Code because when you hit “ctrl+`" or go to View -> Terminal in the menu bar and you would see a terminal right inside the IDE! The command is “ng generate component component_name”:

Generating a component with the angular cli automatically does 6 things:
- creates a sub folder inside the app folder with the component name e.g Navbar
- creates the component html template file e.g navbar.component.html
- creates the component stylesheet file e.g navbar.component.scss
- creates the typescript logic file for the component e.g navbar.component.ts
- creates the test spec file for the component e.g navbar.component.spec.ts
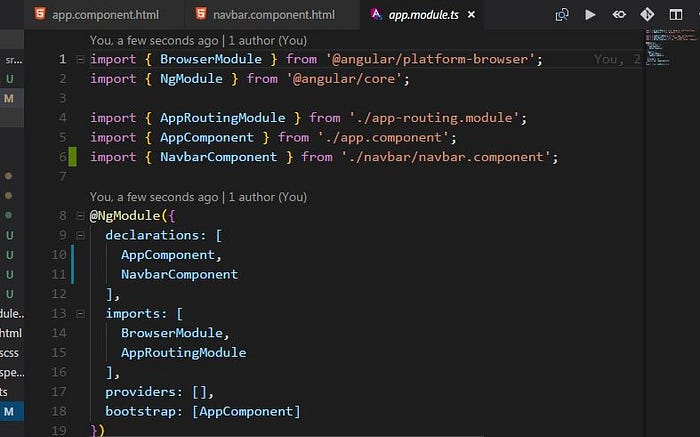
- updates the app module file signalling there is a new component generated.
The App module file is basically where all imports and generated files are recorded with their configuration metadata in the NgModule object. As a footnote, all components go into declarations, services into providers and modules into imports.
Let’s build a pretty app!
We would be building a simple application with the already existing angular starter boilerplate we have used above and style it with bootstrap 4.
You can see the angular svg icon is more prominent and we have a navbar above it. This styling can be achieved by using bootstrap in your angular project. If you have coded along from the start of the article, then proceed to install bootstrap.
Installing Bootstrap 4
Bootstrap, as you might know, is an open source toolkit for building very powerful, responsive and dynamic mobile-first user interfaces. It uses jquery (and popper sometimes) as a dependency. We can easily install bootstrap 4 on our angular project with one NPM command in our terminal.
After installation, you should see a bootstrap subfolder in the node_modules folder.. Add bootstrap to the angular.json file like so:
Then generate one new component , call it page1. (see instructions how above). Next, we create routes to navigate pages.
Routing
Remember when we started this project, we agreed for the installation prompt to include routing to the project. Now let us set up the already included routing up with routes. When you open the app routing module file, it should look exactly like this

To setup an route, first import the component where the route would come from then specify the route location as an object in the routes array like so:
At this stage, let us work on the presentation templates of the components using angular elements to ensure they are styled and responsive, there would not be a need to use the stylesheets as we are already using bootstrap for that.
- App Component
- Navbar Component
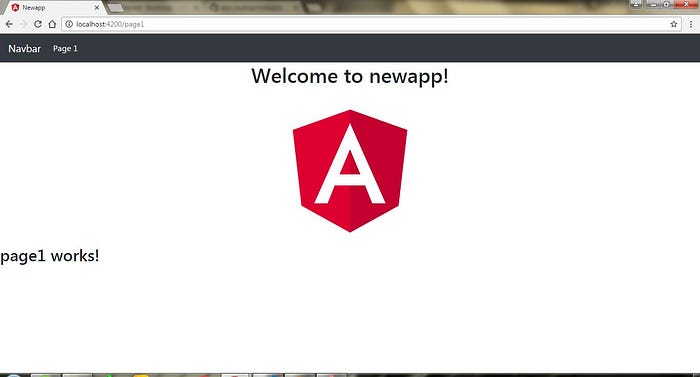
Run ng serve and visit localhost:4200 on a browser, if you have no errors, then you have successfully built an angular 7 application with bootstrap 4 styling. It should look exactly like this.
Conclusion
In this article, we got introduced to Angular 7, and starter concepts like installation, using the cli, angular components, generating components with cli, routing and bringing in and using third party dependencies like bootstrap easily. If you would like to know more about new features in Angular 7, you can take a look at this article.
Here is a link to the angular official documentation, and a link to bootstrap 4 documentation. The code to this tutorial project is open source on github here. If you have any questions, you can drop them in the comment section, I will be happy to help.
Follow me here for more articles and hold down the clap button if you enjoyed this.