Getting Started with React and WebAssembly using Hooks

WebAssembly (often abbreviated to Wasm) is a hot topic right now, and with good reason. It promises to usher in a new era of high-performance, desktop-grade web applications and opens web development up to a new set of languages and developers. If you’re a React developer, you may be wondering how to start adding Wasm to your application.
In this article we’ll discuss the following:
- A brief overview of WebAssembly and why we might use it with React.
- How to add Wasm development capabilities to our code-base.
- How we can use Wasm in our React application with hooks.
In the end, we’ll see that with only a minor amount of effort we can get set up to take advantage of Wasm’s capabilities in our React app.
What is WebAssembly?
At a high-level, WebAssembly is a recent addition to the small family of languages that can run in the browser. It’s an assembly-like language that delivers speed in a secure and portable package.
It’s fast because it’s a compiled language and the browser doesn’t need to do much to optimize and run our code. It’s secure because it runs in a sandbox, and can only access that which we explicitly allow it to access. It’s portable because Wasm modules can be used in a variety of languages, and can be built from a variety of languages.
If you’d like to go deeper, There are plenty of great resources focusing deeply on Wasm from a more technical perspective. I recommend this great series by Lin Clark.
But Why?
So why would we want to use WebAssembly in React?
Maybe there’s a piece of logic that needs to stay consistent with other apps, written in other languages. Maybe there’s a Rust Crate that you’d really love to use in your JS module. WebAssembly’s portability could help us there. Maybe we’d like to allow users to run untrusted code within our system to customize a report or add logic to an interaction. Seems like a good fit for Wasm’s sandboxing. Perhaps we just need something to go really fast, think identifying a bar-code in an image, collaborative design tools, video games or other thoughts.
Maybe we’re just curious 😺.
Introducing use-as-bind
Use-as-bind is a React hook that allows developers to load and instantiate WebAssembly created with AssemblyScript and the AsBind loader.
I created the use-as-bind hook as a part of a workshop that I ran where attendees integrated Wasm built with assembly-script into a number of environments. After the workshop, I felt that the hook might be useful to others and published it on NPM.
While you could skip the remainder of this article and start using the use-as-bind hook immediately, it may also be beneficial to find out how it works! What follows are the considerations that went into the creation of use-as-bind, and a tutorial showing the reader how to implement this hook on their own.
Decisions, Decisions
Before we start using WebAssembly in React there are three things that we’re going to need to decide on: 1.) how we’re going to write it, 2.) how we’re going to load it, and 3.) how we’re going to use it.
Writing our WASM
The first thing we’ll need to decide on is how we’re going to write our WebAssembly. There are many options here, but the three most popular options for writing one-off Wasm modules are (at the time of this writing), C, Rust, and AssemblyScript. Each of these options has its own pros and cons.
- C is great because it’s been around for a super long time, has great performance, a massive community, and excellent tooling. It also has a high learning curve coming from JS or TS.
- Rust is great because it has a fantastic compiler, memory safety, and a toolchain that makes integrating Wasm into your app super easy, like C it has a high learning curve coming from JS or TS.
- AssemblyScript is great because it’s a subset of TypeScript, and as JS devs, it’s probable that we’ve had some level of experience with TS at this point, it’s also great because it’s a purpose-built language meant for compiling to Wasm (though it can do other things too).
Given that we’re already using React and writing in JavaScript or TypeScript, AssemblyScript should be a natural fit and fairly accessible for anybody working in the codebase. Let’s go with that.
Loading our Wasm
The second is how we’re going to instantiate our WebAssembly. WebAssembly is downloaded as binary data and needs to be instantiated before it can be used. If we’re using AssemblyScript there are three popular options:
- The built-in WebAssembly module, which is available in the browser and offers low-level functionality.
- AssemblyScript Loader, which is meant to be used alongside AssemblyScript compiled Wasm. It offers methods for manipulating memory.
- AsBind, a loader built on top of AssemblyScript Loader which abstracts away the additional steps required to safely use strings and arrays of numbers with Wasm.
As-Bind lets us do all of the things the other loaders do, plus it makes it easy for us to use strings and arrays of numbers, so let’s use that.
Using our WASM
The third thing we should figure out is how we would like to bring the WebAssembly functionality we create into our React App. React has many interesting patterns around fetching data.
- We could create a service that gets called during the component life-cycle.
- We could use thunks, sagas, or observables for fetching as a side-effect in a Redux backed application.
- We could create a custom hook to fetch and instantiate our Wasm.
Let’s go with custom hooks! They are advantageous because they can be used with functional components and they don’t require any additional libraries beyond React.
Setting up our App
Let’s walk through setting up a React Application with AssemblyScript and AsBind in six quick steps.
- Set up our React application
$ npx create-react-app wasm-hook-example
$ cd wasm-hook-example
2. Install AssemblyScript and AsBind
$ npm i -D assemblyscript
$ npm i as-bind
3. Set up AssemblyScript
$ mkdir assembly
$ touch assembly/tsconfig.json
$ touch assembly/index.ts
4. Add the following to assembly/tsconfig.json
5. Add the following to assembly/index.ts
Yeah, this is going to add two strings together, and while that isn’t very exciting, it’s useful to ensure that AsBind works as expected.
6. Add the following to your package.json file
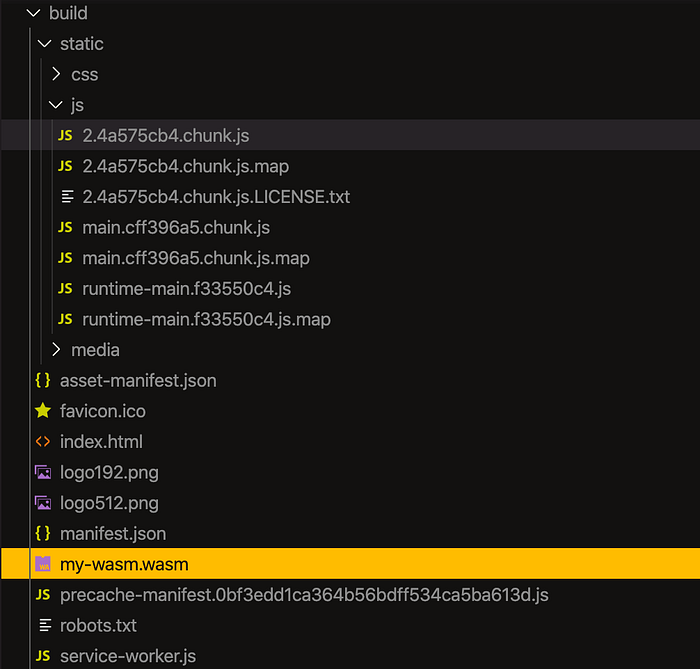
As you can see we’ve renamed a build to build:react and added a build:wasm script. What this is going to do is run the AssemblyScript compiler with as-bind.ts and our index.ts file as inputs, and build us an optimized Wasm file in our public folder named my-wasm.wasm. Lastly, we’ve added a new build script, which builds both our Wasm files and our React app.
Let’s run it and take a look around.
$ npm run buildWe now have a build folder with our incredible app inside, and in the root folder we can find our Wasm files.
Great, it builds! Now to use it.
Setting up our Custom Hook
Let’s start by creating a new file for our hook
$ touch src/useWasm.jsand inside we’ll set it up like this:
This is a pretty straight-forward hook, we’ll get a state inside using useState, which we’ll return, and in the meantime, we’ll also perform a side-effect with the useEffect hook. This hook is going to fetch our Wasm file from the public directory, instantiate it with AsBind, and then update our state, which in turn updates our view.
Now all that’s left is to hook it into our app and use it:
We’ve set the hook up to run in our functional AppComponent and when the instance is loaded we call the addString method on our WebAssembly module.
So, with only a small amount of effort, we were able to get some WebAssembly running in our React application! We could probably leave this here and in most cases be fine, but what if we’ve got multiple Wasm files to load, or the files are big enough that the user may navigate away before loading is complete? Let’s refine our hook to make it more robust and re-usable.
One Hook, Many Files
The first thing we’re likely to want to do is to allow our hook to load different Wasm files with different capabilities. Doing this will make our hook re-usable within our application, and in any other applications, we want to add it to. To do this we’re going to need to give our hook the ability to take arguments. Not only will our Wasm files have different names, but they’ll also have different requirements. Each Wasm file can define functions that it expects to receive from the instantiating environment. With AsBind we can pass these functions to the instantiate method using the second argument.
Awesome, now we can take arguments and use our hook in different situations, but what if we wanted to dynamically load things with it? Right now we’ve still got an empty array as the second argument for useEffect, which means that that effect will pretty much never re-run. Likely, it should re-run every time one of the arguments changes, so let’s add those arguments to useEffect’s dependencies.
Finally, let’s update our our App.js file to supply the arguments we’re expecting.
Updating the API
Ok, that’s cool, now we can dynamically load different Wasm files if we want to and give them capabilities through the imports object, but the API feels a bit unpolished, after all, it’s simply returning null before the WebAssembly has been instantiated. Let’s be a bit more explicit by adding an initial state and updating it when the WebAssembly has instantiated.
And we’ll update our App.js file to use the new API:
Adding Error Handling
The last thing we’re going to need is a bit of error handling. There are a couple of places in the hook where things can go terribly terribly wrong, specifically, the fetch request may not find anything, or the thing that it finds may not be a well-formed .wasm file. If either of these two things happen we will have an error. One option would be to let the error happen, crashing the parent application. Another option is to catch the error and present it to the parent application, allowing it to do something based on the error. To do this we’ll need a new key for our state, as well as some extra logic around the fetching and instantiating of our Wasm.
Here we’ve got a new error key in our state, and our fetchWasm function will update the error key if an error is caught while we’re loading and instantiating our .wasm file. While this will work if we load a malformed .wasm file, it won’t work if we attempt to fetch a file that isn’t there, as fetch won’t throw an error for that case. Let’s make another update:
Now, if our fetch doesn’t find a file, we’ll throw an error and trigger the catch block. That’s looking pretty good so far, but there’s just one other thing — Wasm files can be pretty big, and can potentially take some time to load. There’s a chance that a user may visit a page with a component that uses our hook, and then leave before the Wasm has loaded, but after the request has been made. This is going to result in an annoying error message and possibly a memory leak. We can avoid this situation by using an AbortController.
Now when our component gets destroyed and our hook gets cleaned up our AbortController will abort the fetch request and stop our state from being set, averting disaster. We’ll need to update our component one last time to take advantage of our new error state:
All done!
To summarize, we’ve set up AssemblyScript and AsBind to build and instantiate our WebAssembly, built a React hook to load our Wasm files into our React application, and added error handling to deal with possible exceptions. Now go write some AssemblyScript that does more than add strings together! 🎉 🎉 🎉
If this seems like a lot and you’d rather use an external lib, I’ve created a package called use-as-bind, which implements everything described in this article.