Home Automation using Google Assistant + Dialogflow + Firebase + ESP8266/Wemos (Part 1)(Updated)
The tutorial has been updated with latest changes to Firebase Cloud Functions SDK v1.0 and Dialogflow.

Voice is playing an important role in this ‘AI First’ era of computing, and NLU models in the form of Google Assistant, Amazon Alexa, Bixby, etc., have brought the power of voice in the consumer market via smartphones, smart appliances like TVs, speakers, etc.
Today, we’ll be experimenting with the Google Assistant that is available now on almost all the devices running Marshmallow and the later Android versions. We are building a simple automated bulb which goes on and off based on user requests from the Google Assistant. Complete code for this demo is available here. There is a YouTube video series covering all the four parts. Check it out here. Also, don’t forget to subscribe to the channel :P
Requirements
- Google Home/Smartphone supporting Google Assistant/Raspberry Pi (Pi setup here)
- ESP8266 or Wemos d1 mini
- One bulb with holder and 2/3 pin socket, one 3.3-5V Relay, few jumper wires.
Project Setup
- Setting up a Google Assistant app in Actions on Google Console.
- Setting up Agent in Dialogflow console.
- Write a webhook using Firebase cloud function HTTP trigger.
- Circuit connections on Hardware side.
- Writing the code on ESP8266.
1. Setting up Google Assistant app in Actions on Google console and Dialogflow agent (part 1):
- Go to actions on google console and click on Add/import project

Give a suitable name to your project and choose your country. Click Create Project after all the details are filled.
2. Open the new project you created and click on BUILD under Dialogflow from the other 3 available options.

3. From the dialog window that pops up, click on Create Actions on Dialogflow.
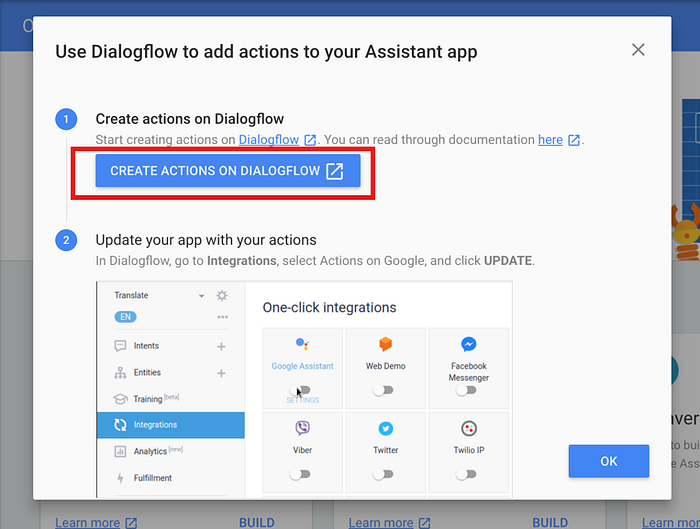
This will redirect you to Dialogflow console where we fill in the basic details of our agent. It will ask you for your Google credentials. Use the same email address under which you have created the project in Actions on google console.
4. In the Dialogflow console, give your agent a name, add a description about what it does, keep language as English — en and select your desired timezone. SAVE the details.

Once the details are saved, you will be redirected to the Intents section. We’ll come back to the intents later.
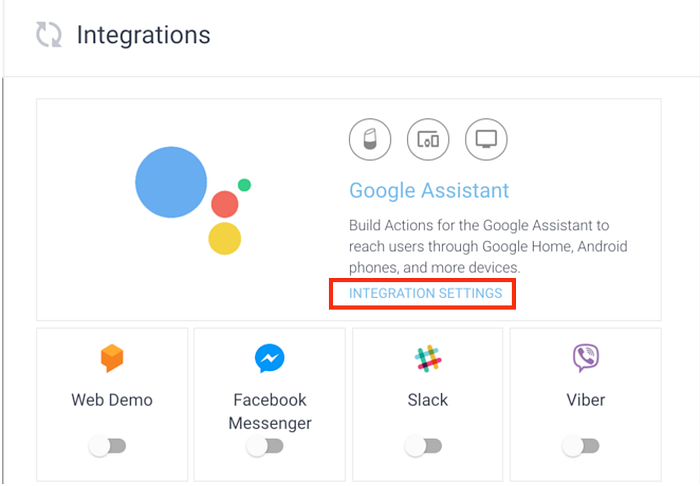
5. From the options in the left side, select Integrations. Under One click integrations you will see Google Assistant. Click on INTEGRATED SETTINGS.
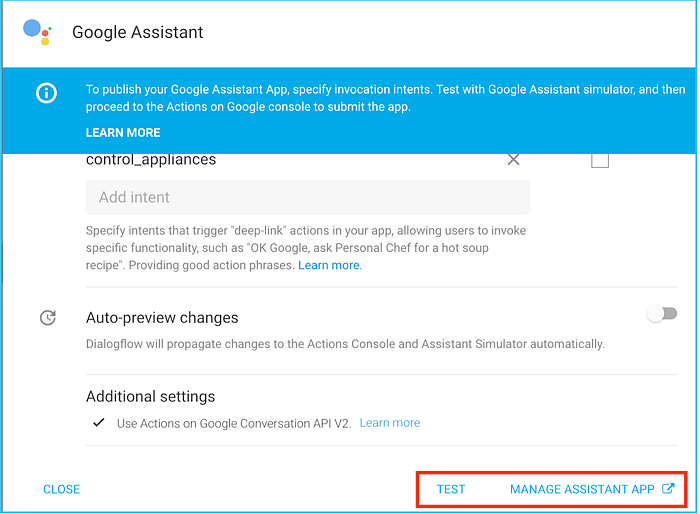
Inside the new dialog that pops up, click TEST or MANAGE ASSISTANT APP, if any changes are required. button. Authorize the project if asked to do so. You have now successfully linked your agent with your actions on google project!
Once the draft is successfully updated a confirmation screen comes up. Click on VISIT CONSOLE for further setup of the project.

