Horizontal scroll animations in React Native
Link <Animated> with <ScrollView> to create a nice navigation UI animation in React Native
What we will be building

What you will need
- React Native
- Simulator
- No third party libraries required :)
Creating Screen component with <Animated>
First, import Animated, Dimensions, ScrollView, StyleSheet, Text, View from “react-native” .
Next, create a component that will be treated as a screen or a view.
We are using Animated.View here because we are going to animate that wrapper component.
That width ofscrollPage style and transitionAnimation(props.index) are important because we are going to interpolate horizontal scrolling values to multiple animation values. In other words, we are going to track where the screen is and animate the screen component based on that value.
It’s one of the things that are tricky to explain in words, but it is the key concept to understand for this to work.
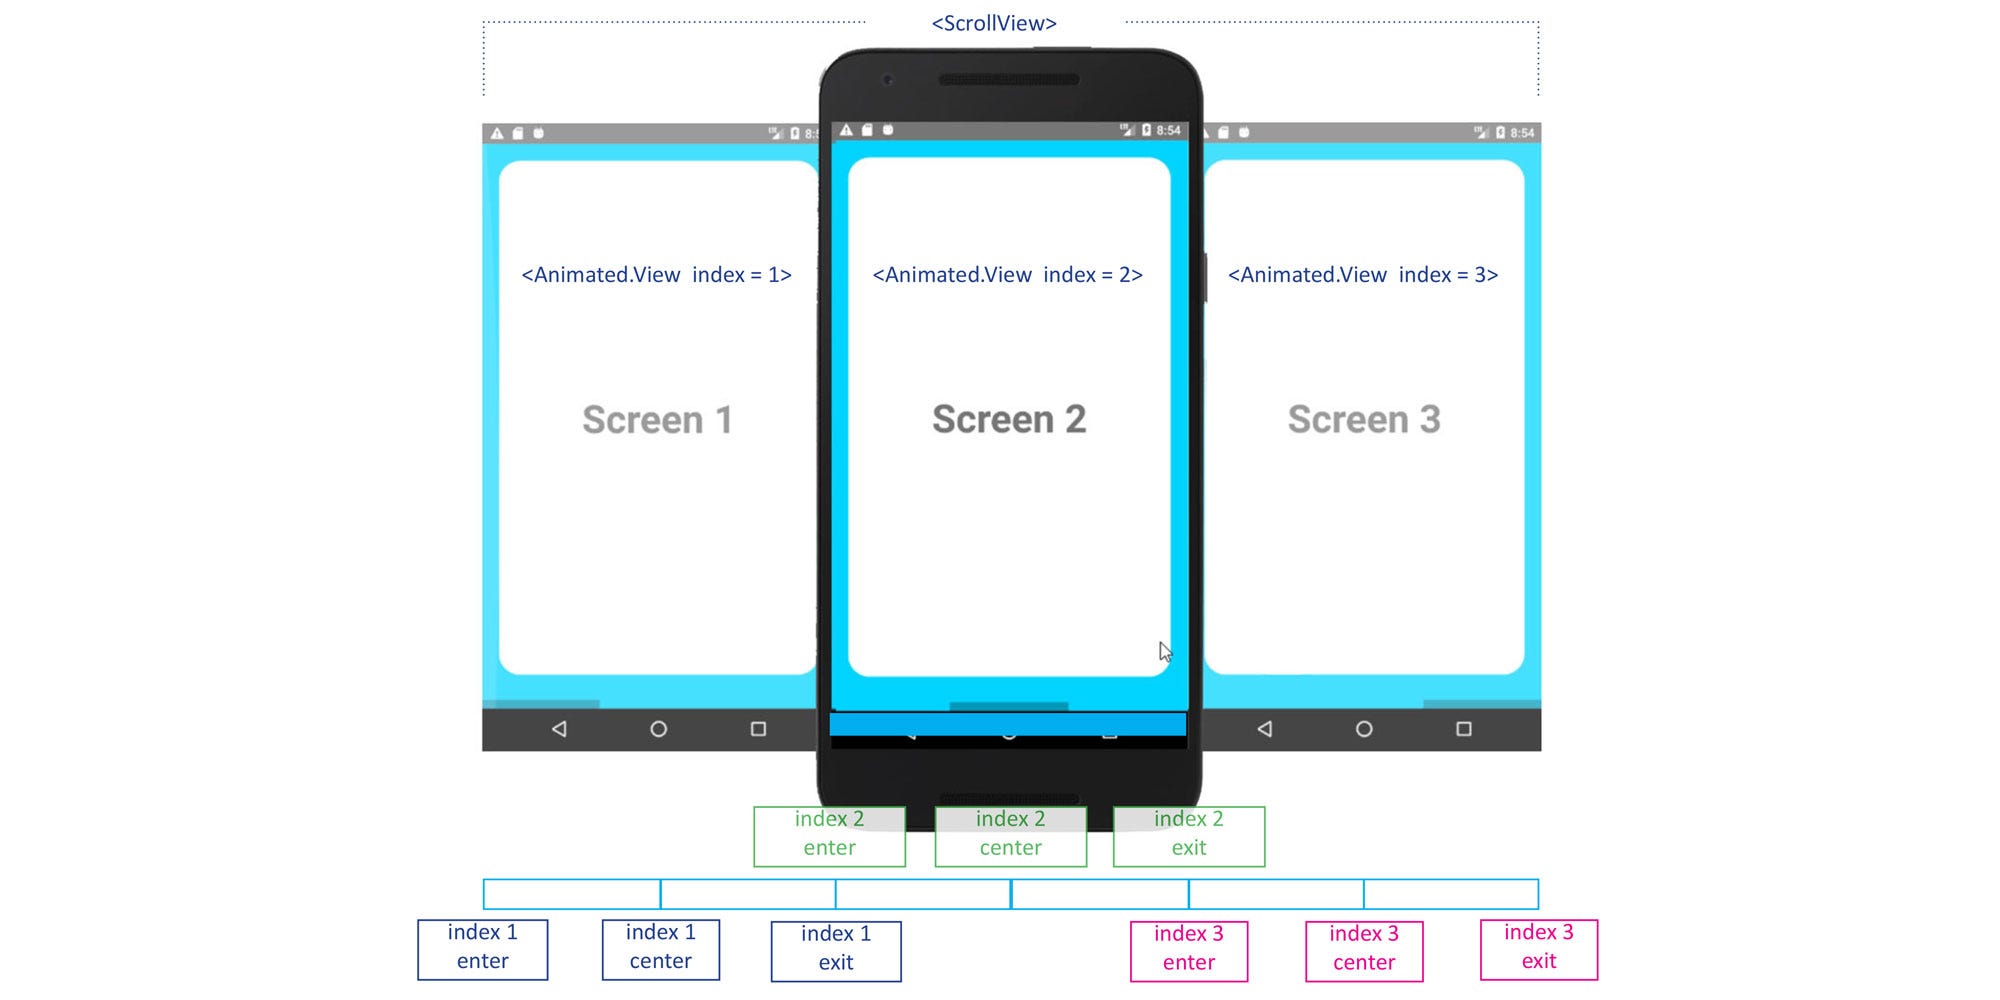
Basically, we link animations based on the value of the scroll x. Say the device width is 100, when user swipes to the left and gets to the next screen, we can express those as 100 x 2, 100 x 3, and so on …
So if we start the animation at 0 and end it at 200, we can write the input range and output range like this,
If the screen width was 100, it’d be [0, 100, 200] for index = 1, and [100, 200, 300] for index = 2 . When the scroll position is at 150, first screen is half way done exiting, and the second screen is half way done entering.
Adding animations
Since they are all set up, it is time to write the animations. We need index value as a prop, so we can write a function that returns an array of transform animations like this,
Notice the Animated.Value of x offset, which is to track the input and output values for the animations. We don’t need three of them because the inputRange (device width) is the same for all three animations.
scale is for the size of the Screen component and rotateX and rotateY are for rotation. As you can see, transform accepts an array of objects, and the rotate transformations require a string expressed in degrees.
I won’t talk about Animated library in depth here but if you’d like to know more about that, please read my previous blog post or refer to FB’s official page.
Linking Animations to ScrollView
This is the last step! We are going to useScrollView to integrate touch locking “responder” system. They are a few props that we need to pass in to make this work.
Let’s start with scrollEventThrottle . That prop is responsible for controlling “frequency” of the event.
horizontal enables horizontal scrolling. pagingEnabled moves scrollView to nearest multiple of it’s own width (like snapping to the grid).
onScroll is where we can pass the animation. We pass xOffset we declared earlier and set useNativeDriver to true . This is necessary because this allows native code to perform the animation on the UI thread without having to convert the Javascript on every frame. If this was set tofalse , the Screen animations would be lagging.
That’s about it! If you wrote everything correctly, you will see this,
Conclusion
This would be a nice UI animation if you were planning to use it for a simple navigation. However, if you want this for a very long list of items, there are few things I’d like to note.
The ScrollView component renders all its child components. Therefore, if you were to work with a long list, there might be a performance downside.
If that’s the case, consider using FlatList instead, which renders items lazily to save memory and processing time. You would have to write a different inputRange since FlatList removes items that scroll way off screen.
I think this is pretty neat UI animation that’s pretty simple to use. As always, I hope this tutorial was helpful to your project. Until my next blog,
Happy coding!
Resources
This tutorial was requested by Akshay Kadam. The original design was by Zachary Gibson. Thanks for the request, it was really fun deciphering how it was written :)