How I deployed My Sails ⛵️ v1.0 App on Heroku
Hey, it’s me again(missed me? 😃). So I successfully deployed a web service built in Sails to Heroku and I want to show you how I did it if such a thing is of interest to you.
Spoiler Alert 😥: the deployment was super easy thanks to the awesome people at both Sails and Heroku.
Prologue
So let’s say you already created a REST web service in Sails using:
sails new awesome-rest-web-service --no-frontendand you already have a Heroku app created either from the web dashboard or from the Heroku CLI tool.
Also, you are using Github for hosting your codebase and you’ve already connected Github to Heroku(kind of like my favorite workflow 😏)
The Meat 🍖
Because Sails is awesome, it has already configured what will happen when a PaaS like Heroku run:
npm run starton your NodeJS application.
Knowing that the sails CLI tool won’t be available on such services Sails declared this in package.json:
"start": "NODE_ENV=production node app.js"Ain’t that cool? All you have to edit for your app to be deployed on Heroku is in /config/env/production.js
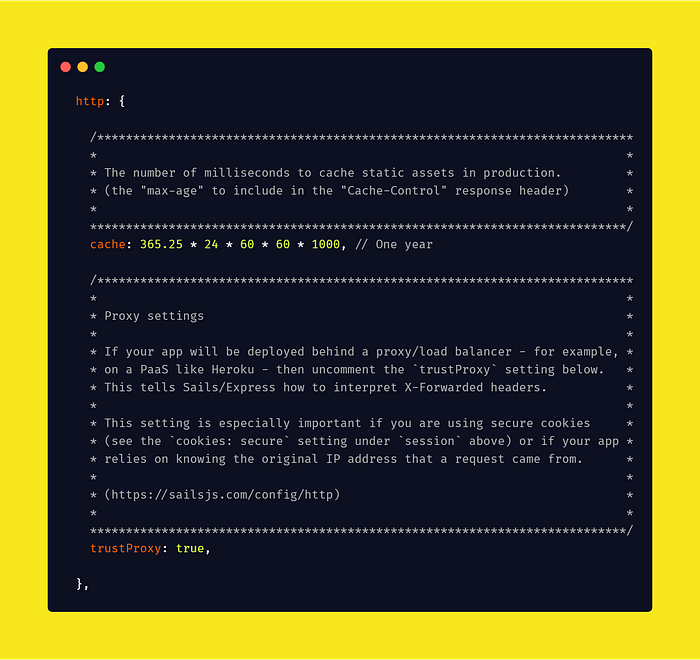
If your app will be deployed behind a proxy/load balancer — for example, on a PaaS like Heroku — then uncomment the `trustProxy` setting below. This tells Sails/Express how to interpret X-Forwarded headers. — Comment in production.js
I guess the above says everything right? If not let’s go on together then:
Look for the below section in production.js:

Scan for the line:
// trustProxy: trueAll you have to do is uncomment it. So you end up with something like this:
Whitelisting your app URL(s)
Because Sails comes with the support of web sockets out of the box, you need to tell it which URL(s) have the permission to open sockets. Sails enforce this for security reasons and your app won’t deploy if you don’t do this step. Here is the message Sails will send when you deploy without whitelisting URL(s):
No `sails.config.sockets.onlyAllowOrigins` or `sails.config.sockets.beforeConnectSo let’s whitelist our app’s URL(s). Look for and uncomment the below line in config/env/production.js:
// onlyAllowOrigins: [// 'https://example.com',// 'https://staging.example.com',// ],
So if let’s say your app would be deployed on Heroku subdomain for staging and your custom domain for production, the above line would now look like:
onlyAllowOrigins: ['https://Your_APP_Name.com',https://Your_APP_Name.com',],
You can whitelist any number of URL(s) as you have need for
It’s A Wrap
From here on, just save up and push to Github then go on deploying on Heroku and your web service should be live via your Heroku app link.
Psst: If you encounter any problem using my description above, do leave a comment and I am sure we could figure it out together.
Happy deploying 🚀 🚀 🚀
The folks at Dawn Lab made those screenshots possible. Like them? you could use them too.

