We can think of Angular Components like LEGO pieces. We create a component once but can use them multiple times in different parts of our website. Writing reusable code pieces? Sounds fun :)
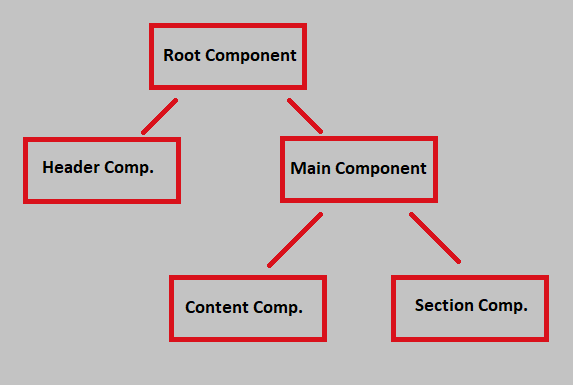
An Angular app is a tree structure consisting of all those components that we create, like how we make a Lego Structure from little Lego pieces.
Components are the most basic UI building block of an Angular app. An Angular app contains a tree of Angular components.— Angular official docs
So this is basically what an Angular Component is, but that’s not all. In this article, you will find answers to the following questions:
- What are the tasks of a component?
- What is inside of a component?
- How does a component work?
- What is ngOnInit?
If you don’t know how to install Angular on your machine:
Tasks of a Component
The main tasks of a component are:
- Displaying a specific page/section and its data with the support of Interpolation, Directives, and Pipes
- Binding data between the view and the model
As developers, we should pay attention to assign only the tasks I mentioned above to a component, in terms of the separation of concerns rule and also for a cleaner code.
What is inside of a component?
A component contains (mostly) 3 parts:
- Template File— HTML View
- TypeScript File — Model
- Style File — CSS

The Folder (app) is our Component Folder, which contains HTML, CSS and TS files. Spec.ts is for testing, and you can ignore module.ts for now.
So each component has its own HTML structure, style (CSS) and functionality (TS). But how does a component work actually?
We should carefully name our Folders when creating an Angular App, otherwise, we get lost inside a bigger project.
How does a component work?
Well, the answer lies on inside the app.component.ts:

We have here an ordinary TypeScript class. But in order to use it as a component:
- First of all, we import Component from the @ angular/core library, so we can create an Angular Component
- The @ Component decorator marks the TS class as a Component and allows us to add the following metadata
- The selector is for calling the component inside other HTML files of the project, as an HTML tag:
<app-root> </app-root> - TemplateUrl is where the HTML View of the component is.
- style URLs (can be more than 1) is where the style CSS of the component is.
- Finally, we export the class(component) so that we can call it inside the app.module or other places in the project.
So these steps create an Angular component. Now let’s see how to use it…
After creating the component, we must save it inside the App Module, under declarations:

Finally, we can call the component with its selector name, and then we should be able to see it on the webpage:

Since Angular is a modular Framework, every component, service and other Angular features must be saved inside the App Module (or a custom module), so we can use them anywhere in the project.
So much effort for a little component?
Don’t worry, all of these steps can be done automatically by Angular CLI, but you can edit them manually if needed.
What is ngOnInit?
OK, now you learned how to create a component. When you create a new component, you will realize that a method named ngOnInit ( ) appears below the constructor:
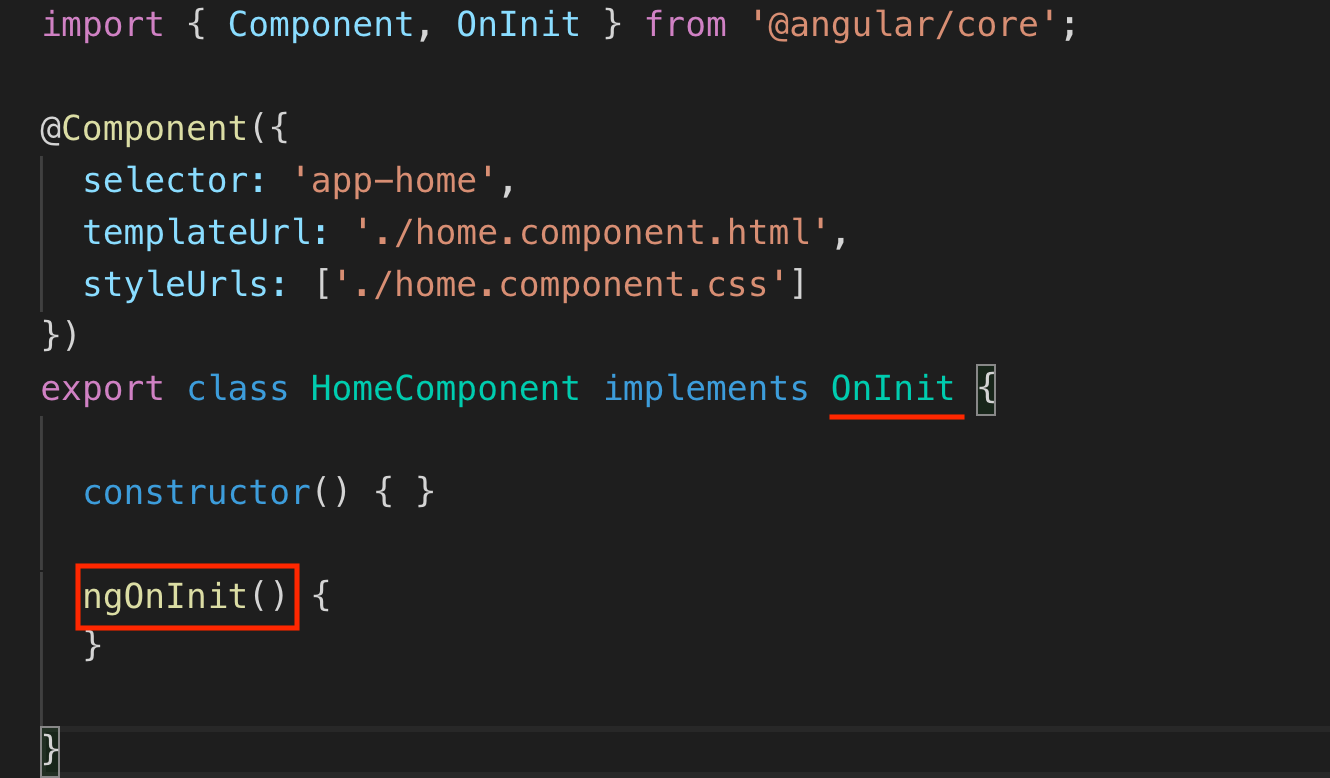
Every component has a lifecycle. The ngOnInit() method is called immediately after Angular finishes setting up the component. In other words, Angular is telling us that “Component is ready”.
What we can do inside the ngOnInit() method is that some operations like fetching data, or something we want to see immediately on page load. It is not recommended to do these kinds of operations inside the constructor, so we have ngOnInit instead.
In Angular, the constructor should only be responsible for dependency injection.
According to Angular official documents, we need ngOnInit() method for:
- To perform complex initializations shortly after construction.
- To set up the component after Angular sets the input properties.
An
ngOnInit()is a good place for a component to fetch its initial data. — Angular official docs
One of the big steps of learning Angular is to know how to create components and use them efficiently. If you have any questions, don’t hesitate to ask them in the comment section. I hope you find this article helpful.
If you want to learn more about Web Development, feel free to follow me on Youtube!
Thank you for your time & support!

