Polymer Skeleton: Webpack, PostCSS, Service Workers and the future.
Bring developers to the next level.

What is Polymer?
Polymer is a JavaScript library that helps you create custom reusable HTML elements, and use them to build performant, maintainable apps.
Finally Polymer 3 and finally the compatibility layer we needed to use Webpack and modern web development tools.
We tried to build up a simple (but really accurate) skeleton for Polymer and Webpack, with the nice presence of PostCSS and some other useful tools.
Polymer Skeleton
This is not a create-react-app like tool, but a repository where to start building your Polymer application, insta-ready for production.
But let’s dive in what we included in the “bundle”:
- Webpack
- webpack-dev-server
- PostCSS
- WorkboxJs for Service Workers generation
moduleandnomodulebuild for using module in modern browsers- standard-version for releases
- load vendor libraries (webcomponents polifylls) from
node_modulesusing Webpack - and just checkout the package.json for details 😁
We also tried to define an opinionated folder structure for a pleasant development. We divided dumb components from stateful components.
This is necessary if you don’t want to pollute reusable components with some state implementation (like Redux).
HTML template
The first thing for which the Polymer community was struggling, is the new “js approach” to render the HTML template, using a static template() method within the component’s class. This because HTML import will not be a standard and Polymer 3 will be more Web Components oriented, and so js-oriented.

This could lead to understandable problems for designers while developing HTML (similar, but not the same, with JSX), and this is why folks have chosen Polymer at the beginning: you could put everything in a HTML file and import it as JS file.
We easily discovered that Webpack can help us handle this problem very well using a text-loader: simply load, as Webpack dependency, the HTML template as text and then print it using the template() static method. Contrary to “popular belief”, this is actually way better and permits the designers to focus only on HTML files for creating mockups.
PostCSS. Enable Babel for CSS.
The PostCSS implementation is pratically the same of the HTML. We load the .postcss files using the text-loader, pass them through
the postcss-loader that will load the plugins reading the postcss.config.js and after all we can print the computed styles just before the HTML template, using again the template() method. PostCSS, if you still don’t know, is a processor for CSS that is a bit more versatile and fast than SASS and other pre/postprocessors (a bit, yes 😅). There are a bunch of awesome plugins you can use, like cssnext, that literally works like Babel, but for CSS.

Babel and transpilation
We are transpiling the code with the babel-env and because of this we need to import the custom-elements-es5-adapter.js. This is a known issue with
the Web Components v1 specification and ES6 classes: they are not supported by the polyfill (the webcomponentsjs polyfill) if transpiled, because components need to be classes. The adapter just makes this work also using a transpiled version of the application.
WorkboxJs (Service Workers)
Workbox is our game changer in the Service Workers world. It simply creates the Service Workers for us and can be added as Webpack plugin. Of course we can improve this task, but actually the standard configuration works pretty well just to have an initial offline support. You can check out my article about this: WorkboxJs produces Service Workers for you. Also through Webpack.
Developing with webpack-dev-server
Embracing the Webpack environment, we also decided to use the webpack-dev-server during the development. This allows us to use hot reload, error layer and every cool feature of it.
For example, using the copy-webpack-plugin we are able to load the vendor dependencies from the node_modules folder, during the development, in memory, without polluting the src folder where we don’t want compiled files at all. We are using it mostly for “global” dependencies such as the WebComponents polyfills.

<script type="module">
Actually I lied a bit talking about the transpilation of the bundle to ES5. Browsers that support Service Workers, also supports ES6 Modules, and if they support modules they also support the new type="module" spec for scripts import and of course a lot of new ES6 features with it. With the help of Webpack, Babel and the babel-env plugin we are able to create two types of bundle to handle both browsers with support for the new type of script and not.
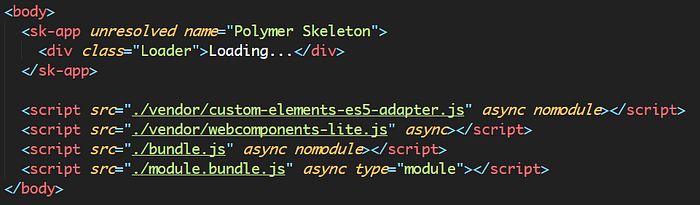
This can happen with the help of the attribute nomodule, that’s also supported by these browsers and can help us not to load two versions of the bundle. Adding this attribute we can literally tell to new browsers not to load this files.
Older browsers, instead, don’t support the type="module" attribute and will not load the modules. Also, not knowing the nomodule attribute, they will load as usually the transpiled <script> (learn more by watching the #15 Micro Tip). Done, we are now shipping to our users the correct version of the bundle suited for their browsers.
WCT and test
Testing is one of the most tedious tasks during front-end development, and because of this the Polymer guys have built the web-component-tester (WCT) time ago. It’s a wrapper of some useful tools for doing functional testing (and units, if you want) easily, in the browser. You can learn more from the repository.
WCT is included with the Polymer Skeleton and it’s ready to run your tests.
A little note about this: WCT actually is not ready for NPM-only projects, but with a small trick, we are able to make it work as expected.
Of course, you can use whatever test runner you want.
Browser support
The support is for every modern browser. That’s it. We have transpilation both for JavaScript and CSS, we have polyfills for browsers that don’t support things like Shadow DOM and Custom Elements (yet).
An important note: IE 11 and older browsers are not supported by this stack. This because we are intensively using the platform, and not everything can be polyfilled.
A forked Polymer
If you check the package.json of the skeleton you will notice that we are not downloading the Polymer 3.0-pre package published on NPM. Instead, we are using a forked version in which we disabled and removed the evil flat flag within the package.json. Flattening is not required (and actually bad) when you load dependencies from the node_modules with a tool like Webpack. This is the only change we made, for the rest the forked Polymer is up to date with the current 3.0-preview branch of the Polymer official repository.
ShadowDOM or ShadyDOM?
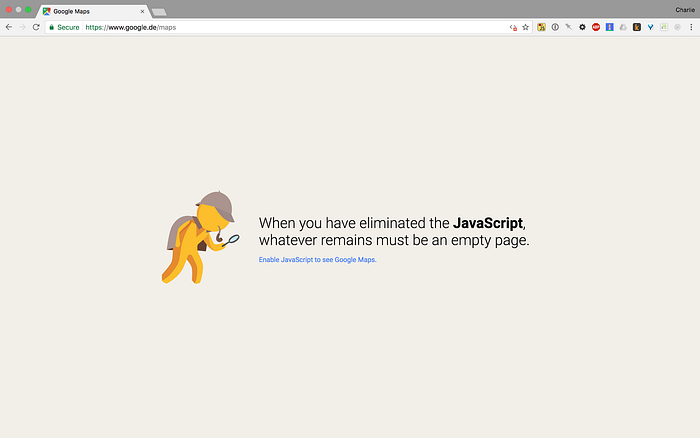
Polymer 3 is built for the ShadowDOM, and you should use it whenever possible. Polyfill is good for nowadays and will be nice to remove it when the spec will be developed by every browser. But of course there are cases where you can’t use the ShadowDOM at all, mainly for a problem called: search engines indexing. Hard to solve, really hard to solve since many of the engine’s bots are not running JavaScript when scraping your web app and this a big problem for your content. Always a blank page, or a CSS loader that runs forever. This is the world without JavaScript.
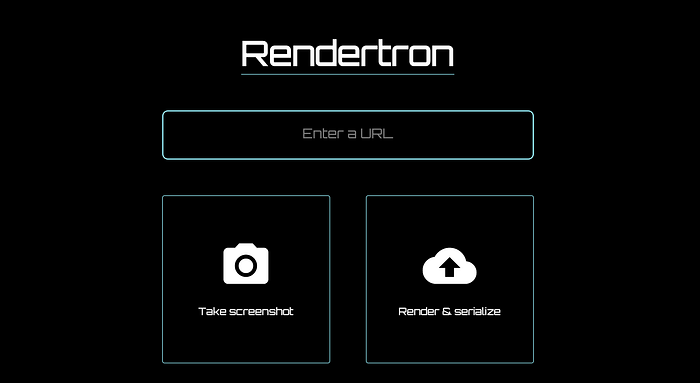
This is why today we have tools like Rendertron or Puppeteer, respectively a renderer that uses Chrome headless under the hood and a NodeJs interface to run Chrome headless (or not) programmatically. With these tools we can serve to the dumb bots a rich web page, with content already loaded and pretty nice for indexing.
But of course there is at least one problem: these tools are still not good for parsing the ShadowDOM. Here is why, maybe sometimes, you need to enable the ShadyDOM for this work. In fact, the webpcomponents-lite.js polyfill is ready to make this happen. You can simply add an attribute within the <script> tag of the polyfill recalling the ShadyDOM:
<script src="./vendor/webcomponents-lite.js shadydom></script>
Now your app will load the ShadyDOM polyfill instead of the ShadowDOM. Enabling ShadyDOM, CSS will be global again, so you should pay attention if you are switching the polyfill on an existing application. Also if you are using the shadowRoot selector within your components, the switch is going to bring you problems, of course.
Yeoman generator
We built a little Yeoman generator to simplify the process of starting a new project. You can install it now: PolymerX/generator-polymerx.
It helps you start a project with the Polymer Skeleton but also let you create a single Polymer element for your app: a template.html, a style.postcss and the index.js that exports the element class with the name you choose.
Can I use it in production?
Yes and no. Polymer 3, currently, is nothing more than Polymer 2 on NPM. The APIs are the same but of course Polymer 3 is still in pre, and this is why we tagged the first Polymer Skeleton release as beta. This is up to you.
This is a really high level overview of the Polymer Skeleton. You can check out the repository for more details: PolymerX/polymer-skeleton. We are also available for chatting and you can reach us on Twitter, me as @lasalefamine and Mattia Astorino as @equinusocio.
Raise an issue if you have any problems or want to improve the skeleton in some way. We really appreciate feedbacks! 👍