Practical Azure: Authenticate Angular App using Azure AD B2C
The objective of this post is to give the readers a practical understanding of Azure AD B2C by authenticating an Angular application using B2C.
Getting Started
Let’s say we are developing a single page web application and decide to add authentication support to the application. After some research, we found that there are multiple ways to do this:
- We can collect and store user credentials in our database and validate users against it. Here, it's our job to secure and scale our database.
- Outsource the authentication part of our app to a third-party identity provider like Azure Active Directory or Amazon Cognito and focus on our application rather than the authentication complexity.
Based on the complexity of authentication, we decided to go with the second option and choose Azure Active Directory as our identity provider. But when we start reading more about Azure Active Directory, we were confused to find that they offer three providers?

What is Active Directory?
Active Directory is the directory service provided by Microsoft that helps to organize your company’s users, computers, and more. Think of an active directory as the “contacts” app on your mobile device. Your individual contacts would be the “objects”, and their address, email, and phone information for each contact would be the “values” in your active directory. The “objects” aren’t just limited to people and users, they can also contain “group objects” such as computers, printers, and so forth.
Azure AD (Azure Active Directory)
Azure AD is a directory service with the goal of serving organizations and their needs for identity management in the cloud. You develop against Azure AD, you can secure your applications with it — their users in Azure AD tenants can use it. Your application is targeted for a specific organization or multiple organizations using Azure AD (Office 365). In a nutshell, it allows organizations to grant access to their applications and services for users within their organization.
Azure AD B2B (Business 2 Business)
This allows organizations to grant access to their applications and services for users from other tenants. From your app perspective, nothing changes; it’s still the same Azure AD app. Azure AD B2B has an API that can be used to create flows for the invitation of users from another directory but is not changing your app design, etc.
Azure AD B2C (Business 2 Consumers)
Azure AD B2C is another service built on the same technology but is not the same in functionality as Azure AD. Azure AD B2C’s goal is to build a directory for consumer applications where users can register with e-mail ID or social providers like Google, FB, MSA, known as “Federation Gateway”. The goal for Azure AD B2C is to allow organizations to manage a single directory of customer identities shared among all applications (i.e. single sign-on). The advantage here is that users can use their local accounts or social accounts for identity purposes.
If you are still confused check this out.
Since we want our web application to be targeting consumers and allowing them to log in to the application using their email address or any social identity providers, we chose B2C as our identity provider. Now, with some decisions made, let’s configure our B2C.
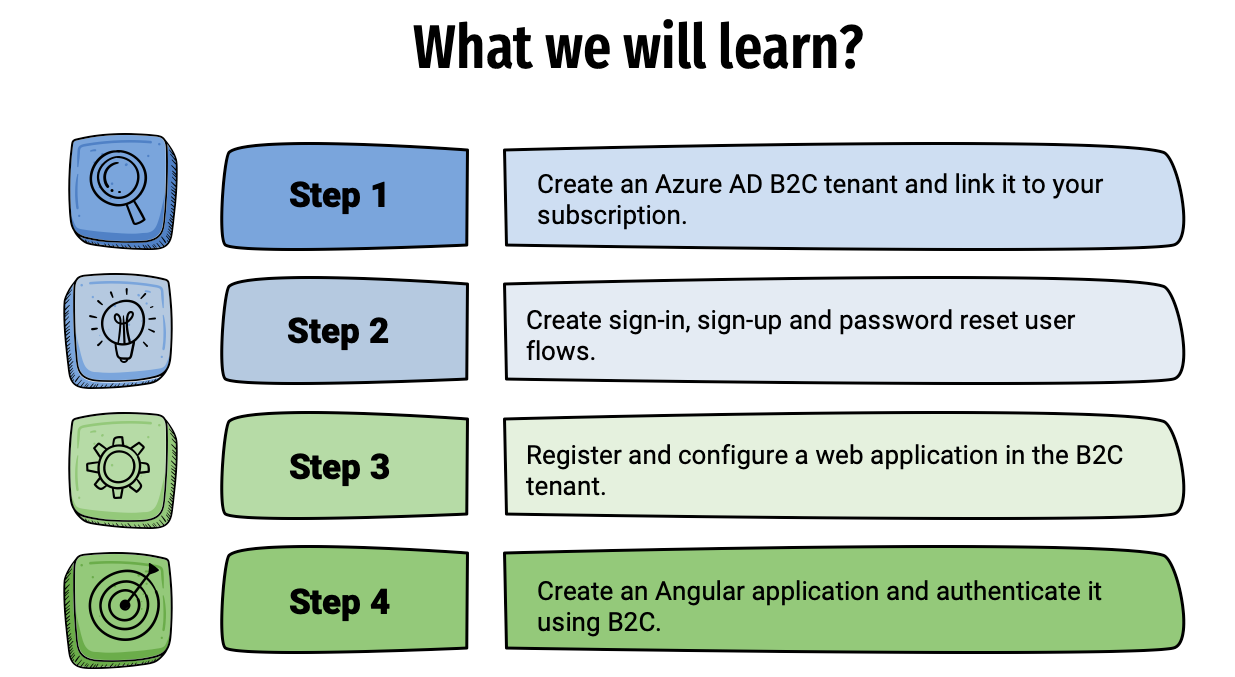
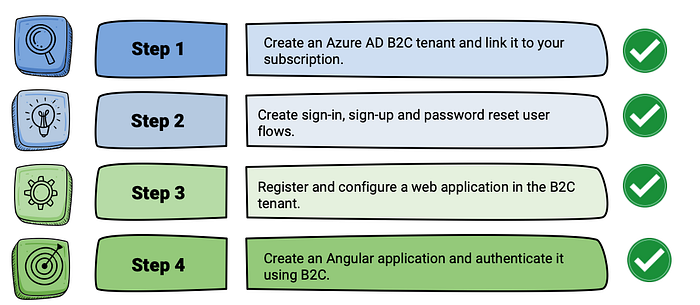
Step 1: Create an Azure AD B2C tenant and link it to the subscription
Create an Azure AD B2C Tenant
Login to Azure portal -> (+) Resource -> search B2C
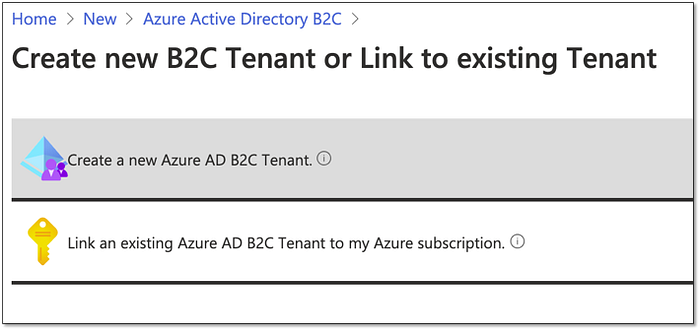
Now we have created our B2C Tenant, but we need to link this tenant to a subscription (that's how Microsoft can charge us).
- Login to Azure Portal
- Add resource and select B2C, click “Create”, and choose “Link an existing Azure AD B2C tenant to my Azure subscription”.
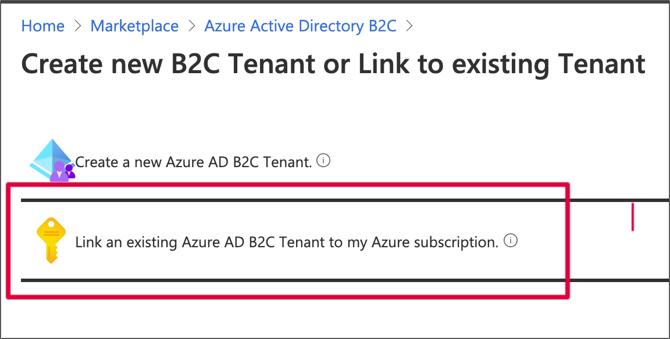
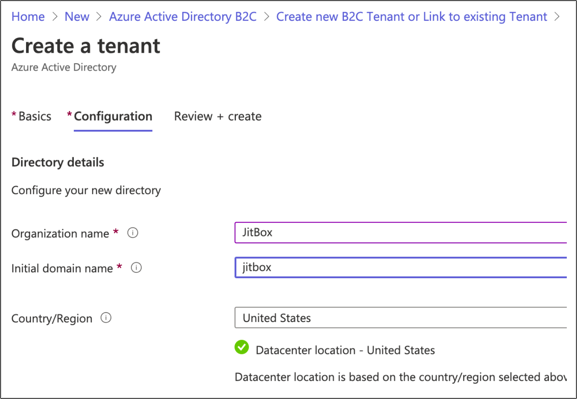
Now choose the tenant we created earlier and associate it with your subscription.
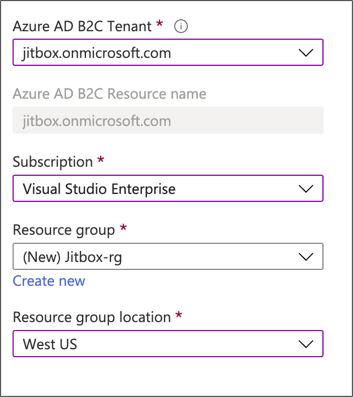
Now we have linked our tenant to a subscription and resource group. Let’s create some basic user flows.
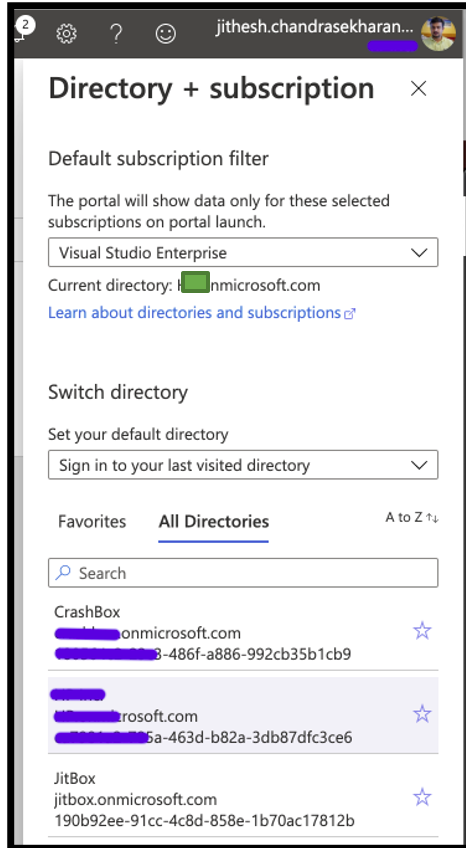
Please note: Tenant and directory are used interchangeably. Both denote your active directory in the cloud.
Now if you check your directories you can see the new active directory created for you. In my case, there are three directories.
Now with our B2C tenant ready, let’s go to our second step of creating user flows.
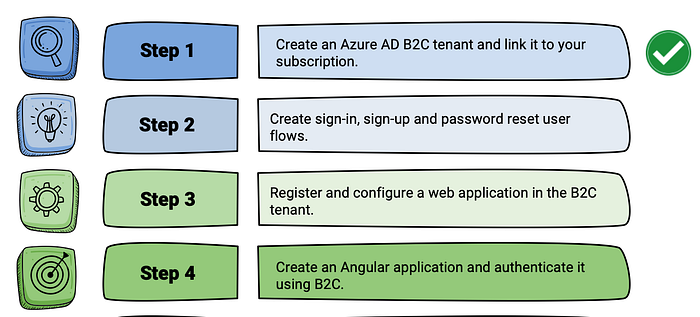
Step 2: Create a sign-in, sign-up, and password reset user flows.
User Flows
Azure AD B2C Tenant can be considered to be like a user-pool and multiple applications can be registered in this tenant. We can create a standard user flow that all apps can share, or we can create an individual user flow for each app. Each request sent to Azure AD B2C specifies a user flow. A user flow controls the behavior of how your client application interacts with Azure AD B2C. It’s essentially the route a user takes.
When a user clicks the register button on a website homepage, this would be configured to trigger the sign-up user flow. This user flow will then redirect the user to the sign-up page provided by B2C. However, if your user clicked on your login button, this would be configured to trigger a login user flow (which then directs them to the sign-in page).
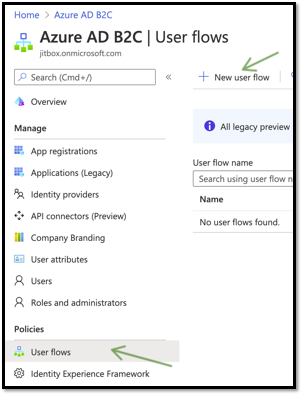
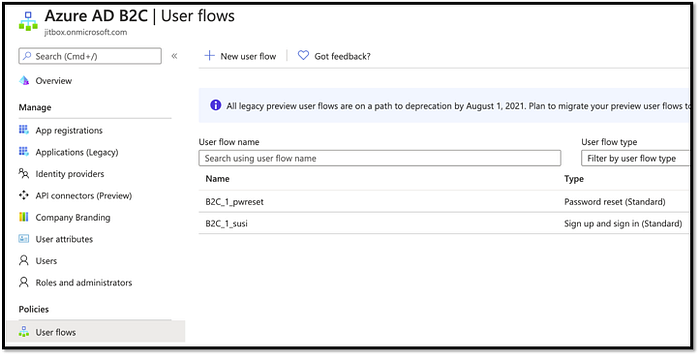
Let us start with sign-in, sign-up user flow. Ensure that you are in the newly created directory before starting this. Go to the user flows tab and click new user flow.
In our Angular application, we are interested in providing user flows for sign-in, sign-up, and password reset.
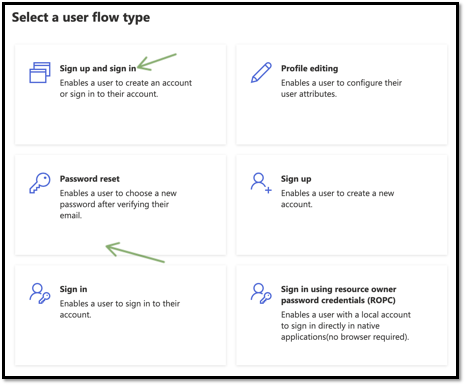
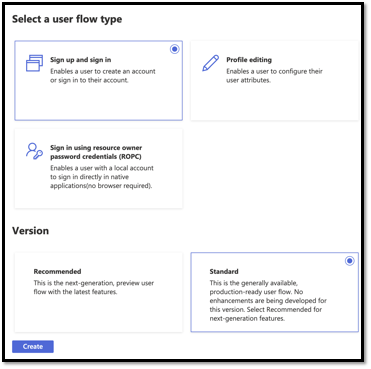
At first, we are going with the sign-up and sign in.
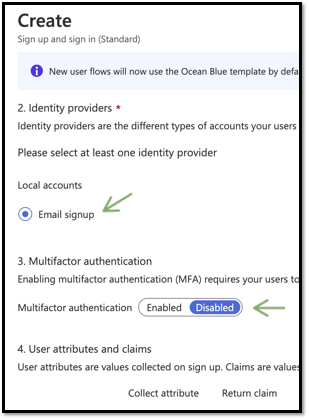
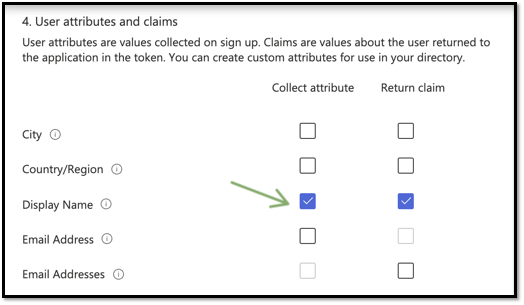
We are only collecting the display name attribute and returning that in the token claim. It's very easy to add custom attributes too.
Now we are done with our sign up, let’s sign in to user flows. B2C will create the UI based on our user attributes and present it to the user.
Create a password reset user flow

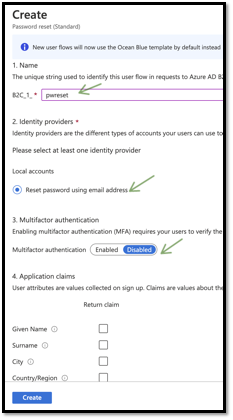
We are not collecting nor returning claims during this flow. Now our user flows are ready. These user flows are specific to the tenant and any applications registered in this tenant can use this user flow. Please take note of the user flow names.
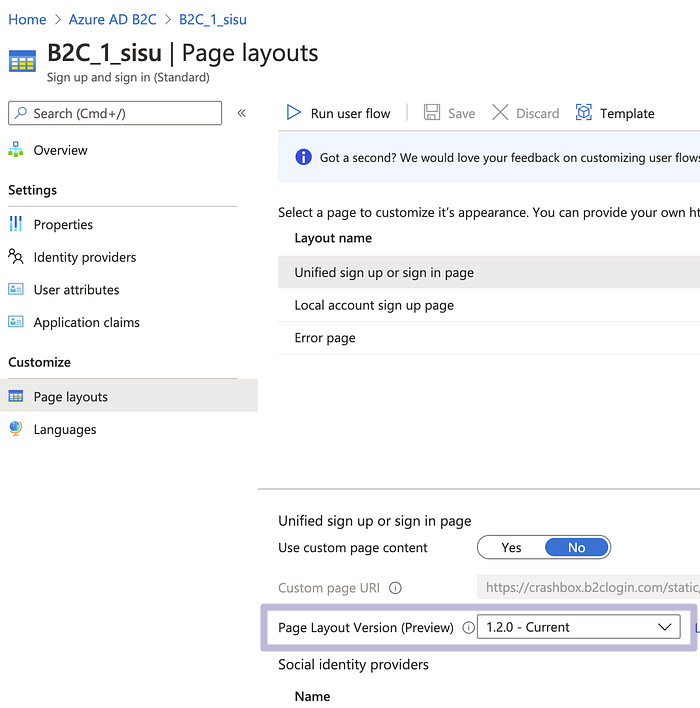
Customizing the user flow dialog
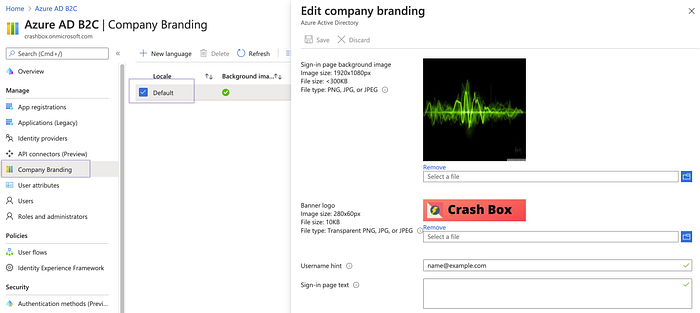
You can easily add branding to your user flow. Go to the B2C directory and select “Company Branding”. Then you can supply a background image, your companies banner logo (280 X 80), and a background color.
Once saved, go and select the user flow and select the latest page layout version.
Now we have our B2C Tenant configured, linked, and have some basic user flows. It's time to register the application.
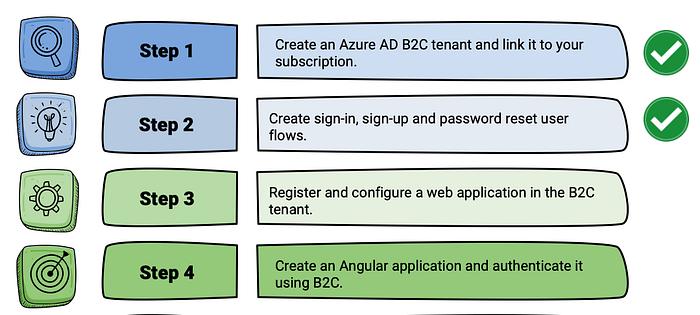
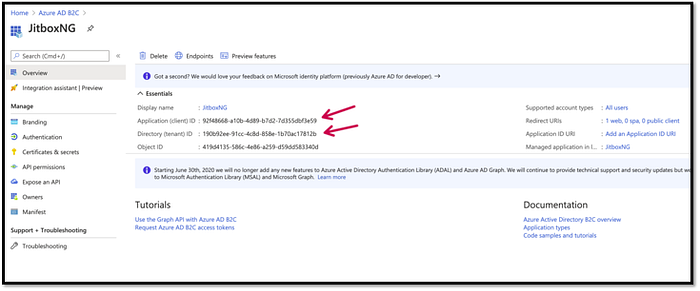
Step 3: Register and configure web application in the tenant
Now in the Azure portal switch your directory to the newly created one.

Now click the App registrations -> New.

Redirect URI: I provided the URI of my local angular application.
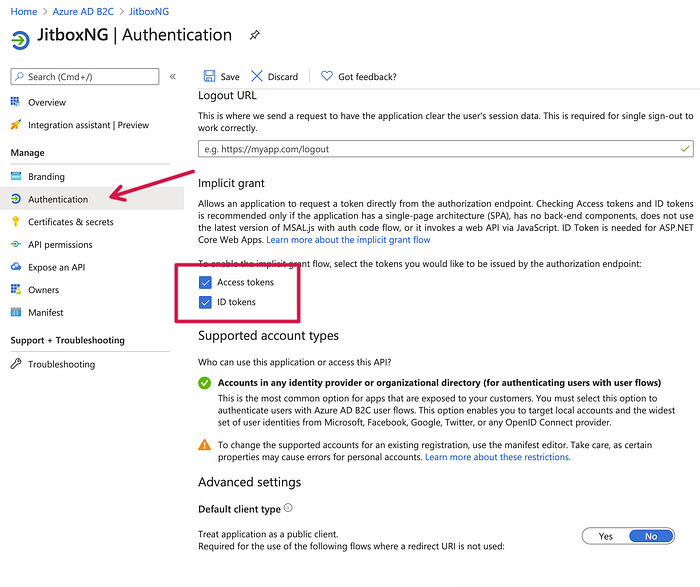
Now go to the authentication tab and select the Id and Access Token. Since this is a SPA application, we will be carrying out an implicit flow where we will have to retrieve both tokens from the Javascript.
Now go to the API Permission tab. You can see that — by default — this application has permission to access a couple of Micrograph APIs. Ensure to grant admin consent for accounts in JitBox, as this means that your application has an implicit grant to access these API’s and no consent dialog will appear.

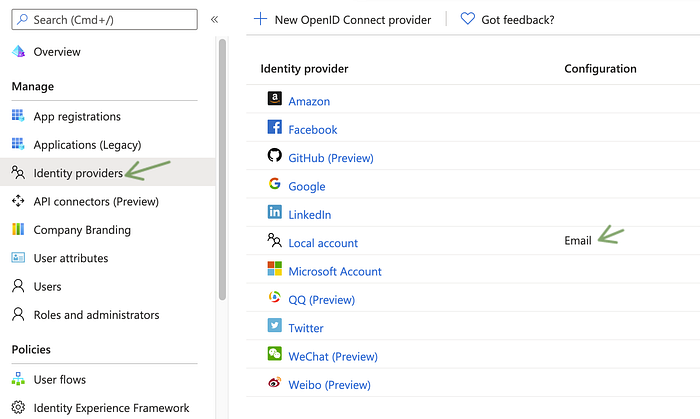
At this moment we are not exposing any APIs or setting any new policies. We will do that later. Your app can now choose the identity providers it needs to support. In my case, I am sticking with the email option.
Setting up Identity Providers
In our application, we are not planning to set up any external identity providers. Setting up social providers are pretty much straight forward. We need to register our app on their open id website and provide the client information here. We are going to use a local account (an email) as our identity here.
Now let’s check the various endpoints to ADB2C to our application. You will be using these various endpoints from the client app to communicate with B2C.
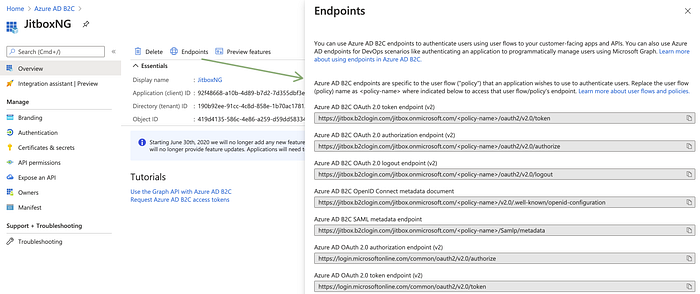
The policy-name will be replaced by your user-flow name created. Now we have our B2C tenant ready and the application configured. Let’s now develop our Angular application. This marks the end of step 3, registering the application.
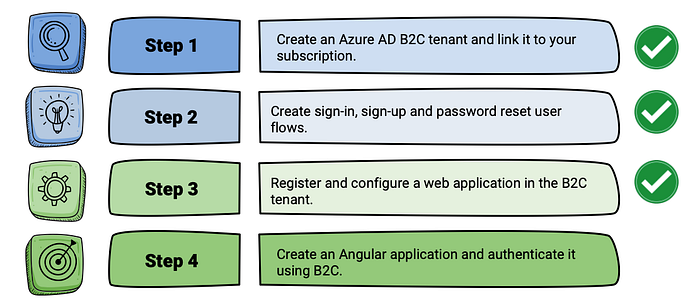
Create an Angular App and configure MSAL
Web applications-B2C authentication is based on the OpenID Connect protocol. Essentially your web application outsourced the authentication work to B2C. Once authenticated, B2C returns the identity token to the application, which the web app internally uses to request access tokens. The app put this access token in the HTTP header when sending an HTTP request to a Web API. Microsoft provides an excellent Javascript Library (MSAL) to interact with B2C.
Now let us set up our Angular application.
$ ng new JitBoxNg --minimal=true --skipGit=true$ JitBoxNg % npm install bootstrap jquery font-awesome# Add these css entries in style.css
@import "../node_modules/bootstrap/dist/css/bootstrap.min.css"; @import "../node_modules/font-awesome/css/font-awesome.min.css";# Mention the scripts in the angular.json"styles": ["src/styles.css"],
"scripts": [
"node_modules/jquery/dist/jquery.min.js",               "node_modules/bootstrap/dist/js/bootstrap.min.js"
]# Make inlineTemplate and inlineStyle false in angular.json"@schematics/angular:component":
{
"inlineTemplate": false,
"inlineStyle": false,
"skipTests": true
}
Now create a navbar component and paste the following code in the navbar.component.html
$ ng generate component navbarNow modify the app.component.html to include this navbar.
<div class="container">
   <app-navbar></app-navbar>
</div>
Now our basic home page is ready with a navbar.

Now let’s work on the login part. The first step is to install the ‘MSAL’ libraries provided by Microsoft. This library handles the interaction with AzureADB2C.
JitBoxNg % npm install msal @azure/msal-angularNow let’s configure our MSAL module. This is the configuration that connects our Angular app with the actual App registration we made in the B2C tenant.
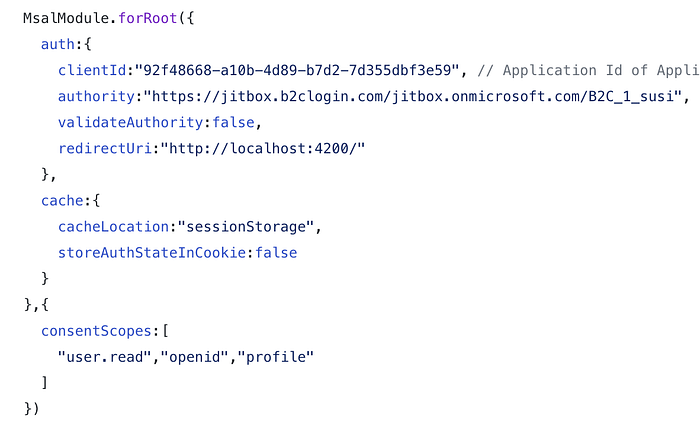
Ensure that you check your directory configurations and enter the correct values. ‘Authority’ represents the entry point of our app for authentication.
We have to import HttpClientmodule & MsalModule in the app.module.ts. The MSAL module is configured with our App settings in B2C. Authority represents the OpenID endpoint in B2C.
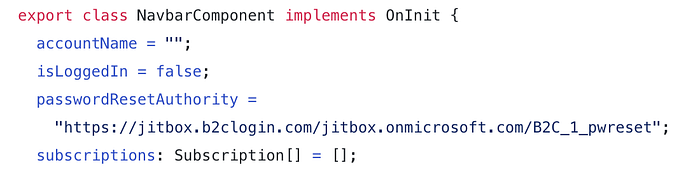
Now let’s implement our authentication part. For simplicity, I am adding the code in the navbar component expecting authentication always happens from the navbar. If that is not the case for you, then you better write a service that wraps the code we are writing below.
The MsalService (which reads the config we mentioned in app.module.ts) is injected in the constructor.
ngOnInit(): Authentication events are notified via Broadcast service. So we are subscribing to various events. If the user clicks ‘forgot password’ we will launch the login popup with a password reset endpoint.
onLogin(): This is where the login and log out are handled. We are making login popup calls of MSAL service.
checkAccount(): Here we verify whether the user is logged in or not and updates the account name we display in the menu bar.
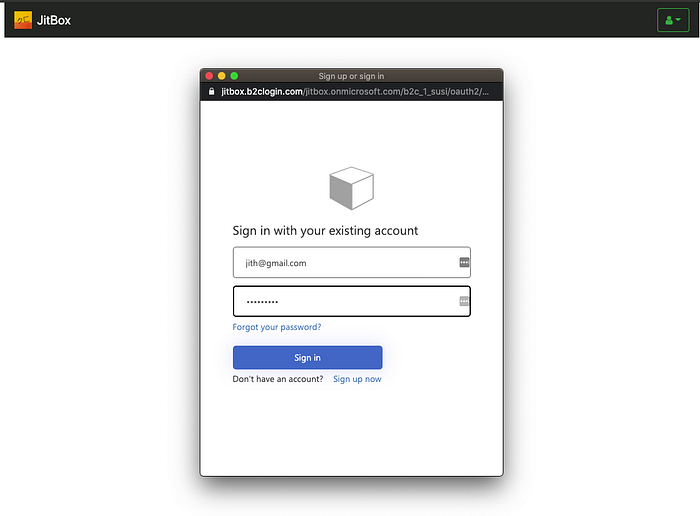
Now let’s run the code and do a sign up first and then sign-in.
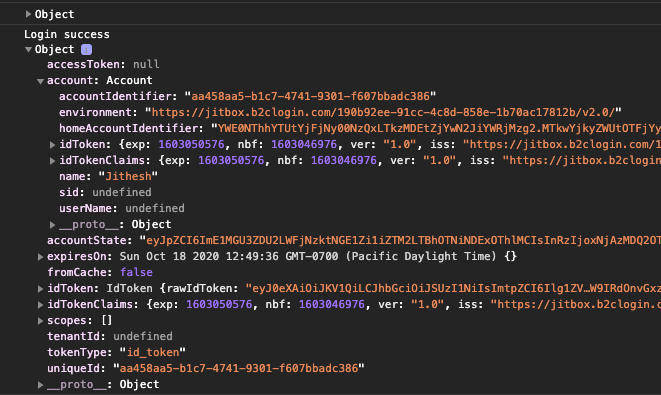
If you check your console you can see the identity token we received and you will find the name as part of the claim.
On successful login, the display name will be shown in the menu bar.

Now our Angular application supports authentication using AzureADB2C. That means we got the identity token and we can request the access token.
Our next step is to request the access token from B2C and use that token to call an API secured by B2C. Now we have an Angular web application that gets authenticated against Azure AD B2C.
Conclusion
In the next post, we will discuss how we can secure a .NET core Web API using B2C. I hope you enjoy the article and you can find the source code here.