Quick-start Flutter on Windows
Ready for a Hot Reload?

My cross-platform mobile app development journey stared from the time when Microsoft acquired Xamarin. C# was close to what I had already been developing (to be honest, I was mad developing illogical C++ games, uh!). It was all good until we realized Windows Phone and the Windows Store apps were not evolving much, I moved to React Native. I just read the documentation and closed my browser accepting that I wasn’t comfortable with JavaScript. Still, in middle of developing apps for Android and thinking whether it should be Android Studio or Xamarin, I had a feeling that one day I’ll start making cross-platform apps no matter what it takes. Fortunately, my type of nativeness came in the least expected form. The surprise was from Google. Let’s talk Dart and Flutter!
What’s Flutter? Wait, what’s Dart?

Okay. I get you. Well, Flutter is Google’s own framework to compete (I think so) with Facebook’s much popular and loved React Native. Or as they’ve documented,
Flutter is Google’s mobile UI framework for crafting high-quality native interfaces on iOS and Android in record time.
Yes, nativeness itself means it’s for both Android and iOS. The last two words in the sentence above means a lot to this UI framework. This is one of the main pillar features of Flutter. The remaining two are:
- Beautiful UI with Material Design for Android and “Cupertino” widgets for iOS.
- Native. Native. Nativeness! You are free to reuse your Java, Swift/Objective-C code with access to popular SDKs.
Isn’t that beautiful? Now, Dart 🎯. Dart is a programing language developed by Google to make applications for mobile or web with powerful frameworks. Do me a favor, kindly follow Dart’s publication for latest and greatest news. We’ll use Dart language throughout our app development. There’s no need to panic. The language itself is natural and easy-peasy grasping. And yes, there’s a single .dart file which is used for both logic and expressive UIs. How cool is that!
Shall we…Flutter?
> Installation on Windows 🔽
What will you need? Nothing much. I suppose you already have the necessary tools like Git for Windows, a powerful code editor like Visual Studio Code and Android/iOS emulator (optional). Make sure Git is working properly. I had some serious PATH issues. Tip: while installing Git, let the installer set the environment variable path for you.
- Let’s clone the Flutter SDK: Open up a Terminal alternative in your machine like Git Bash. (Note that this will also work with Command Prompt provided you’re already in your Git executable path.) Copy and paste the following URL and hit enter-
$ git clone -b beta https://github.com/flutter/flutter.git
This will download all the necessary components and libraries to your username folder inside C drive. Wait for few moments until you get the following message:

2. Just like Git, add the nasty PATH for Flutter: This is done so that we can run the Flutter commands from any terminal session. It’s easy and quick. First we need to find out the exact location of the SDK. In the terminal, type in where flutter. Copy the full path till \bin and not \bin\flutter. This should be something like this- C:\Users\kvaib\flutter\bin. Then you need to Ctrl+S from the desktop to pop-up not-so-used Cortana. Type in ‘environment variables’. Open ‘Edit environment variables for your account’ option. Enter the ‘Environment Variables’ window, under ‘User variables’ select the ‘Path’ variable, ‘Edit’, ‘New’ and paste the above path. Hit OK. Now reboot.
3. Let the doctor diagnose current situation: We need to make sure that all the necessary components are installed. Therefor we open up a new CMD or PowerShell session and write- flutter doctor This will install remaining tools along with Dart language SDK. You need to checkout which tools you need in order to run Flutter successfully like checking for Android emulator (this can be done by installing Android Studio) or installing the IntelliJ IDEA IDE with support for both Dart and Flutter (just search for their plugins and set the SDK path).

Tip: If you try to run the doctor command in Bash, it’ll not run as it’s currently not supported. But there’s a simple trick. Just type flutter.bat doctor and enjoy.
> Configuring our editor 🛠️
I’ll be using Visual Studio Code (VS Code). Install the editor and do these-
- Install Dart Code plugin: Follow the GIF :) Make sure to reload the editor after installation.
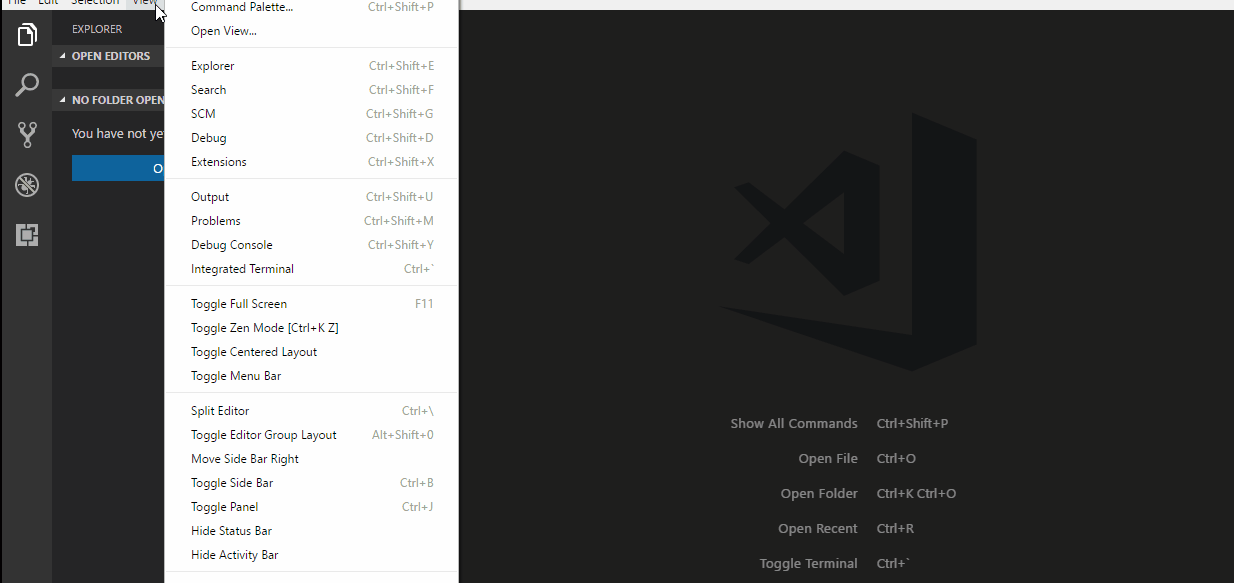
2. Check to see if everything works fine…validate the install!: Invoke the Flutter: Run Flutter Doctor command.

That’s it! This is all we need to do. So now, let’s dive straight to our first Flutter app!
> Wait. Let’s Hot Reload 🔥
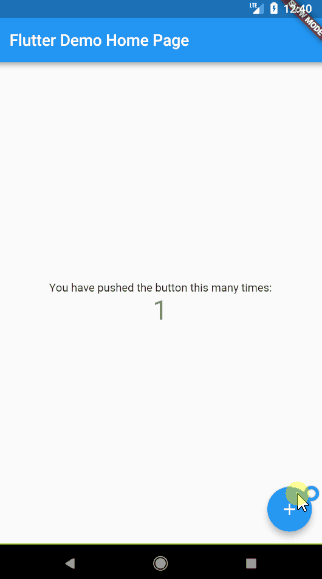
Hot Reload is the most awesome feature of Flutter. Any changes done to the code will be reflected almost instantaneously to the emulator. This happens in a blink of an eye. To test the same, we’ll make a new project in IntelliJ IDEA. All you need to do is to choose ‘Flutter’ as project type (make sure you have the correct SDK path), name it and hit ‘Finish’. Alternatively, you can follow this video. You’ll be greeted with a main.dart file where all the ‘main’ application code lives. It’ll be quite uncomfortable for some at first sight but we’ll just focus on the real deal. Keep your emulator up and running. Then hit Shift+F9 to start the default debug session. You’ll be able to run a decent app which quietly increments the value of counter every time you tap the ‘+’ button. Simple and Materialistic. Don’t click the ‘Stop’ button yet! Let the app be in run state.
We’ll now change few things to look how fast is this Hot Reload. Let’s do few changes-
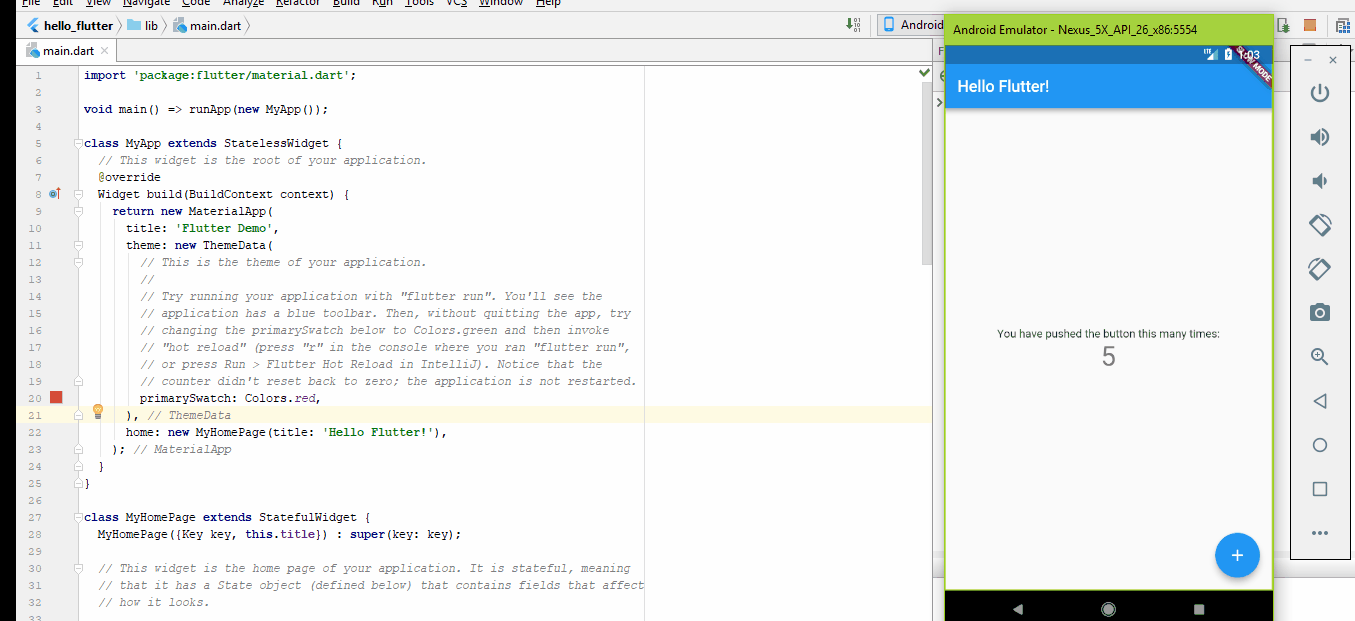
- Changing the Action Bar title: In
main.darthead over to the line which sayshome: new MyHomePage(title: ‘Flutter Demo Home Page’),this sets the Action Bar text to ‘Flutter Demo Home Page’. As you might have guessed, we need to change the text between the single quotes to make the change we want. I’ll say ‘Hello Flutter!’. - Changing the primary app color: Just a line above the previous one we can find the
primarySwatchvalue of the application to beColors.blue. I’ll choose my favorite. Feel free to use any color of your choice.
Done? Now it’s the time to see the Hot Reload in action! Note that to do a Hot Reload you can either click on the flash ⚡ symbol or be a ninja by hitting Ctrl+S (to save the changes in code).
> Let’s say “Hello World” in Flutter 👋
Typical programmer stuff. We’ll be deleting almost all of the already written code and start from scratch. Follow along!
The normal VS Code way…
- Open VS Code.
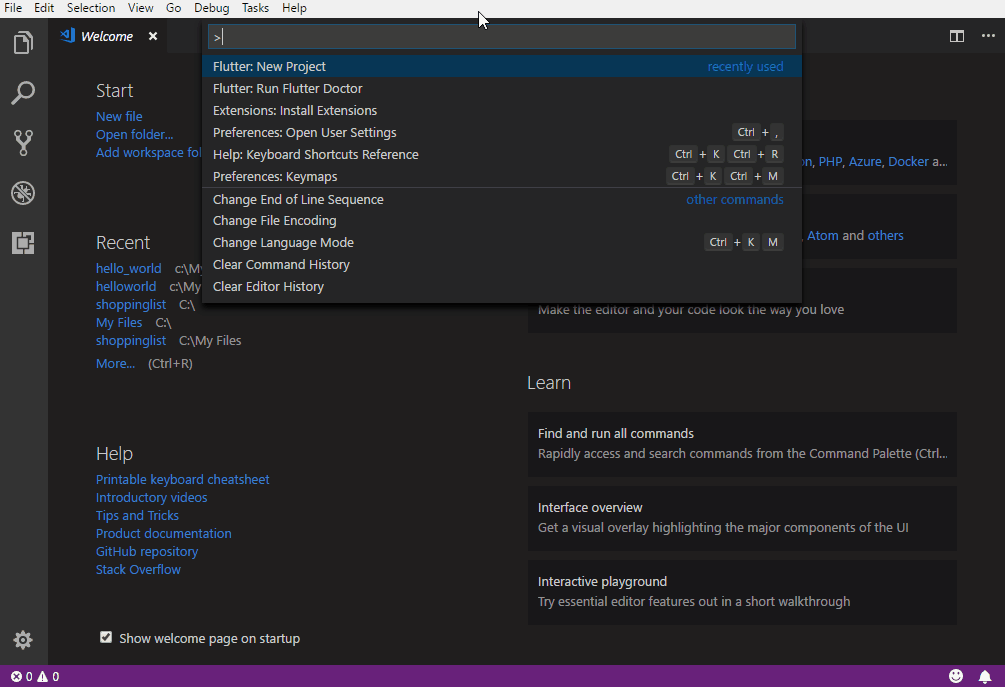
- Hit Ctrl+Shift+P to start Command Palette and start typing ‘Flutter new’. Select ‘Flutter: New Project’ action.
- Enter the name of the project like ‘hello_world’
- Next, VS Code will ask you to locate a folder where this project will live. Choose a folder and see the magic!
- Be patient until
main.dartfile appears in the editor.
The ‘nerdy-ninja like’ Bash way…
- Open Git Bash (or something similar you love).
- Create a new project with command
flutter create. Make sure to add project name after this.flutter create hello_world. - Move to the current project directory with
cd hello_world. - Done. :’)
Start making hello_world
Always make sure your app emulator is up and running before running the app. We’ll be working our very own main.dart. In the Dart file, do Ctrl+A and then backspace. Wohoo! Everything is gone!
- The first step is to
importthe Material Design.
import ‘package:flutter/material.dart’;
2. Now we’ll make the “entry-point” for our app. Yes, the main method!
void main() {}
3. We’ll write everything inside this method. We take the runApp() method and make an instance of MaterialApp providing it only an initial property of home .
Wondering what’s a home? It’s just the main screen which we’ll be designing. We’ll come back to this later.
4. Make a new folder inside the lib called pages and inside the pages folder make a new file homePage.dart. Don’t forget to add the .dart extension!
In order to make the home page UI we need to know that in Flutter we have classes inside classes (or nested classes) and loads of widgets. In fact Flutter design is all about widgets. Here, we’ll be focusing on creating Text widgets. For that, in the new file we add the following line of code:
We made a class HomePage which extends the StatelessWidget class. StatelessWidget class is used to make apps whose state or action doesn’t change either from a user or by the app itself. More like static and dynamic stuff, this is static as we’ll be only displaying a text. The next few lines are more like a normal ‘template’ thing in Flutter which you can use in any other project. It’s overriding the Widget and making its context for our app. Inside this we may define Material property/properties like setting the primary color of the app screen to blue. Save the file, go back to the main file and add a new import. We want to import the homePage.dart file to main.dart.
- Navigate to the homePage file as
import ‘./pages/homePage.dart’; - Make an instance of
HomePagereplacinghome: homewithhome: new HomePage(), - In Git Bash, write
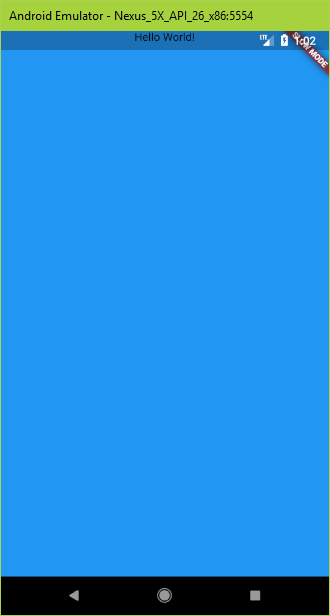
flutter runto run the app in the emulator. It’ll be just a plain app with Material-type blue color. Nothing great?
5. Heading back to homePage.dart, we’ll provide a child inside the Material property block. This one will be an InkWell. This class makes a rectangular area which responds to touch events. Next, in this we will have another child for our text layout column. Go crazy and make another child inside the Column. But wait, this may have more than one element (texts, images etc.). We have a replacement for that in form of childs instead of child. This looks close to an array isn’t it? And finally we make a new text widget passing the data to be shown in between the parenthesis.
Try to run the app and it’ll be like this. :(
Next step is to make it beautiful. More like properties in CSS. Final code will look like this:
Notice that I’ve aligned the text to center using MainAxisAlignment.center property, added style elements to the Text widget to change color and font size. Simple I guess. Try to do a Hot Reload by typing r and pressing enter in Git Bash.
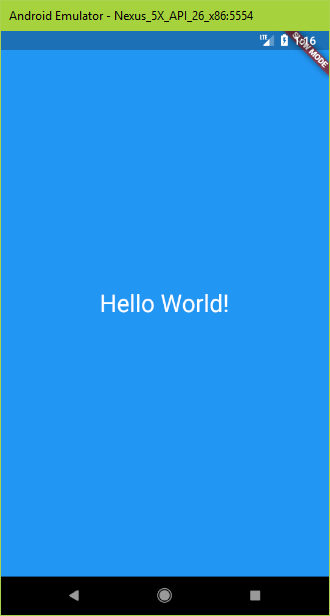
There you have it! Your first Flutter app is ready. Obviously, you can add as many widgets as you like in the app.
Where to next? 🤔
You’re most welcome to visit the official documentation of Flutter here, checkout its open source activities here on GitHub and get a free crash course of the same here on YouTube.
Liked this story? Feel free to clap and motivate me to write more and better. Did I missed something? Any suggestions? The comment box below serves the exact purpose!

✉️ Subscribe to CodeBurst’s once-weekly Email Blast, 🐦 Follow CodeBurst on Twitter, view 🗺️ The 2018 Web Developer Roadmap, and 🕸️ Learn Full Stack Web Development.