Serverless User Engagement with AWS Lambda, SendGrid, BadgeUp and Node.js
A short, simple guide to sending user engagement emails to your end-users. This is perfect for app-builders or anyone wanting to get into serverless.
This article assumes that you have Node.js and the AWS CLI setup in your development environment.
Overall Architecture:
Below is the functional diagram of the system that we will be building. Every component is serverless or a hosted service. This type of system integration is an ideal use-case for serverless technologies.

In this article, we’ll cover:
- Creating a SendGrid API key
- Creating a AWS Lambda function
- Creating a BadgeUp achievement and setting up a webhook
Step 1 – Create a SendGrid API Key
If you don’t have a SendGrid account, signup and log in.

Once in the SendGrid dashboard, click Settings ➞API Keys ➞ Create API Key in the left sidebar.

Name the API key, assign the Mail Send permission and save.

👉 We’ll be using the API Key in the next step, so keep it handy!
P.S. This isn’t something I’m covering, but if you want email images to display by default in Gmail (hint: you do), you’ll want to setup SendGrid domain authentication.
Step 2 – Create a AWS Lambda function
If you don’t have an AWS account, signup and log in. In this article, we’ll be using the AWS CLI so be sure to set that up along with the correct access.
Lambda Function Setup
Create a new AWS Lambda function with API Gateway. I’ve found that it’s easiest to start with the microservice-http-endpoint blueprint (👈 click the link).

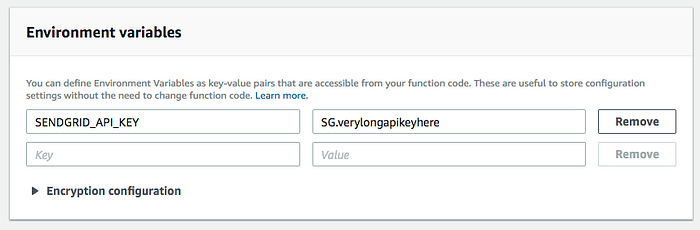
After the Lambda function is created, we can set the SENDGRID_API_KEY environment variable that we created in Step 1. The function will read this environment variable when it is called.
Prepare Lambda Code
The next step is to update the AWS Lambda function code.
Clone the code at https://github.com/badgeup/badgeup-serverless-email-demo to your local machine and set it up.
git clone https://github.com/BadgeUp/badgeup-serverless-email-demo.git
cd badgeup-serverless-email-demo
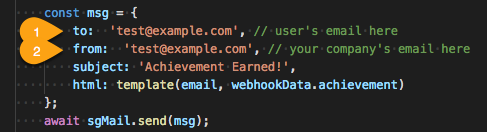
npm ciChange the toand from email fields inindex.js to your email address you want to test with.
Lambda Deployment
Once that’s done, it’s time to deploy! Zip up the directory’s contents and deploy it:
npm ci && \
zip -rq lambda.zip * -x '.git' && \
aws lambda update-function-code \
--function-name 'achievement-email-script' \
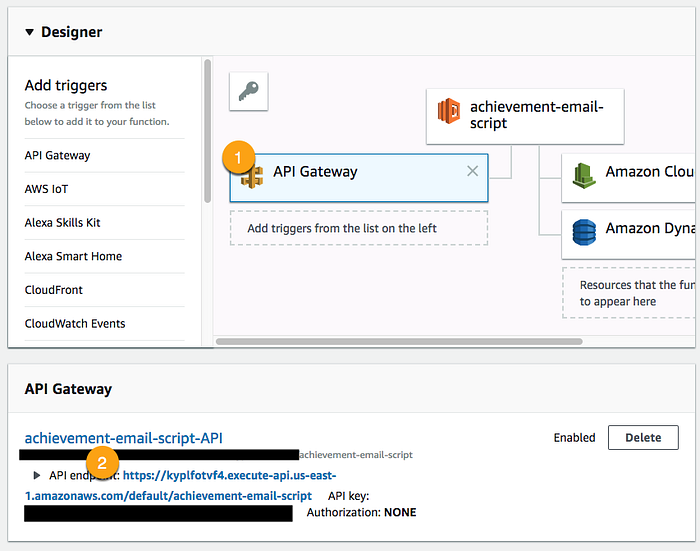
--zip-file 'fileb://lambda.zip'Now that our function is deployed and will be sent to the right email address, we need the AWS API Gateway URL to call. You can find this by clicking on the API Gateway graphic and copying the API endpoint.
👉 Keep the URL handy because we’ll be using it in the next step!
Step 3 — Setup BadgeUp Webhooks
If you don’t have a BadgeUp account, signup and log in.
Achievement Setup
Once in the BadgeUp dashboard, click Achievements ➞ Create New Achievement in the left sidebar.
We’ll be creating a generic “user interaction” achievement. This might represent running 5 miles in your fitness app, attending 5 meetups in your meetup app, or performing a desired action such as sharing a link on Facebook.
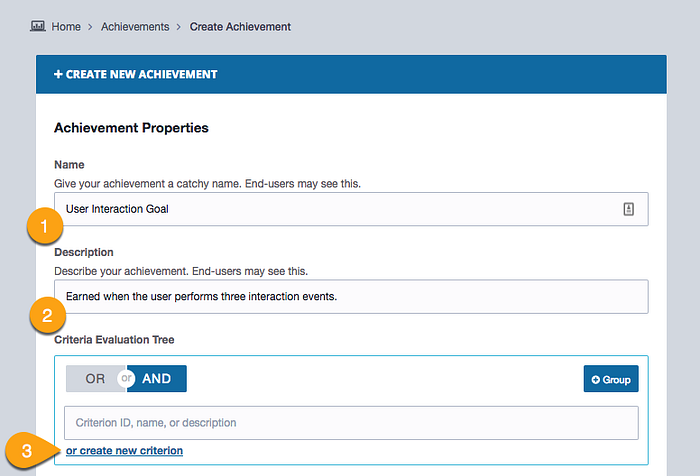
Clicking #3, the Create Criterion modal will appear, shown below. A criterion defines the conditions that need to be met for an achievement to be earned.
We’re defining the criterion as complete when the user-interaction metric is > 3.
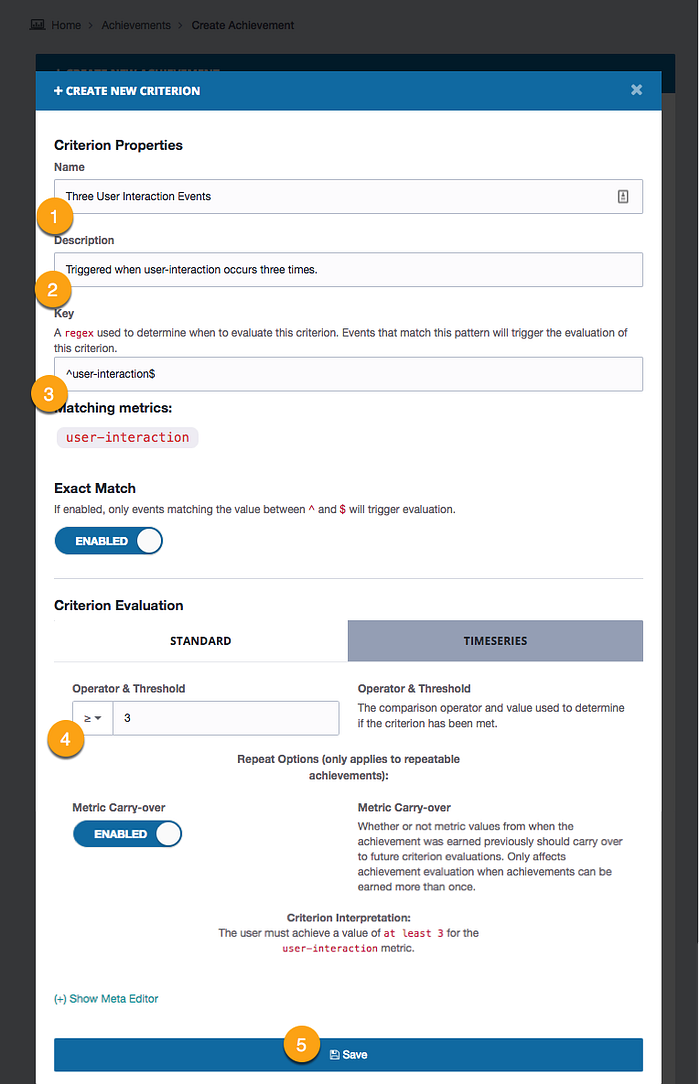
This is just a single comparison criterion. BadgeUp can chain multiple criteria together in an evaluation tree and also supports timeseries criterion. For more information, see the criteria documentation.
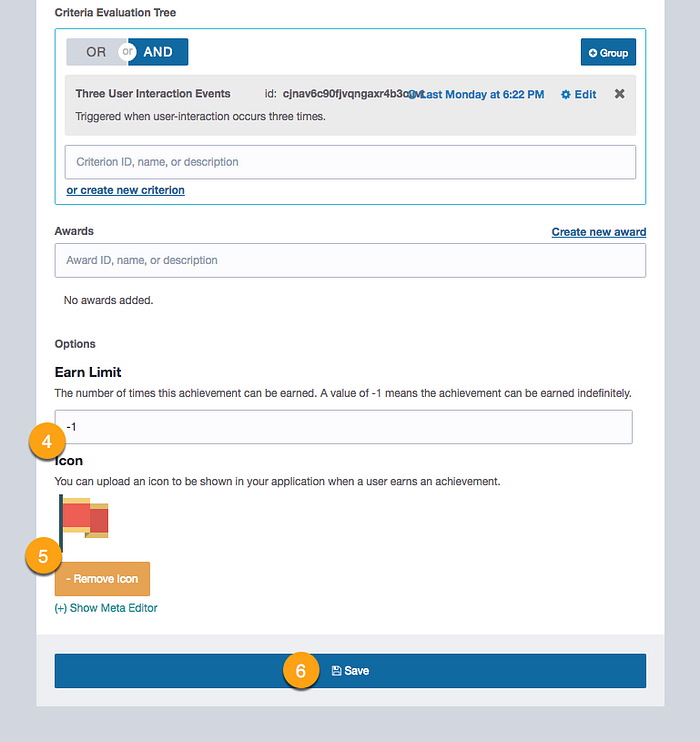
After saving the new criterion, it will show up in the evaluation tree.
Set the Earn Limit to -1 so we can continually test out the achievement in the next step. You can also provide an icon of your choosing that best fits your application. We chose a simple flag that represents a goal. When finished, save the achievement.
Webhook Setup
The next step is to setup the BadgeUp webhooks that will call the lambda function when the achievement has been earned.
Click Webhooks ➞ Create New Webhook in the left sidebar.

For the URL field, provide the API Gateway/Lambda URL we got in step 2.
Trying it Out
Click Test Lab in the left sidebar. The Test Lab allows you to quickly try out achievements in the browser.
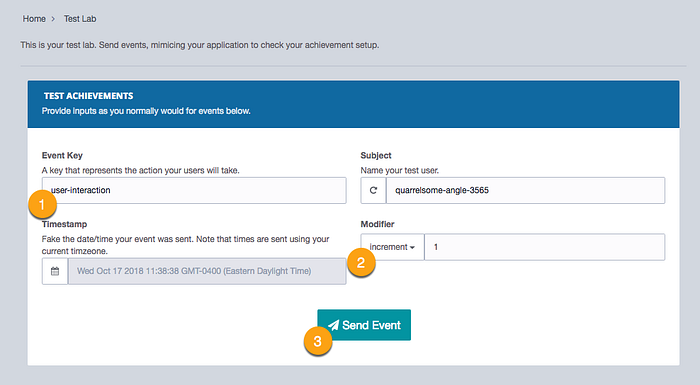
Specify user-interaction as the event key and provide an increment of 1.
Clicking the Send Event button displays the following:
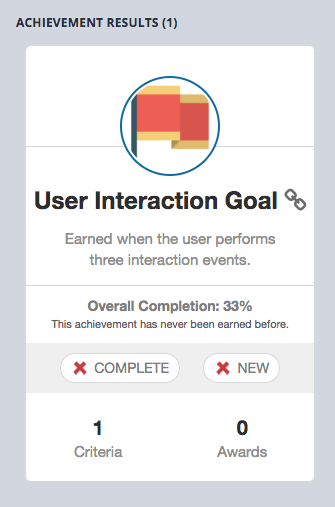
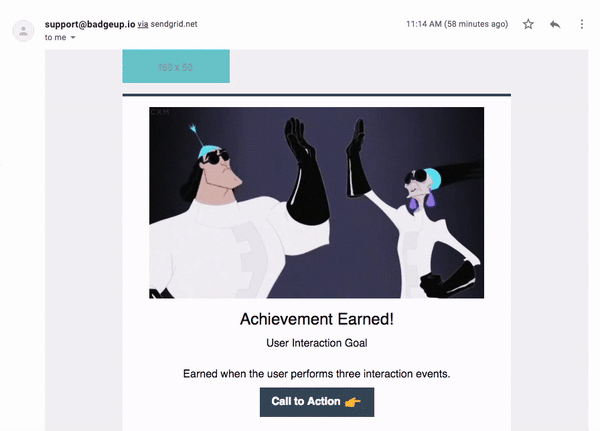
Notice that we’re 33% complete. Click the Send Event button the event twice more and then check your inbox!
Note that you may have to click show images if you didn’t setup SendGrid domain authentication.

If you want to get really fancy, you can add GIFs too. 😎
I hope you enjoyed this article. I encourage you to drop us a message at support@badgeup.io if you have any questions or need help with user engagement in your app. Come visit us at badgeup.io .
If you liked this article, please Clap 👏 and share it with your network.

