How to setup Webpack +2.0 from scratch in 2017 — Part V
Chapter 5, oh Webpack — what will you bring this time ? To put it lightly — we’ve read an entire short book, but hey — that’s cool, we’re learning.
We have unfolded a lot of the magic webpack has. We still have a couple “main” features I would like to explain.
Chapter 4
Chapter 3
Chapter 2
Chapter 1
Images!
Yup. I heard cat gifs and images are popular right now. But how can we use images with webpack? Turns out it’s not hard at all.
What I like to do (and you probably should too) is organise our project. Let’s make a dedicated directory called assets which holds stuff like stylesheets icons images fonts

Next let’s move our styles.scss inside assets/stylesheets
We are requiring our style.scss but we just moved it to another path. Makes perfect sense to update the path where we’re requiring the style.scss as well!

Let’s make our demo more pretty. I’m going to useSCSS variables, pretty basic stuff.

Open up your favourite browser (they’re all quite good nowadays) and you shall see this!

I think we’re ready for images.
Of course we’re gonna need loaders, what did you think?
We need the image-webpack-loader for the images and —
Let me introduce a new concept! React, React, Reaaaact! I love Reactjs, it’s awesome. I love Vuejs too! — they’re both great. I’m sure Angular and and Polymer are good as well, I just personally have experience with React and Vue.
These frameworks/libraries allow us to write single page applications more smoothly and make it fun again.
Now, I know what you’re thinking.. probably. Oh god — is this going to turn into one of those hipster "I prefer to write my code without a monitor" situations? I assure you not, I’m trying to introduce new webpack concepts.
Please, be open and please allow me to expand your brilliant mind.
React — A JAVASCRIPT LIBRARY FOR BUILDING USER INTERFACES
This is still a webpack tutorial — Don’t worry if you don’t know any of these frameworks — I’m going to focus on webpack 95% of the time!
Okay, without further ado — let’s install the loaders and dependencies!
npm i image-webpack-loader file-loader --save-devInclude the loaders in the webpack.config.js file and off we go!


If you got lost or run into any errors- here’s the source code if you want to compare
Our baby is growing. Soon we have to split it up to many different files, but not yet. Let’s allow it to blossom more! We’re not at that critical 200 lines yet. Usually you wanna keep files maximum to 200 lines (in most cases).
Also please don’t forget to restart your webpack every time you make a change to it!
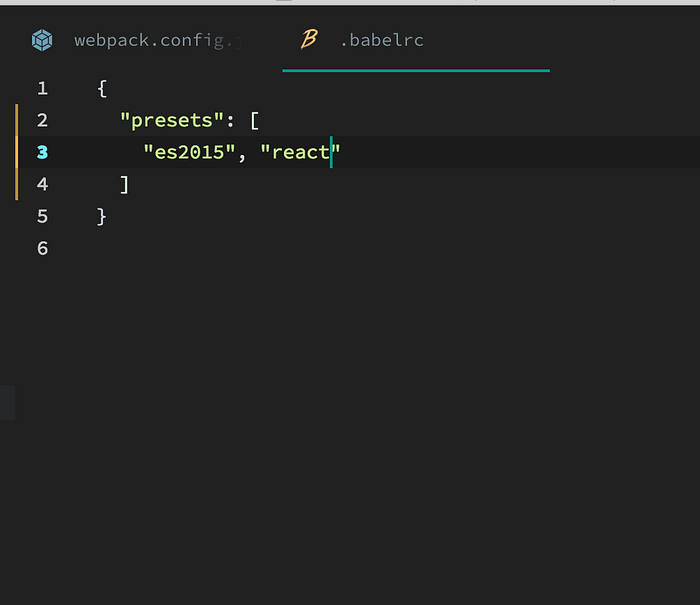
Next we need to make changes to our .babelrc loader since we want to use react!
But first — install the dependencies
npm i react react-dom babel-preset-react --save-devand all we have to do is add "react" to our .babelrc file.
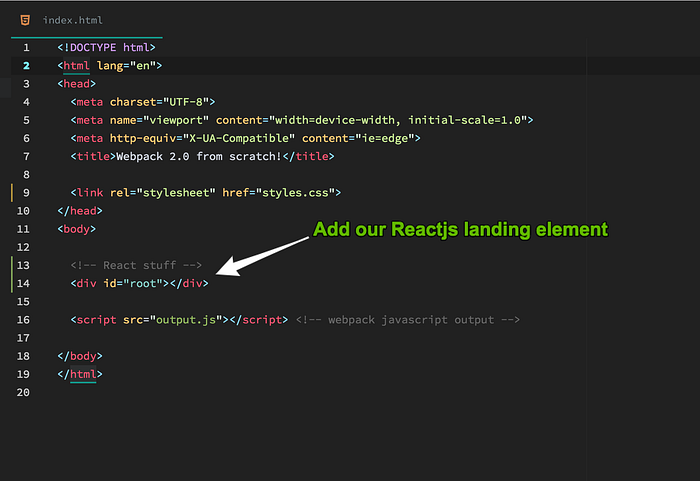
Okay so we have everything we need. Now we just need to strap it together.
We need to strap our landing element to the real DOM since React is using virtual DOM. This is out of our scope unfortunately (You can always let me know if you’re interested in a React or Vue series).
Next we need to import react and reactDOM and mount it to our root element. Let’s also make a new directory inside src called app and inside app make a file called App.jsx
src/app is where our main UI logic lays. We’re almost done to the point I can start demonstrating my points — image-webpack-loader and .jsx files.

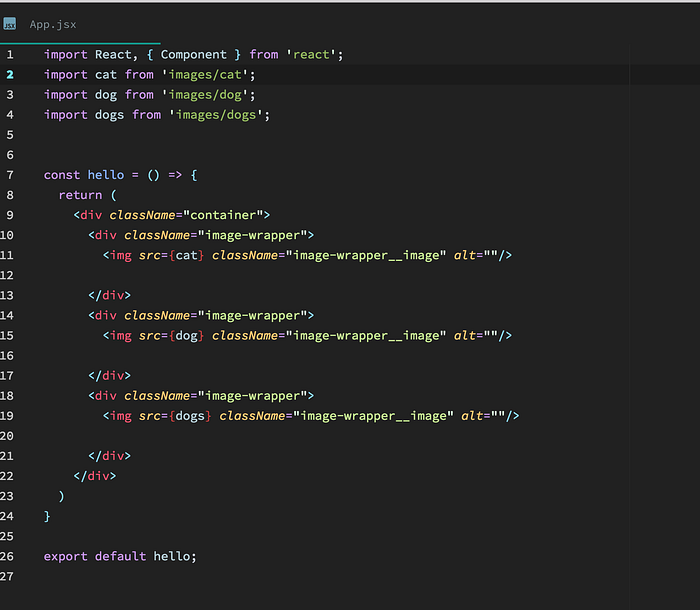
Let’s open our App.jsx and write this one out with me. Don’t worry I won’t get to deep into React.

Open up our browser and we should see a hello from our react component to confirm it works.

Wow! It works! We’re using React now! How cool is that? What was magic before is now crystal clear. We’re using loaders behind the scenes to transform our .jsx to regular plain old js
At this point, we know our jsx loader works. What about images, finally?
Well.. let’s find out.. I will introduce a new concept.. again.. we will import the files and use them directly inside our <image src="" /> tags. Like so

I also sprinkled some SCSS on top of them so they would look pretty for the demo.
But here’s what we would get.
Cool! It’s working as intended.
But there’s one thing bothering me. Do you see it? It’s those darn long import files.
import dogs from '../assets/images/dogs.gif';How could we make this better? Well.. there is a way.. it’s amazingly cool actually.
Aliases
We can have a shortcut to our paths. Webpack has you covered. Let’s add a new object called resolve under the the resolve we shall define our shortcuts aka alias
While we’re there, let’s specifiy or file extensions so don’t have to manually type them out. Webpack is smart enough to fill them out if you give it the options to choose from.

Restart webpack, and let’s clean up our import paths.
Wow! That’ amazing. No more ../../../../../../images/cat.jpg but instead we can use images/cat
How freaking cool?
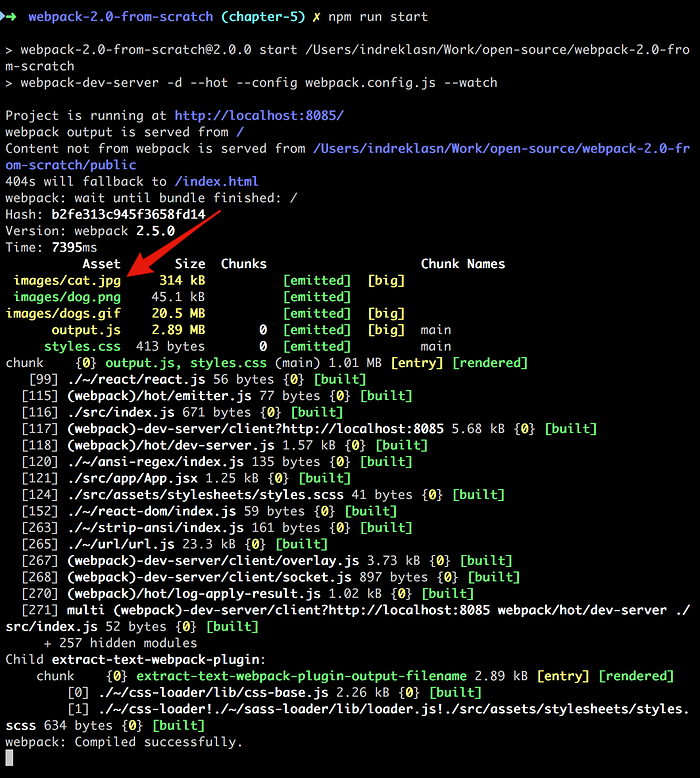
If you run npm run start the images will be automatically compressed on the fly. Webpack is smart enough to detect if the images are compressed an
Cool! I think we did a lot this time. I’m glad you made it this far. There’s actually quite a bit more.. but I think this will do for starters.
You learned about images, some React and how to deal with long paths. You’re doing amazing. Keep learning and start building!
Feel free to buy me a coffee —
Where do I go from here? I recommend learning more about javascript — here are some fantastic javascript courses you can take.
11 May, 2017 Update:
I added Hot-module-reloading support for styles. We add one extra loader and refactor our styles loader.
Install a package called css-hot-loader
npm i css-hot-loader -D-D stands for development dependency (short for --save-dev)
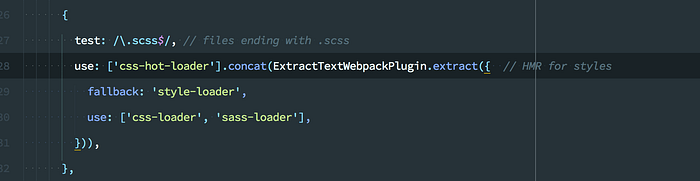
Let’s refactor our styles loader now. We added the css-hot-loader and concatenate it with out style-loaders.
{
  test: /\.scss$/, // files ending with .scss
  use: ['css-hot-loader'].concat(ExtractTextWebpackPlugin.extract({

    fallback: 'style-loader',
    use: ['css-loader', 'sass-loader'],

  })),
},
HMR works for styles now!
10 June, 2017 Update:
As requested, here’s autoprefixer support for our webpack.
First let’s install some dependencies. autoprefixerfor the actual work and postcss-loaderfor hooking it up.
npm i -D autoprefixer postcss-loaderLet’s use the loader like so. No need to import it :)

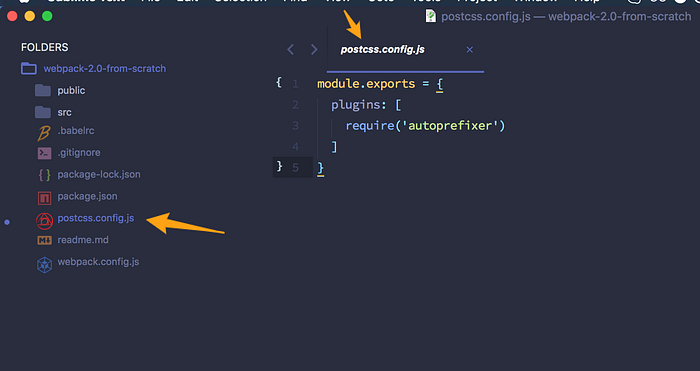
Next let’s make a new file called postcss.config.js and add some configuration there.
Just to make webpack and styles play nicely together, let’s add one final touch to our package.json
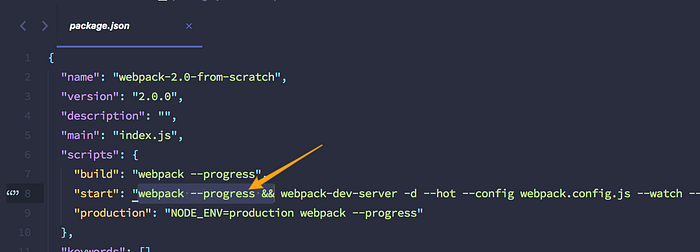
Let’s run our webpack.
npm run start
Cool! It works, let’s test it!


Enjoyed this? Please let me know if there are topics you would like me to cover. Also please don’t forget to follow for more! ❤
Source code
Thanks for reading!