Start creating games with Javascript in Phaser 3 | Part 1
Create an HTML/JS-based game in the Phaser framework.

Chapter 0 — Resources
Full Course: Phaser 3 — The Complete Guide (Build & Publish Games in JS)
Youtube Guide: https://youtu.be/OHAPVjmr7mM
Start Project: https://github.com/Jerga99/phaser-webpack-boilerplate
Final Project: https://github.com/Jerga99/phaser-preview-app
Chapter 1— What is Phaser?
Phaser is a framework for creating HTML based games in Javascript. It’s very simple to use and get started with. It provides a full set of features to create professional games ready to be published on different platforms, including Facebook Instant Games, IOS, and Android platforms.
In this blog series, we are going to create a very simple game to avoid bombs on the map.

Chapter 2— Get a project started
We are going to start with the initialization of the starter project. You can get this project either by cloning or downloading the Github repository: https://github.com/Jerga99/phaser-webpack-boilerplate
After the project is downloaded you need to install dependencies. In the project folder run command :
npm installand after installation is finished:
npm run devthis will start a development server running on localhost:8080

this is what you should see.
Chapter 3— Project structure
Most important for us are the SRC and ASSETS folders. In the “assets” folder resides all static files like images.
In the SRC folder, we will put our source code defining our game.
Let’s start with index.js which is a configuration file used for bootstrapping our game.
const config = {
  type: Phaser.AUTO,
  width: 800,
  height: 600,
  physics: {
    default: 'arcade',
    arcade: {
      gravity: { y: 200 }
    }
  },
  scene: [ PlayScene ]
};new Phaser.Game(config);
Type: Specify a library used for rendering graphics. AUTO means that it will choose renderer automatically depending on the browser. In most of the new browsers default renderer is WebGL (Web-based Graphics Library).
Width/height: Size of the canvas (viewport for our game 800x600px).
Physics (arcade): Lightweight plugin, manages physics simulation. It handles how objects react to the environment; for example, what forces are applied to the objects.
Gravity (y): Gravity force applied to all objects in the game. Objects will be moving downward direction each second 200px faster.
Scene: A game can have multiple scenes. Each scene defines a different stage (state) of the game.
Lastly, we will create an instance of the game with the provided configuration.
Chapter 4— Let’s take a look at the Scene
Located in scenes/Play.js we have our default scene. It’s important to notice that there is a super call in the constructor. In super you will provide the key of the scene (basically the ID of the scene which be any string)
Each scene has a multiple lifecycle function. The most important of them to know are:
- Preload
- Create
- Update
Preload is called the first function and it’s called only once. Preload is used for loading assets into the memory, so once you start the game you don’t need to wait for assets to load.
this.load.image('sky', 'assets/sky.png');The first value is the asset key and the second one is the path to asset location.
Create is called straight after preload. Most of the time you will prepare your data and create your game objects here you want to interact within your game.
this.add.image(400, 300, ‘sky’);This will add an actual image to the canvas. The first value is the x-axis, the second one is the y-axis, and the third one is the key to the image we have preloaded before. Why values 400/300?
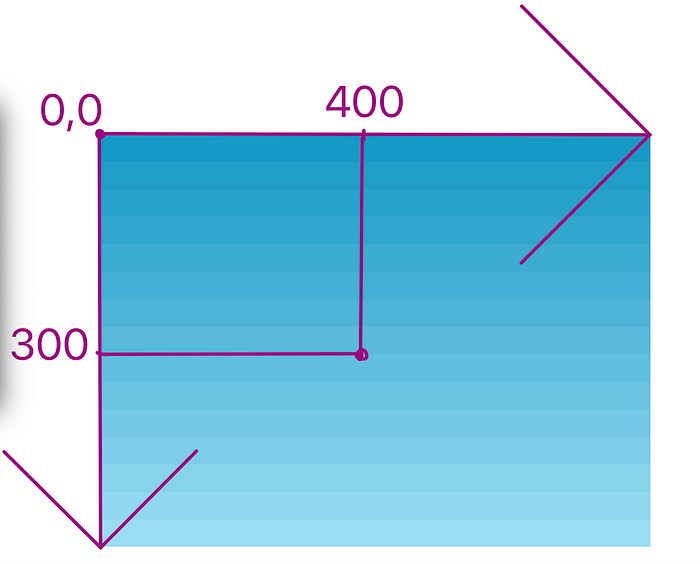
The left top corner is located on coordinates 0,0; the middle of the canvas is 400,300 (since the size of the canvas is 800,600); and the center of the image is inserted on coordinates 800,300.
The update function is called once every re-render of your game. By default, re-render happens 60 times per second(60fps). If you have some functionality that changes the behavior over time then update is the right place to put this in.
Chapter 5— Conclusion
That should be it for the first part of this series in which you have learned how to initialize the project. In the next part, we will add more game objects to the scenes as the player and enemies. If you are interested in the full course then be sure to check out Phaser 3 — The Complete Guide (Build & Publish Games in JS).
See you in the second part!
Best,
Filip

