Tech Stack 2019: Core
Building the core of a technology stack for 2019; for those who appreciate JavaScript.

Updates
As I am using this article as the basis of ongoing training, I have and anticipate continuing to make updates. Going forward, I will be using this section to keep track of the updates:
Feb. 7, 2019: Added the updates section and consolidated all the previous updates here. On the backend, added some additional libraries: prettier, husky, lint-staged, and concurrently. On the frontend, moved to using Create React App for frontend.
First Principles
First, this technology stack unapologetically embraces TypeScript. The good news is that if you already are familiar with JavaScript ES2015, then adopting TypeScript is fairly easy (TypeScript in 5 Minutes).
Where possible, we will closely follow industry standard conventions.
Also, we will work hard to strike the right balance between doing things ourselves versus using third-party libraries / cloud services.
Out of the gate we will depend on Express (backend) and React (frontend); and number of related support libraries.
Organization
We begin, this article, by creating an absolute minimum end-to-end solution to support a backend providing an API that is consumed by a frontend; no more, no less.
Later, through a number of related articles, we will incrementally add common features, e.g., authentication, etc.
These articles are supported by the GitHub repositories (tech-stack-2019-backend and tech-stack-2019-frontend).
- The master branches comprise the absolute minimum (this article) solution
- Subsequent related features, with supporting articles, will be provided as separate branches
Supporting Articles (To Date)
- Tech Stack 2019: Persistence
- Tech Stack 2019: GraphQL
- Tech Stack 2019: Externals and Validation
- Tech Stack 2019: Frontend Routing
- Tech Stack 2019: Frontend Global State
- Tech Stack 2019: Frontend Media and Styling
- Tech Stack 2019: Frontend Bundle Splitting
- Tech Stack 2019: Authentication
- Tech Stack 2019: Secured Binaries
Prerequisites
- Node.js LTS version (currently 10.13.0 LTS)
- GIT
- (Recommended) Visual Studio Code with TSLint extension
Backend
This configuration closely follows the official TypeScript Node Starter example; just stripped of some of its complexity.
In a new folder, enter (auto-accepting all the defaults):
npm init --yesAlso, because we will be using husky (GIT integration), it is important to initialize the project with GIT.
git initAlso, because we do not want to commit either the dependencies or build artifacts to GIT, we create (.gitignore):
We first update the generated package.json to make it a private project; removing the main and adding the private keys.
{
  "name": "tech-stack-2019-backend",
  "version": "1.0.0",
  "description": "",
  "private": true,
  ...
}
Install the development dependencies:
npm install -D typescript
npm install -D tslint
npm install -D tslint-config-prettier
npm install -D tslint-plugin-prettier
npm install -D nodemon
npm install -D prettier
npm install -D husky
npm install -D lint-staged
npm install -D concurrently
Install the dependencies:
npm install express
npm install @types/express
npm install cors
npm install @types/cors
Observations:
- Some libraries ship with Typescript definitions, some do not (as in this case). In this case, we add in the definitions as a separate package
- The cors library enables CORS support in Express
We create the tsconfig.json (download this file) file provided by the TypeScript Node Starter project. We will preemptively add a lib entry to the compilerOptions to allow TypeScript to fully support ES2015 and ESNext (needed for a number of popular third-party libraries).
...
"lib": [
    "es2015",
    "esnext"
]
...
We create the TSLint configuration tslint.json; basically the default configuration with minimal changes to support Prettier and some common-sense rules:
tslint.json
We also create a Prettier configuration; .prettierrc:
Using the conventions in TypeScript Node Starter, we update the scripts section of package.json (will explain scripts below):
...
"scripts": {
  "build-ts": "tsc",
  "start": "npm run serve",
  "serve": "npm run build-ts && node dist/server.js",
  "watch-node": "nodemon dist/server.js",
  "watch-ts": "tsc -w",
  "lint": "tslint -c tslint.json 'src/**/*.ts'",
  "test": "echo \"Success: no test specified\" && exit 0",
  "watch": "npm run build-ts && concurrently 'npm:watch-ts' 'npm:watch-node'"
},
"husky": {
  "hooks": {
     "pre-commit": "export CI=true && npm run build-ts && lint-staged && npm test",
     "pre-push": "export CI=true && npm run build-ts && lint-staged && npm test"
  }
},
"lint-staged": {
   "*.ts": ["tslint -c tslint.json"]
},
...
We now create our application:
src/server.ts:
To compile and run the application:
- During development we use the npm run watch command. It, in turn uses the both npm run watch-ts (recompiles application on source changes) and npm run watch-node (restarts application on recompilation)
- For production, npm run build-ts only compiles the application
- For production, npm run start (same as npm run serve) only starts the application
Frontend
First follow the steps to scaffold a Create React App Typescript project using the instructions provided in Hello Create React App (CRA) — TypeScript.
Then we can use the API we created above by adding two files:
src/apis/hello.ts
src/components/Hello.tsx
and update:
src/components/App.tsx
...
import Hello from './components/Hello';
...
class App extends Component {
  public render() {
    return (
      <div className="App">
        <header className="App-header">
          ...
          <Hello />
        </header>
      </div>
    );
  }
}
...
Debugging
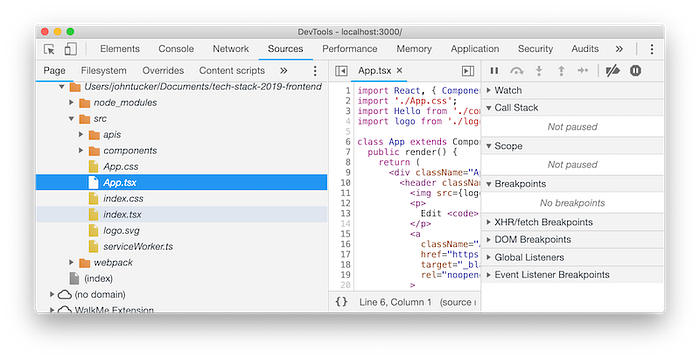
For the frontend, Create React App creates the appropriate TypeScript source maps to enable debugging in Chrome Developer Tools. Just use:
npm startand then use Chrome Developer Tools as usual:
Or, if you prefer debugging in Visual Studio Code: Live edit and debug your React apps directly from VS Code — without leaving the editor. Again, you will first run the application from the command line.
For the backend, if one is using Visual Studio Code, debugging is enabled by:
- Do not run the backend from the command line
- Open server.ts in Visual Studio Code
- Use menu Debug > Start Debugging
note: Do not press the button to create a debugging configuration file (.vscode/launch.json) as the automatic detection works just fine.
note: Also, if you prefer to debug using other tools than Visual Studio Code, follow the instructions provided at Node.js: Debugging — Getting Started; will involve adding the inspect flag to the watch-node script in package.json.
Wrap Up
Now that we have the core backend and frontend solution in place, we will begin to incrementally explore common features. If you are interested in getting updates, would recommend that you follow me.
