Understanding Redux Thunk

Redux is a state management library that has become increasingly popular but there is a learning curve to it. There are certain technical terms that throws off people when they first start learning Redux. If you feel like you need to understand Redux a bit more I suggest trying out my Redux CRUD article. It is a long article that goes over the important concepts of Redux like what are actions,reducers and stores all while building a CRUD based application. In this post which is a follow up to the previous Redux article I will try to explain what is Redux Thunk by building a Github Search application.
So let’s get started first thing you will need is create-react-app so make sure you have it installed in your computer if not type the following command in a terminal:
npm install -g create-react-appWhy are you using npm why not yarn? Old habits. Now that you have the tool set up lets create a new project.
Type the following in the terminal:
create-react-app github-searchThis should create a new project for you with all the dependencies. Let’s open this up in a new text editor by changing to this directory using:
cd github-searchI use visual studio code as my text-editor but you can use whatever you are comfortable. Now whenever I start writing any React application first thing I do is a bit of clean up as we do not require some of these files you can keep them if you like. So go back to the terminal and type the following:
cd src

rm App.css App.test.js logo.svg registerServiceWorker.js
Once that is done go back to the text-editor and make some changes to the index.js file. The changes should be as follows:
Now head to App.js and make the following changes:
Now go back to the root directory of the project and type the followng:
npm startThis gives us the following:

Now lets install redux, redux-thunk and react-redux.
npm install redux redux-thunk react-reduxNow create a new folder under the src directory and call it actions. Next create a file under that folder and name it fetchAction.js. Once that is done create another folder under the src directory called reducers and create a file under it called index.js. Once all that is done under the src directory create a file called store.js.
Now lets write some code. Inside store.js write the following:
We import the createStore function and the applyMiddleware function. What is a middleware? Well it is nothing but a piece of code that sits between your actions and your reducers. It takes your actions does something to it before passing it down to the reducer. Think of it like a middle-man.
Now createStore is used for creating the redux store while the applyMiddleware will be used for adding the thunk middleware. Next we have an import statement from the reducers directory ignore that for now. Basically it is importing the reducer we will need for this application. Here the name of the reducer is asyncReducer. Next we import thunk from the redux-thunk package.
Finally we create the store using the createStore method passing the asyncReducerand theapplyMiddleware functions to it.
Now that we have the store lets write the reducer for this application. Go back to index.jsunder the reducers directory. Note go to index.js under the reducers folder not the root index.js file. In there write the following code:
Here we have a pretty basic reducer. What is interesting here is the shape of the state object. The state contains two properties one is userData and the other is isFetching. The userData is an object that will house all the user related information that we will get from our API. The isFetching property will be used to load the loading indicatior depending upon when the API request is made. isError is used to render an error message in case we do not get back any user data.
Go back to index.js and make the following changes:
Here we have imported the store that we created earlier inside store.js. We are also making use of the Provider component that allows us to access the store state from our components. Hence we pass the App component which is the root component into the provider and passing the store as a prop.
Now lets go back to fetchAction.js which is inside our actions folder and write the following code.
In here we are making use of action creators. Now action creators are just functions that returns an action object. Here we have three action creators each of them returning an action. A little refresher before going forward. Actions are plain old javascript objects which has a mandatory type property. This property defines what sort of action/event is taking place in the application. The first action creator fetch_post is responsible for starting the fetch request. It would be used mainly for showing the loading indicator.
The second action creator receive_post will be called when we get back the data from github. Finally receive_error is an action creator that will be called only when we have an error in getting our data back from github's servers.
Now you might be wondering what is a thunk or where does a thunk come into play. Well let’s discuss it. First lets understand what is a thunk in the most basic sense. A thunk is a function that returns another function. For example:
function say() {
  return function something() {
    //code here
  };
}
The above function say() is a thunk because it returns another function in this case something(). Now how is this useful you might ask. Well we know that in redux reducers are pure functions hence we can't do any async operations inside the reducers and actions are just plain old objects.Now our dispatch method inside the store accepts an action object as its parameter what the redux thunk middleware does is that if say an action creator returns a function instead of an object then it simply executes that returning function.

Now the returning function can accept two parameters. Those are dispatch and getState. This is great because with dispatch we can call other action creators. So now all we do for async operations is to do everything that will be async inside the returning function and then call the relevant action creators when the data comes back passing in the new data that we get from the API. The other relevant action creators in this case receive_post will then pass this new data in an action object to the reducer and then the reducer can update the application's state with the new data.
So with that in mind let’s modify the code in fetchAction.jsas so:
So now we have a new function at the bottom called thunk_action_creator. This function takes a username as its parameter. First we take the username and sanitize the data like removing whitespaces and then put it in the variable user. After that we have our first use of dispatch where we call the fetch_post action creator which will be used for setting our loading indicator as previously stated. Next we return a function from the thunk_action_creator. This function has access to dispatch and the getState methods of the store object. Here we return something from the fetch call. In the parameter we pass in the url that will be used for fetching users and pass along the username that will be provided by the user. Finally when the data comes back we call another action creator using dispatch which is receive_post which takes in the newly received data from the API and passes it as an argument. Finally if the data that is returned has a message property with a value of Not Found we simply throw a new error stating that the user with such username does not exist and so we catch this error and make a call to receive_error which will be used for setting our error flag.
With that in place lets go back to the reducer function and add some more code.
We have three switch cases. The first one FETCH_USER is used for setting the loading indicator. The next one FETCHED_USER is used for setting the data that came from the API in the userData object. Finally we have RECEIVE_ERROR which sets the error flag to true. Here is a link to Object Assign if you feel like you need a refresher.
Now lets head back to App.js and start building the user interface and hook all this up.
I have already prepared the styles for this which are as follows:
Put all that code inside index.css. Note that I am using a custom font here so you might have to try something else.Now with all that if we go back and check the browser it should look like this:

Now if we type something in the input and hit submit we can see that we are able to capture the user data inside the console as well.
Now I know I could have made the form a controlled component and used an onChangehandler. I used refs as they are simpler to understand atleast for me. You can switch back to using your preferred way.
Now lets head back to App.js and connect it to our store.
If we check the console we can see that we have gained access to our store state from within the App component.
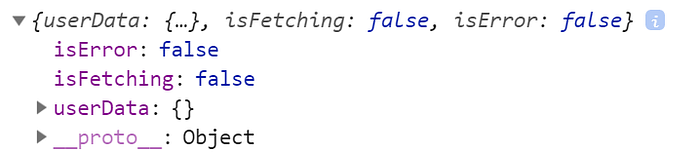
If the above code feels weird to you I strongly suggest checking out my Redux article where I go in depth about connect and how the above code basically works.
Now that we have access to the store lets dispatch some action
A lot going on here. First we make use of our thunk_action_creatorinside our handleSubmit where we dispatch it passing in the username that we got back from the user.
Inside the App component after the form element we check to see if the isFetching flag from our state is set to true if yes we show the loading indicator. Next we check to see if there are any errors while fetching the data if yes we show the error message. Finally we check to see whether the userData object is empty or not. If not we render the <UserInfo>component and pass in the userData object as a user prop.
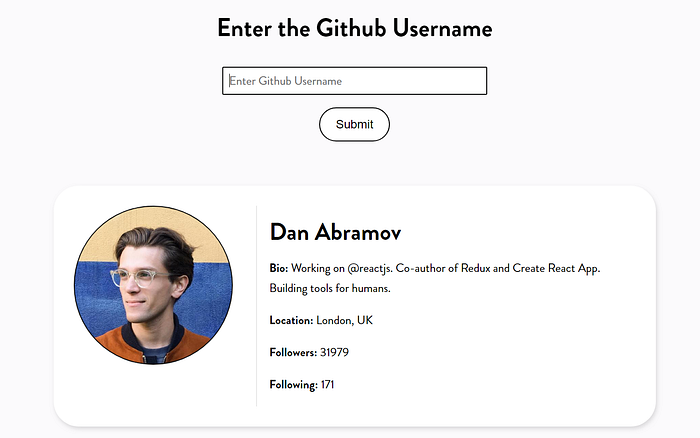
Inside the UserInfo component we have the following code:
Just a basic component that takes in the userData object and shows it on screen. Now if we go back to the browser and type a username back we see the following:
Now I know all of this is overkill to create such a basic application. We could have done it with React itself. Yes, I agree but my main objective here was to show you how redux thunk works with a simpler example. Once you understand this you can easily take this approach and replicate it in bigger projects with some modifications.
Now that you have an understanding of redux thunk improve this application even further use React Router and create a separate page use some other API's like Reddit's API and fetch some data and show it in a nice clean user interface. Maybe learn how you can cache these requests. You can even add some custom animations as the UserInfo component is revealed. As you can see we can easily expand this application to more complex territories if we desire.
Thanks for reading this long article and I will be back with another one.

✉️ Subscribe to CodeBurst’s once-weekly Email Blast, 🐦 Follow CodeBurst on Twitter, view 🗺️ The 2018 Web Developer Roadmap, and 🕸️ Learn Full Stack Web Development.