Using Google Analytics with Angular

Introduction
Google Analytics is a tool that helps you keep track of your User Activity. This includes how many users entered your website in a specific time-span, where those users came from, which pages they visited, etc. It has even expanded to how well your site’s speed is doing and how much social signal your site has garnered.
In short, Google Analytics is all about real data in your website. Data that you can translate into useful business intelligence and SEO strategy for your online campaigns.
The Challenge
Google Analytics works well in MPAs (Multi-Page Applications). When a user navigates to the other pages of a website, Google Analytics code triggers a pageview event using a simple code which is provided by Google. This enables you to calculate the number of views a particular page of the website has. In the case of SPAs (Single Page Applications), It has only one page (index.html). It’s difficult to track users page visits because there is no page request from the server all appropriate resources are dynamically loaded and added to the page as necessary, usually in response to user actions. This results in inaccurate page visits data because routes navigation in SPAs does not perform a full server request, so a pageview event is not triggered.

The Solution
Angular provides a module Router that enables navigation from one view to the next. During each navigation, the Router emits navigation events through the Router.events property. These events range from when the navigation starts and ends to many points in between.Since the events are provided as an Observable, you can filter() for events of interest and subscribe() to them to make decisions based on the sequence of events in the navigation process.
To solve the Google Analytics problem in Angular (SPA), we subscribe to the Router events observable and send the pageview event to Google Analytics when a router event is emitted.
In this article, we are going to see how to track page visits in Angular by subscribing to Router events observable.
Hands in the Mud
So let’s get our hands dirty. Before we start, let’s first create and register our app in Google Analytics website.
Step 1: Goto http://www.google.com/analytics/

Click on Sign In.

A drop-down list pops up, click on Analytics.

Click on the Sign up button. It will take you to the sign-up page. Fill in the signup form and click on Get Tracking ID.


It will take you to your Google Analytics dashboard page.
Step 2: Copy your tracking code.
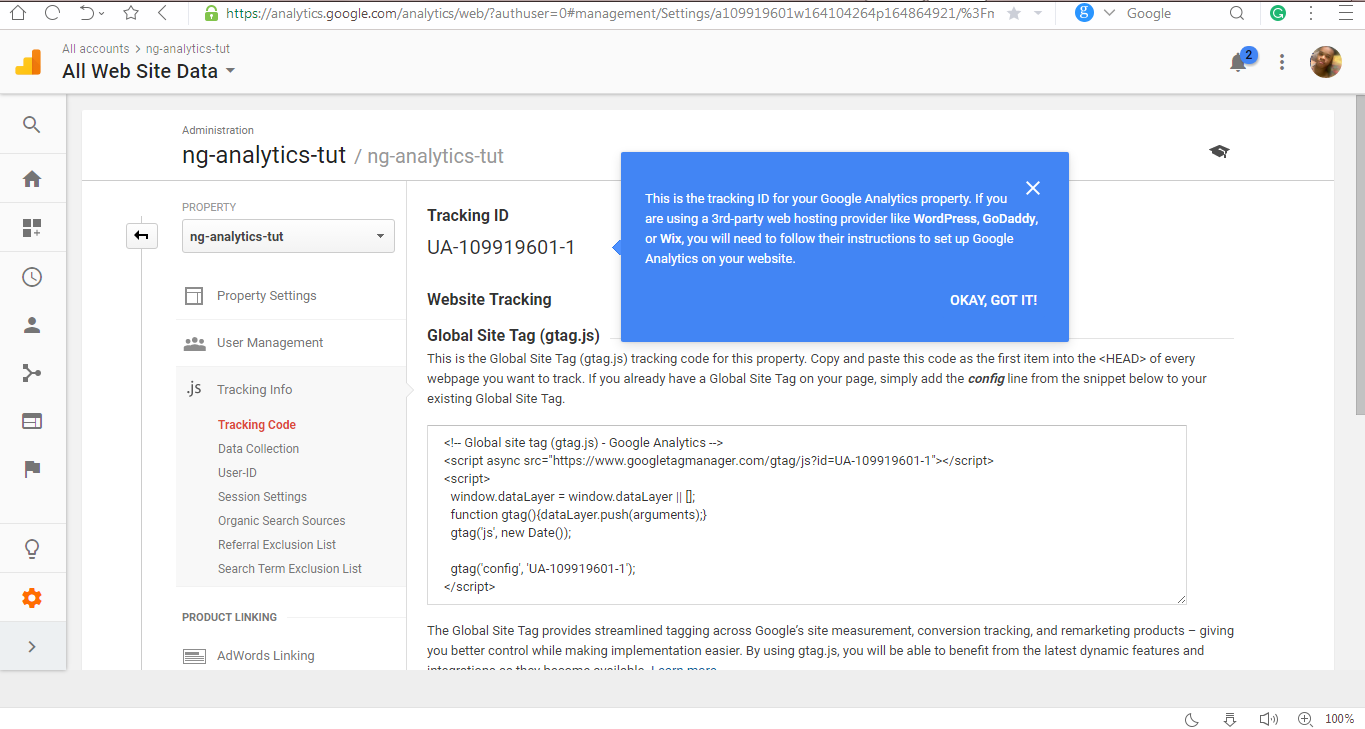
OK, now we are done with the registration and now have our tracking code.As the instruction said, copy it and paste it into the code of every page you want to track. But for an SPA website, we are only going to paste it in the index.html. Before that let’s scaffold an Angular project using Angular CLI.
ng new google-analytics-using-angular --minimal
cd google-analytics-using-angular
Open index.html and paste the Google Analytics tracking code below the <app-root> tag.
/** index.html **/
...
<app-root></app-root>
<script>
  (function(i, s, o, g, r, a, m) {
            i['GoogleAnalyticsObject'] = r;
            i[r] = i[r] || function() {
                (i[r].q = i[r].q || []).push(arguments)
            }, i[r].l = 1 * new Date();
            a = s.createElement(o),
                m = s.getElementsByTagName(o)[0];
            a.async = 1;
            a.src = g;
            m.parentNode.insertBefore(a, m)
        })(window, document, 'script', 'https://www.google-analytics.com/analytics.js', 'ga');ga('create', 'UA-109919601-1', 'auto');// add your tracking ID here.
ga('send', 'pageview');
</script>
...
Serve the app.
ng serveNavigate to localhost:4200.

This will trigger a pageview event and send it to Google Analytics. Open your Google Analytics dashboard. You will see the following stats.

Looking at the above picture. We can see that we have one active user and the Top Active Pages section has ‘/’ recorded, that happened when we navigated to localhost:4000 in our browser, the code we pasted in our index.html triggered and sent a pageview event to Google Analytics. If we close the localhost:4200 tab, the stats will also update.

OK, now we have seen how Google Analytics really works. Let’s go ahead and see how we can track page views within our app.
Implementing routes
We will create two routes RouteOne and RouteTwo .
ng g c routeone --inline-style=true --spec=false
ng g c routetwo --inline-style=true --spec=false
Now we must integrate the two created components with the routing. To do this, we first create the route configuration and then add the router-outlet to the AppComponent. Finally, the RouterModule must be imported in the AppModule. The route configuration will also be applied.
/** app.module.ts **/
...
import {RouterModule} from '@angular/router';
...
import { RouteoneComponent } from './routeone/routeone.component';
import { RoutetwoComponent } from './routetwo/routetwo.component';@NgModule({
  declarations: [
    AppComponent,
    RouteoneComponent,
    RoutetwoComponent
  ],
  imports: [
    BrowserModule,
    RouterModule.forRoot(
      [
        { path: 'routeone', component: RouteoneComponent },
        { path: 'routetwo', component: RoutetwoComponent },
        { path: '**', redirectTo: '/routetwo' }
      ]
    )
  ],
.../** routeone.component.ts **/
import { Component, OnInit } from '@angular/core';@Component({
  selector: 'app-routeone',
  template: `
    <p>
      routeone Works!
    </p>
  `,
  styles: []
})
export class RouteoneComponent implements OnInit {constructor() { }ngOnInit() {
  }}/** routetwo.component.ts **/
import { Component, OnInit } from '@angular/core';@Component({
  selector: 'app-routetwo',
  template: `
    <p>
      routetwo Works!
    </p>
  `,
  styles: []
})
export class RoutetwoComponent implements OnInit {constructor() { }ngOnInit() {
  }}/** app.component.ts **/
...
template: `
    <h1>
      Welcome to {{title}}!!
    </h1>
    <router-outlet></router-outlet>
  `
...
We have configured our routes. Next, we will modify app.component.ts to capture router events and forward them to Google Analytics.
/** app.component.ts **/
...
constructor(private router: Router) {
     this.router.events.subscribe(event => {
      if (event instanceof NavigationEnd) {
        (<any>window).ga('set', 'page', event.urlAfterRedirects);
        (<any>window).ga('send', 'pageview');
      }
    });
  }
...
To navigate at all, We have to add two links, so that the view can be switched between RouteOne and RouteTwo component.
/** routeone.component.ts **/
...
template: `
    <p>
      routeone Works!
    </p>
    <a routerLink="/routetwo">RouteTwo</a>
  `.../** routetwo.component.ts **/
...
template: `
    <p>
      routetwo Works!
    </p>
    <a routerLink="/routeone">RouteOne</a>
  `
...
Remove the ga(‘send’, ‘pageview’); line from index.html.
Note: Make sure you paste your own tracking code to the
index.html.
/*** index.html ***/
...
ga('create', ''UA-109919601-1'', 'auto'); //add your tracking ID
ga('send', 'pageview'); // Remove this line
...
Run the app
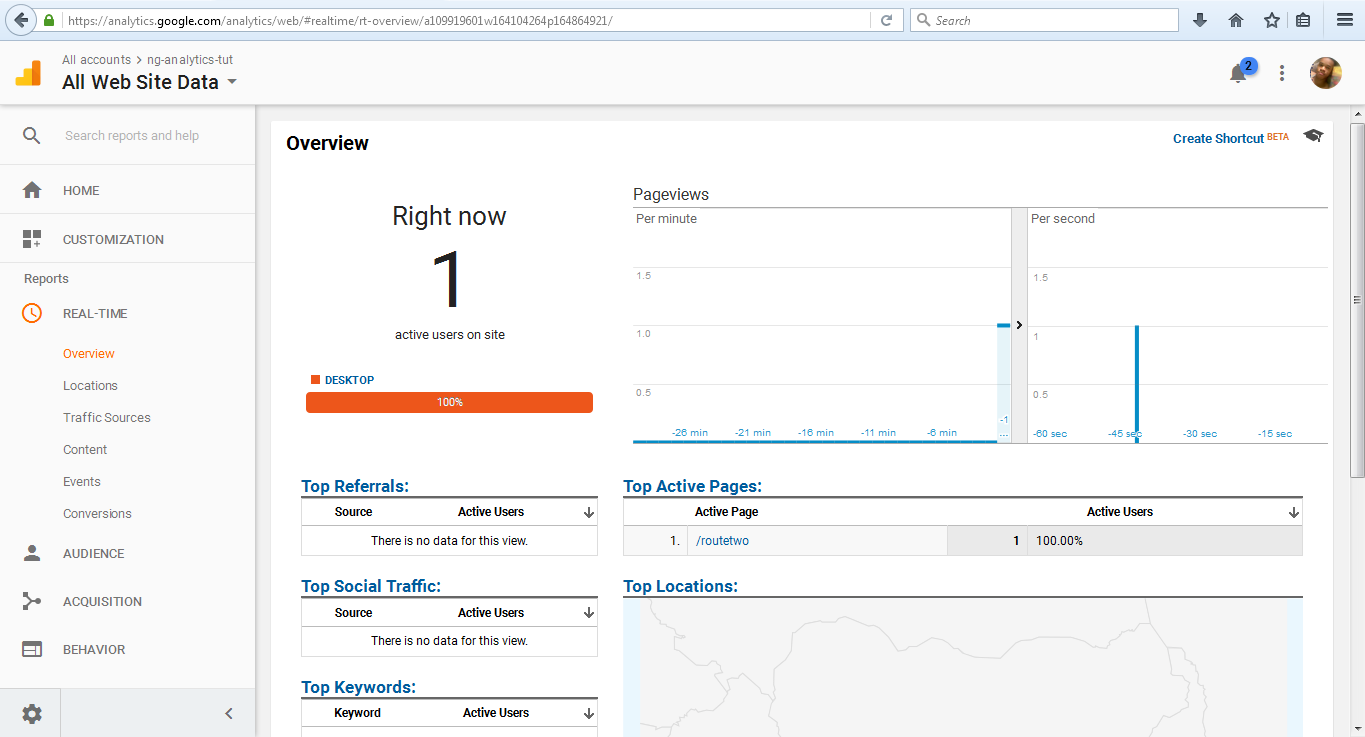
OK. We are now set to test our app. Serve the app in your terminal, and navigate to localhost:4200. Notice it redirects to localhost:4200/routetwo.

Our Google Analytics will update.
To test for pageview events. Click on the routeone link. The view will change as expected to RouteOne view.

Our Google Analytics will register a pageview event.
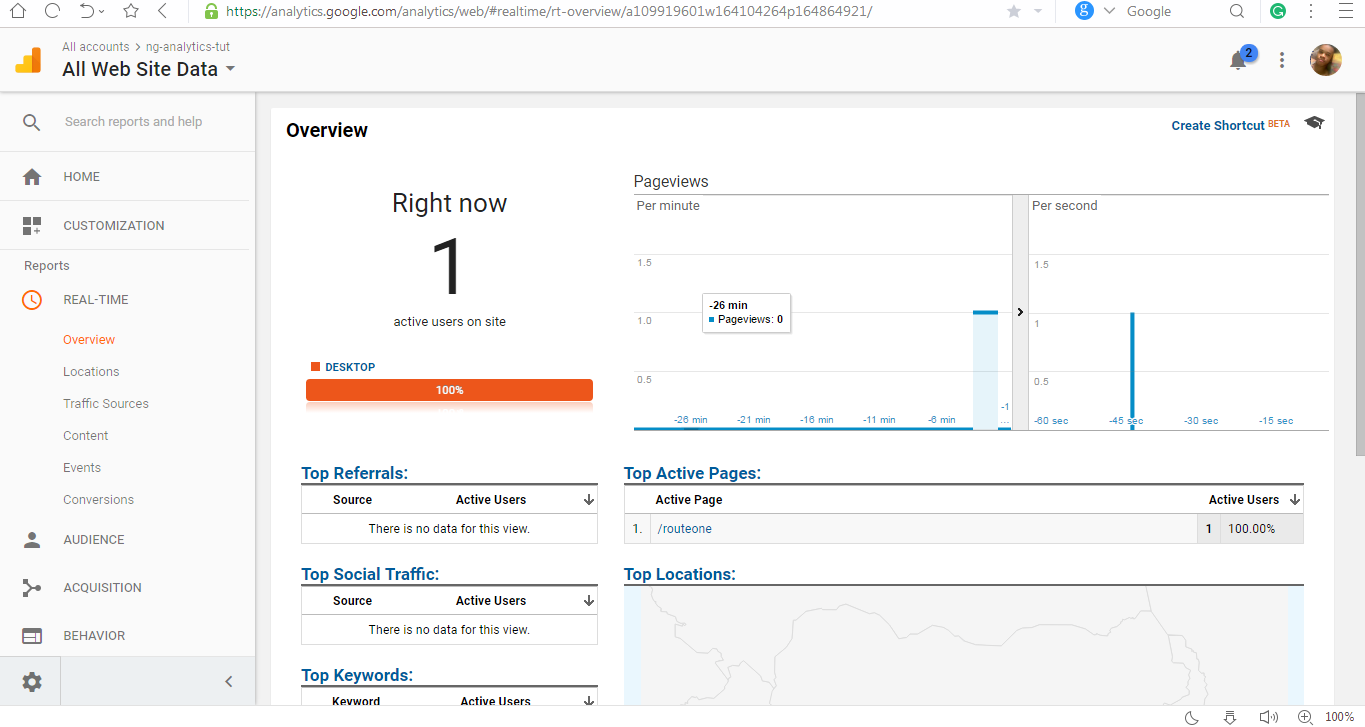
Wow. What happened here is that, whenever we click on a link, either routeone link or routetwo link, the Router observable emits an event. We subscribed to the Router observable which enabled us to capture the event and, then send a pageview event to Google Analytics.
That’s it. We have successfully configured pageview events in an Angular (SPA) application.
Tracking user’s activities
We can also track user’s interactions with our app. People go in your website to do a certain activity. Either it’s to read the information in your page, watch a video, play a game, or simply send you an email using your contact form. Whatever it is, you can track it and collect the data as an event. This data can be used to further improve your website — such as whether to put the email subscription form in the sidebar or as a pop-up or which of your advertisements are getting the most attention / clicks.
This can be done by attaching code to a link or button.
The code is something as simple as:
onClick=”_gaq.push([‘_trackEvent’, ‘Event Category’, ‘Event Action’, ‘Event Label’]);”<a href=”http://yourURLhere.com” onClick=”_gaq.push([‘_trackEvent’, ‘Event Category’, ‘Event Action’, ‘Event Label’]);”>Your Anchor Text</a>
What this code does is it tells your Google Analytics Tracking code to track an event happening in your website. And whenever someone clicks this link where the code is attached to, it will record the event.
We will add a button to our app components template and implement the onclick event to send an event to Google Analytics whenever a user clicks on it.
/** app.component.ts **/
...
    <button (click)= 'sendEvent()'>Click Me</button>
    <router-outlet></router-outlet>
...
sendEvent = () => {
    (<any>window).ga('send', 'event', {
      eventCategory: 'eventCategory',
      eventLabel: 'eventLabel',
      eventAction: 'eventAction',
      eventValue: 10
    });
  }
...
OK. Save the file and view the modified app.

Click on the Click Me button. On your Google Analytics Sidebar, go to REAL-TIME -> Events. You will see our event registered.

Conclusion
Following this tutorial, we have seen how Google Analytics helps us to track user’s activities and page views in our apps. Also, we have seen how to implement it in an Angular (SPA) app. The earlier you apply this in your website, the more valuable data you can look back to. That data can be your basis for A/B testing of forms, buttons, links, videos, etc.
Learn from your user activity, apply that data to your website, test. That’s what Google Analytics is about.
Github repo
You can find the full source code in my Github repo.
Special thanks to
- Grammarly — for proof-reading.
- Google Analytics— for providing tool that enable devs to track user’s activities in their website.
Social media
Feel free to reach out if you have any problems.
Follow me on Medium and Twitter to read more about TypeScript, JavaScript, and Angular.

