How to View and Edit CSS in Chrome Developer Tools
Learn how to make real-time changes to this website with Chrome DevTools

In this article we’re going to be learning how to make real-time changes to this very website using the Google Chrome Developer Tools. If you’d like to follow along at home, make sure you’re reading this in Google Chrome. Once you are.. read on!
View an element’s CSS
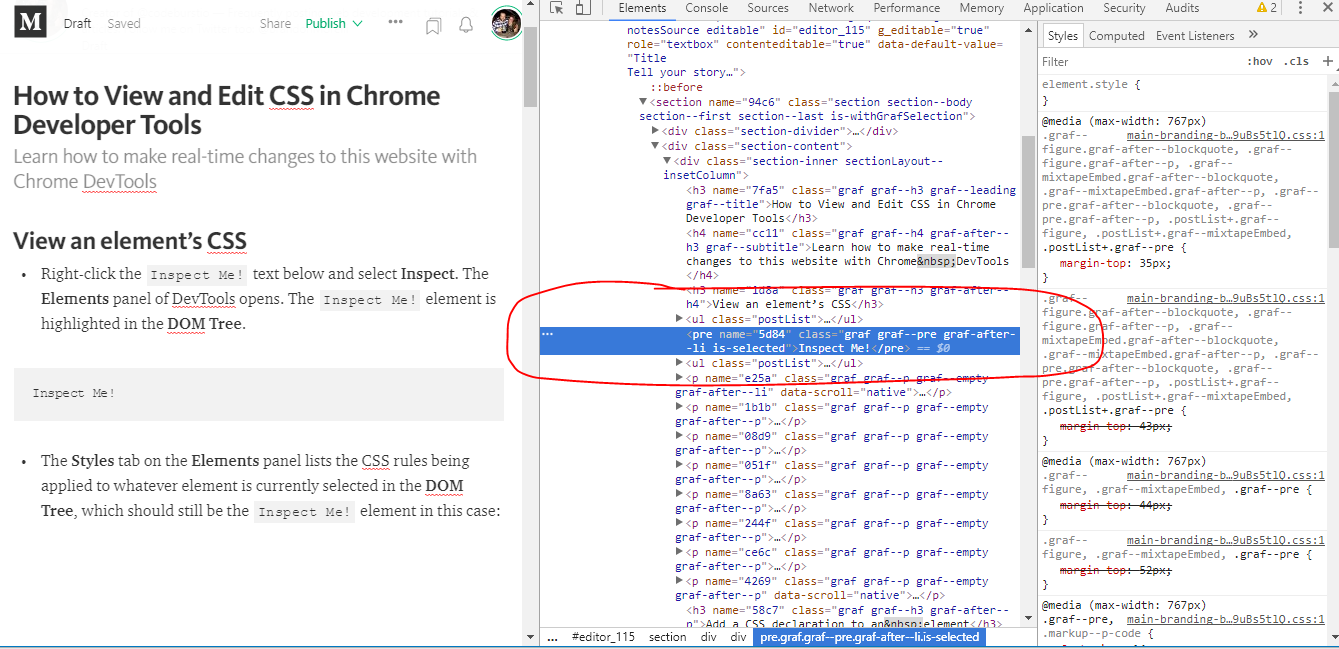
- Right-click the
Inspect Me!text below and select Inspect. The Elements panel of DevTools opens. TheInspect Me!element is highlighted in the DOM Tree.
Inspect Me!- The Styles tab on the Elements panel lists the CSS rules being applied to whatever element is currently selected in the DOM Tree, which should still be the
Inspect Me!element in this case:

Add a CSS declaration to an element
Use the Styles tab when you want to change or add CSS declarations to an element.
- Right-click the
Add A Background Color To Me!text below and select Inspect.
Add A Background Color To Me!- Click
element.stylenear the top of the Styles tab. - Type
background-colorand press Enter. - Type
yellowand press Enter. In the DOM Tree you can see that an inline style declaration was applied to the element.

Add a CSS class to an element
Use the Styles tab to see how an element looks when a CSS class is applied to or removed from an element.
- Right-click the
Add A Class To Me!element below and select Inspect.
Add A Class To Me!- Click .cls. DevTools reveals a text box where you can add classes to the selected element.
- Type
color_mein the Add new class text box and then press Enter. A checkbox appears below the Add new class text box, where you can toggle the class on and off. Since theAdd A Class To Me!element already has other classes applied to it, you can also toggle them on and off from here!

Add a pseudostate to a class
Use the Styles tab to permanently apply a CSS pseudostate to an element. DevTools supports :active, :focus, :hover, and :visited.
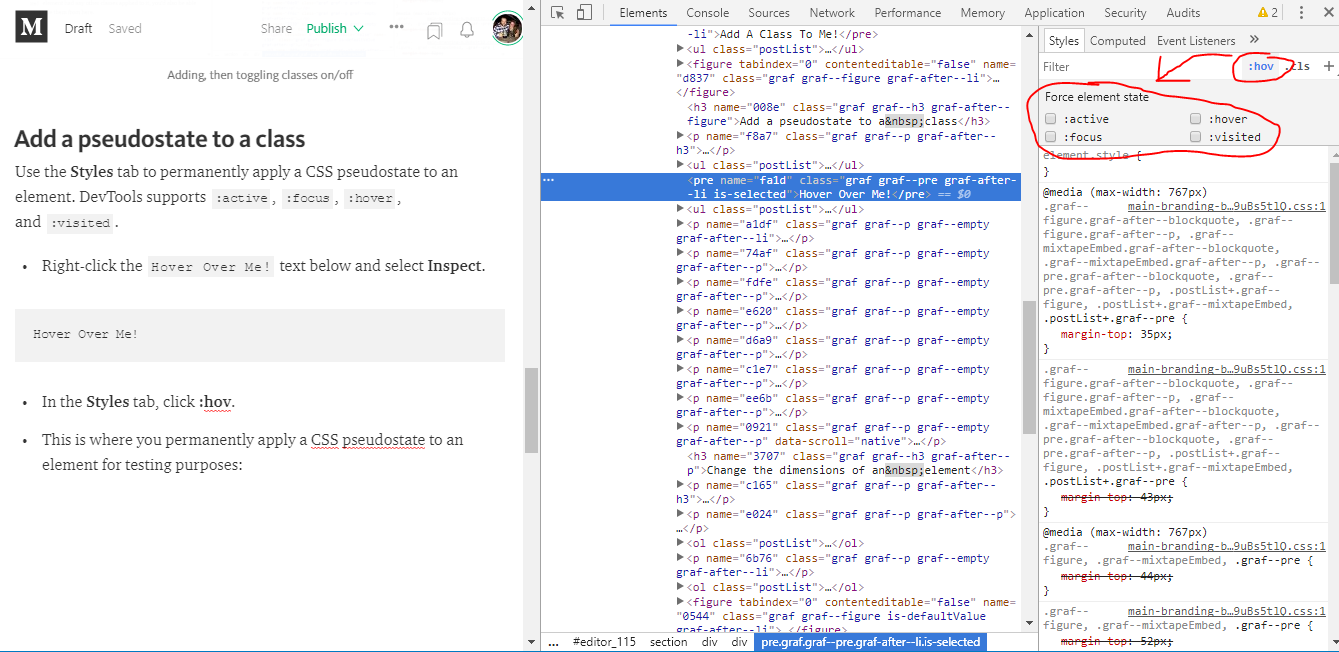
- Right-click the
Hover Over Me!text below and select Inspect.
Hover Over Me!- In the Styles tab, click :hov.
- This is where you permanently apply a CSS pseudostate to an element for testing purposes:
Change the dimensions of an element
Use the Box Model interactive diagram in the Styles tab to change the width, height, padding, margin, or border length of an element.
Note: Depending on the size of your DevTools window, you may need to scroll to the bottom of the Styles tab to see the Box Model.
- Right-click the
Change My Padding!element below and select Inspect.
Change My Padding!- In the Box Model diagram in the Styles tab, hover over padding. The element’s padding is highlighted in the viewport.
- Double-click the top padding in the Box Model, which currently has a value of
20. - Type
100and press Enter. The Box Model defaults to pixels, but it also accepts other values, such as25%, or10vw.

Closing Notes:
Want to learn more CSS? Check out: Tutorial: Three Awesome CSS Hover Transitions & Animations for Beginners
Thanks for reading! I hope you’ve learned something new! Please consider entering your email here if you’d like to be added to my once-weekly email list, or follow me on Twitter.
Portions of this page are reproduced from work created and shared by Google and used according to terms described in the Creative Commons 3.0 Attribution License. This article was adapted from: Get Started with Debugging JavaScript in Chrome DevTools, written by Kayce Basques.
