Let’s make a website. Episode VI – CSS
Coding with style.
At this point in this series, you know the basics of HTML, and should be able to create a simple page. As a bonus, you learned about code editors. You might even have tried some of their cool features on your own already!
However interesting the content on your page is though, there’s a good chance people won’t really stay for more than 5 seconds if its design is barebones or looks outdated. Think about your web browsing habits: if you stumble upon a website with just a block of text and nothing else, you might start thinking that there’s a problem with your connection, or even that this page is part of a scam!
A solution to this problem is to make your page look good.

That’s it for today! See you ne… I’m kidding. Totally got you there.
On the web, we use a language called CSS to describe the page design. Let’s learn about it.
“It’s motherf*cking CSS time.”
— Abraham Lincoln
CSS
Preparations
CSS stands for Cascading Style Sheets, but let’s politely not care about that for now.
We’ll start with a very basic page to make things simpler.
Create a new file in your editor (quick reminder: Ctrl + N on Windows or Cmd + N on macOS) and save it (Ctrl + S or Cmd + S) on your desktop. I’ll name it index.html, but you can give it the name you want!
Copy and paste this code in your file:
If you open the page in your browser, it should look like this:

See this text in Latin? It’s called a Lorem Ipsum. Basically just some randomly generated text in Latin. Useful when you need to have some content on your page in order to properly design it, but don’t actually have content yet.
Let’s add some style

There’s two (common) ways to add some CSS to a page. Either with an external CSS file (we’ll talk about that later), or in a HTML tag called <style>.
This tag is here to tell your browser: “Everything inside my opening and closing tags is CSS, not HTML. Interpret it as such. Please. Thank you.”
Let’s add this tag to our code, at the end of our <body> tag.
Ok but let’s really add some style now
So… How do we code with CSS?
At its core, you tell the browser which style rule you wanna apply, to which element. For example, you could say: “I want all my level 1 titles (the <h1> tags) to use the Verdana font.”
In CSS code, it basically goes like this:
h1 {
  font-family: Verdana;
}
The h1 part is outside the braces. It’s named a selector. It tells the browser which tags are concerned by this style rule.
The font-family part is inside the braces. It’s named a property. It tells the browser which style rule is concerned. In this case, we want to specify the name of the font used for the <h1>.
The Verdana part is named a value. We told the browser we’re gonna modify the font of the <h1> tags, but it needs to know which font we’ll use. This is the role of this value.
While we’re at it, we’re also gonna change the font for all the paragraphs (<p>) to Georgia (on my mind). Can you guess how we would do it?

Here’s the solution:
p {
  font-family: Georgia;
}
One last thing before we add this to our page. Our level 1 titles will use the Verdana font, which is great, but we want the level 2 titles (<h2>) to use it too. We could write another block for h2, just like we did for h1, like this:
h2 {
  font-family: Verdana;
}
But there’s a better way to do it! We can actually tell CSS to add the same style rule to multiple selectors, using commas. Just like this:
h1, h2 {
  font-family: Verdana;
}
Alright! Let’s add all these rules in our style tag:
Reload your page in your browser. You should get this:

Can you see how the font changed for our paragraphs and titles? Congratulations, you just added some CSS to your page!
Let’s go further
The text is still difficult to read. It’s in part due to the fact that it takes the whole width of your page. Due to this, when you finish reading a line, your eyes take way too long to go to the beginning of the next one. It makes reading the paragraphs difficult.

We’re gonna reduce the width of the page contents. To do this, let’s add a new rule, on the <body> tag this time!
body {
  width: 65%;
}
A few things here:
bodyis our selector, just likeporh1, h2before. Since we want to reduce the width of all the page contents, we apply our rule to<body>.widthis our property. In CSS, the property which controls the width is namedwidth. This is pure genius.65%is our value. It tells the browser: I want<body>to take 65% of the width of its parent tag (well, that’s kinda what it tells, but we’ll keep it simple for now). Its parent tag being<html>, which takes 100% of the page width,<body>will take 65% of the page width. I know, this isn’t simple but don’t worry, we’ll practice all of this in the next articles.
Let’s add this to our existing code:
This is what our page looks like now:

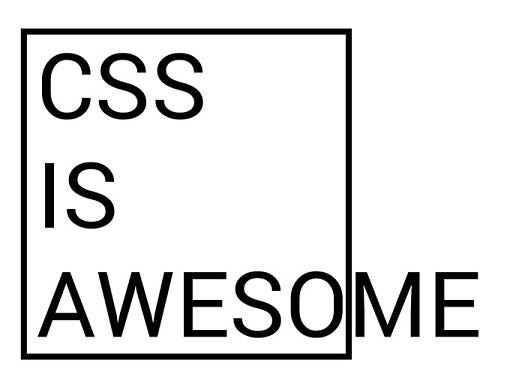
See how much more readable it is? CSS is awesome.
Ok! One last CSS rule for today!
Let’s add more space between the paragraph lines. It will make them even more readable. What we really want to do is make our lines bigger: increasing the height of a line while keeping the same text size will make them look more spaced! The style property controlling the height of a line is named… line-height.
p {
  font-family: Georgia;
  line-height: 1.4;
}
We give it a value of 1.4. It means that the height of the line will be equal to 1.4 times the size of the text used in the paragraph. If this isn’t clear (and it shouldn’t because this property is actually quite complex), try other values and see how it changes the result!
We’ll add this new style rule to our code:
Reloading our page, this is what we get:

Our paragraph lines are more spaced, which makes it even easier to read.
To conclude or not to conclude (spoiler: to conclude)
The beauty of CSS
I’ll be honest here. CSS is as powerful as it can be complex. This article is, to date, probably the most difficult to understand in this series if you never had the opportunity to code before. Feel free to tell me in the comments if something is not clear, I’ll do my best to help!
The awesome thing with CSS that you might have already noticed is that your content (HTML) is completely separated from your design (CSS). What this means is that two pages could have the exact same code in HTML, but different CSS, and they would look completely different!

CSS Zen Garden is a pretty amazing website that takes this idea to the extreme. The basic idea is that everybody posting their pages there uses the exact same HTML code. They just use different CSS.
Which means this one, this one, and this one are all based on the same HTML code. It’s just that they don’t use the same CSS. As you can see, to the visitor, they all look extremely different! To this day, I’m still and will probably always be impressed by that!
So… what’s next?
In the next article, we’ll learn about the layout in CSS. Basically, how to move your content around on your page. As of right now, the content goes from top to bottom, each tag after the other, vertically. There’s nothing on the right side of the page, for example. Oh, and it would be quite cool if the page contents were centered, don’t you think (alright let me give you a tip for this one: check out margin: auto ;) )? There are many ways to do that in CSS. That’s what we’ll learn about.

Oh, and one last thing: when you’ll have read the next article (in which we’ll learn about layout), you’ll actually have some pretty decent basics in web page building. I’m thinking about organizing a little contest in the next post, where you could send me your pages, and I would feature my five favorites! What do you think? It’s just an idea right now, and I’ll probably talk more about it in the next episode.
See you next time!
The next article is available here!
Note: This post is part of a series.
- Let’s make a website. (Episode I)
- Let’s make a website. Episode II — HTML
- Let’s make a website. Episode III — Your first page
- Let’s make a website. Episode IV — Images
- Let’s make a website. Episode V — The code editor
- Let’s make a website. Episode VII — Let’s make a Pokédex!
- Let’s make a website. Episode VIII — Intermission
- Let’s make a website: the JavaScript adventures.
- Let’s make a website: the JavaScript adventures — The variables
As usual, feel free to share this article if you liked it!


